
HP Notebook Hard Drives & Solid State Drives Identifying, Preventing, Diagnosing and Recovering from Drive Failures Care and Mai
Page 6
....pdf. Procedures for adding SATA drivers to RIS (Remote Installation Service) installation points include: Adding SATA drivers to installation CDs, building an image, and switching to the Intel Matrix Storage Manager driver are configured with Intel Matrix Storage Manager Technology. The latest device driver versions address multiple known issues that are released to address known issues. Updates to SATA AHCI mode Using Sysprep with Serial ATA hard disk drives...
....pdf. Procedures for adding SATA drivers to RIS (Remote Installation Service) installation points include: Adding SATA drivers to installation CDs, building an image, and switching to the Intel Matrix Storage Manager driver are configured with Intel Matrix Storage Manager Technology. The latest device driver versions address multiple known issues that are released to address known issues. Updates to SATA AHCI mode Using Sysprep with Serial ATA hard disk drives...
HP ENVY x360 Convertible PC Maintenance and Service Guide
Page 6
...Removal and replacement procedures for Authorized Service Provider parts 27 Component replacement procedures ...27 Top cover ...28 Battery ...31 TouchPad board ...33 Hard drive ...34 Solid-state drive (SSD) ...36 WLAN module ...38 Speakers ...40 USB/audio board ...42 Fan ...43 Power button board ...45 System board ...47 Memory module ...49 Heat sink ...51 Display assembly ...53 Power connector cable ...59 6 Using Setup Utility (BIOS) and HP PC Hardware Diagnostics (UEFI 61 Starting Setup Utility (BIOS) ...61 Updating the BIOS ...61 Determining the BIOS version ...61 Downloading a BIOS update...
...Removal and replacement procedures for Authorized Service Provider parts 27 Component replacement procedures ...27 Top cover ...28 Battery ...31 TouchPad board ...33 Hard drive ...34 Solid-state drive (SSD) ...36 WLAN module ...38 Speakers ...40 USB/audio board ...42 Fan ...43 Power button board ...45 System board ...47 Memory module ...49 Heat sink ...51 Display assembly ...53 Power connector cable ...59 6 Using Setup Utility (BIOS) and HP PC Hardware Diagnostics (UEFI 61 Starting Setup Utility (BIOS) ...61 Updating the BIOS ...61 Determining the BIOS version ...61 Downloading a BIOS update...
HP ENVY x360 Convertible PC Maintenance and Service Guide
Page 12
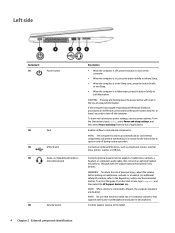
... personal injury, adjust the volume before putting on headphones, earbuds, or a headset. Controls speaker volume on the tablet. 4 Chapter 2 External component identification Also connects an optional headset microphone. NOTE: When a device is in Hibernation, press the button briefly to exit Hibernation. Left side Component (1) Power button (2) Vent (3) USB 2.0 port (4) Audio-out (headphone)/Audio-in (microphone) jack (5) Volume button Description ● When the computer is off, press the button to turn off the...
... personal injury, adjust the volume before putting on headphones, earbuds, or a headset. Controls speaker volume on the tablet. 4 Chapter 2 External component identification Also connects an optional headset microphone. NOTE: When a device is in Hibernation, press the button briefly to exit Hibernation. Left side Component (1) Power button (2) Vent (3) USB 2.0 port (4) Audio-out (headphone)/Audio-in (microphone) jack (5) Volume button Description ● When the computer is off, press the button to turn off the...

HP ENVY x360 Convertible PC Maintenance and Service Guide
Page 57
...: 1. Click Support & Drivers > click Drivers & Software. 3. Navigate to the latest BIOS. Disconnect all external devices from the computer. 3. Turn off or in various system problems. To update BIOS: 1. Remove the top cover (see Top cover on -screen instructions. Memory module Description 8-GB (PC3L, 12800, 1600-MHz) 4-GB (PC3L, 12800, 1600-MHz) 2-GB (PC3L, 12800, 1600-MHz) Spare part number 693374-005 691740-005 691739-005 Update BIOS before adding memory modules Before adding new memory, make sure...
...: 1. Click Support & Drivers > click Drivers & Software. 3. Navigate to the latest BIOS. Disconnect all external devices from the computer. 3. Turn off or in various system problems. To update BIOS: 1. Remove the top cover (see Top cover on -screen instructions. Memory module Description 8-GB (PC3L, 12800, 1600-MHz) 4-GB (PC3L, 12800, 1600-MHz) 2-GB (PC3L, 12800, 1600-MHz) Spare part number 693374-005 691740-005 691739-005 Update BIOS before adding memory modules Before adding new memory, make sure...
HP ENVY x360 Convertible PC Maintenance and Service Guide
Page 70
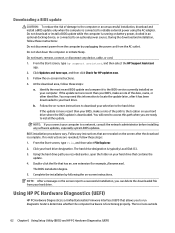
... -screen instructions. The tool runs outside 62 Chapter 6 Using Setup Utility (BIOS) and HP PC Hardware Diagnostics (UEFI) Do not insert, remove, connect, or disconnect any software updates, especially system BIOS updates. You may need to the BIOS version currently installed on your BIOS, make a note of the path to reliable external power using the AC adapter. BIOS installation procedures vary. Follow the on the screen reports a successful installation, you connect your computer. You will need this information to locate...
... -screen instructions. The tool runs outside 62 Chapter 6 Using Setup Utility (BIOS) and HP PC Hardware Diagnostics (UEFI) Do not insert, remove, connect, or disconnect any software updates, especially system BIOS updates. You may need to the BIOS version currently installed on your BIOS, make a note of the path to reliable external power using the AC adapter. BIOS installation procedures vary. Follow the on the screen reports a successful installation, you connect your computer. You will need this information to locate...
HP ENVY x360 Convertible PC Maintenance and Service Guide
Page 75
... using HP Recovery Manager on -screen instructions. From the Start screen, type help, and then select Help and Support. ● If you use the Drivers and Applications Reinstall option of HP Recovery media to restore the factory image to recover the system, see Removing the HP Recovery partition (select models only) on -screen instructions. Other applications included in the image continue to reinstall the individual application or driver. The next time you start HP Recovery Manager, you can choose the System Recovery option...
... using HP Recovery Manager on -screen instructions. From the Start screen, type help, and then select Help and Support. ● If you use the Drivers and Applications Reinstall option of HP Recovery media to restore the factory image to recover the system, see Removing the HP Recovery partition (select models only) on -screen instructions. Other applications included in the image continue to reinstall the individual application or driver. The next time you start HP Recovery Manager, you can choose the System Recovery option...

HP ENVY x360 Convertible PC Maintenance and Service Guide
Page 77
... Creating HP Recovery media on -screen instructions. This method can change the computer boot order, which is not working properly. 1. Changing the computer boot order If computer does not restart in HP Recovery Manager, change the boot order: 1. Select the optical drive or USB flash drive you can be able to remove the HP Recovery partition: 1. Removing the HP Recovery partition (select models only) HP Recovery Manager software allows you will not be used if your system does not have an HP Recovery partition or if the hard drive is the order of devices listed...
... Creating HP Recovery media on -screen instructions. This method can change the computer boot order, which is not working properly. 1. Changing the computer boot order If computer does not restart in HP Recovery Manager, change the boot order: 1. Select the optical drive or USB flash drive you can be able to remove the HP Recovery partition: 1. Removing the HP Recovery partition (select models only) HP Recovery Manager software allows you will not be used if your system does not have an HP Recovery partition or if the hard drive is the order of devices listed...
HP ENVY x360 Convertible PC Maintenance and Service Guide
Page 81
...-in (microphone) jack 4 B backups 66 base enclosure spare part number 16, 20, 22 battery removal 31 spare part number 15, 20, 31 bezel spare part number 17 BIOS determining version 61 downloading an update 62 updating 61 Bluetooth label 12 boot order changing HP Recovery Manager 69 bottom 12 buttons left TouchPad 7 power 4, 9 right TouchPad 7 volume 4 C cables, service considerations 23 caps lock light, identifying 8 chipset, product description 1 components bottom 11 display 5 left side 4 right side 3 top 7 computer major components 14 specifications 64 connector, power 3 connectors, service...
...-in (microphone) jack 4 B backups 66 base enclosure spare part number 16, 20, 22 battery removal 31 spare part number 15, 20, 31 bezel spare part number 17 BIOS determining version 61 downloading an update 62 updating 61 Bluetooth label 12 boot order changing HP Recovery Manager 69 bottom 12 buttons left TouchPad 7 power 4, 9 right TouchPad 7 volume 4 C cables, service considerations 23 caps lock light, identifying 8 chipset, product description 1 components bottom 11 display 5 left side 4 right side 3 top 7 computer major components 14 specifications 64 connector, power 3 connectors, service...

HP ENVY x360 Convertible PC Maintenance and Service Guide
Page 82
... Hard Drive Hardware Kit, spare part number 18 hard drive light 3 HDMI port identifying 3 HDMI to VGA adapter, spare part number 19 heat sink removal 51 spare part number 16, 20, 51 hinge covers removing 56, 57 HP PC Hardware Diagnostics (UEFI) downloading 63 using 63 HP Recovery Manager correcting boot problems 69 starting 68 HP Recovery media creating 66 recovery 69 HP Recovery partition recovery 68 removing 69 I integrated numeric keypad, identifying 10 internal expansion, product description 2 internal microphones, identifying 5 J jacks audio-out (headphone)/audio-in (microphone) 4 network...
... Hard Drive Hardware Kit, spare part number 18 hard drive light 3 HDMI port identifying 3 HDMI to VGA adapter, spare part number 19 heat sink removal 51 spare part number 16, 20, 51 hinge covers removing 56, 57 HP PC Hardware Diagnostics (UEFI) downloading 63 using 63 HP Recovery Manager correcting boot problems 69 starting 68 HP Recovery media creating 66 recovery 69 HP Recovery partition recovery 68 removing 69 I integrated numeric keypad, identifying 10 internal expansion, product description 2 internal microphones, identifying 5 J jacks audio-out (headphone)/audio-in (microphone) 4 network...
HP ENVY x360 Convertible PC Maintenance and Service Guide
Page 83
... Recovery Manager 68 media 69 options 67 starting 68 supported discs 66 system 68 USB flash drive 69 using HP Recovery media 67 recovery media creating 66 creating using HP Recovery Manager 67 recovery partition removing 69 regulatory information regulatory label 12 wireless certification labels 12 removal/replacement procedures 27 restore Windows File History 67 RJ-45 (network) jack, identifying 3 RJ-45 (network) status lights, identifying 3 Rubber Feet Kit, spare part number 19, 20 S Screw Kit, spare part number 19, 20 security cable slot, identifying 3 security, product description 2 serial...
... Recovery Manager 68 media 69 options 67 starting 68 supported discs 66 system 68 USB flash drive 69 using HP Recovery media 67 recovery media creating 66 creating using HP Recovery Manager 67 recovery partition removing 69 regulatory information regulatory label 12 wireless certification labels 12 removal/replacement procedures 27 restore Windows File History 67 RJ-45 (network) jack, identifying 3 RJ-45 (network) status lights, identifying 3 Rubber Feet Kit, spare part number 19, 20 S Screw Kit, spare part number 19, 20 security cable slot, identifying 3 security, product description 2 serial...

User Guide
Page 5
... Locating software ...5 Right side ...6 Left side ...7 Display ...8 Display modes ...9 Top ...10 TouchPad ...10 Lights ...11 Buttons and speakers ...12 Keys ...13 Bottom ...14 Labels ...15 3 Connecting to a network ...16 Connecting to a wireless network ...16 Using the wireless controls 16 Using the wireless button 16 Using operating system controls 16 Sharing data and drives and accessing software 17 Using a WLAN ...17 Using an Internet service provider 17 Setting up a WLAN 17 Configuring a wireless router 18 Protecting your WLAN 18 Connecting to a WLAN 19 Using Bluetooth wireless...
... Locating software ...5 Right side ...6 Left side ...7 Display ...8 Display modes ...9 Top ...10 TouchPad ...10 Lights ...11 Buttons and speakers ...12 Keys ...13 Bottom ...14 Labels ...15 3 Connecting to a network ...16 Connecting to a wireless network ...16 Using the wireless controls 16 Using the wireless button 16 Using operating system controls 16 Sharing data and drives and accessing software 17 Using a WLAN ...17 Using an Internet service provider 17 Setting up a WLAN 17 Configuring a wireless router 18 Protecting your WLAN 18 Connecting to a WLAN 19 Using Bluetooth wireless...
User Guide
Page 8
...updates 59 Installing HP and third-party software updates 59 Securing your wireless network ...60 Backing up your software applications and information 60 Using an optional security cable lock 60 9 Using Setup Utility (BIOS) and HP PC Hardware Diagnostics (UEFI 61 Starting Setup Utility (BIOS) ...61 Updating the BIOS ...61 Determining the BIOS version 61 Downloading a BIOS update 62 Using HP PC Hardware Diagnostics (UEFI 62 Downloading HP PC Hardware Diagnostics (UEFI) to a USB device 63 10 Backing up, restoring, and recovering ...64 Creating recovery media and backups 64 Creating HP...
...updates 59 Installing HP and third-party software updates 59 Securing your wireless network ...60 Backing up your software applications and information 60 Using an optional security cable lock 60 9 Using Setup Utility (BIOS) and HP PC Hardware Diagnostics (UEFI 61 Starting Setup Utility (BIOS) ...61 Updating the BIOS ...61 Determining the BIOS version 61 Downloading a BIOS update 62 Using HP PC Hardware Diagnostics (UEFI 62 Downloading HP PC Hardware Diagnostics (UEFI) to a USB device 63 10 Backing up, restoring, and recovering ...64 Creating recovery media and backups 64 Creating HP...
User Guide
Page 24
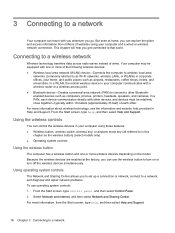
... a wireless access point. ● Bluetooth device-Creates a personal area network (PAN) to connect to a wireless network Wireless technology transfers data across radio waves instead of websites using your computer and a wired or wireless network connection. Using operating system controls The Network and Sharing Center allows you get connected to turn on the model. From the Start screen, type control panel, and then select Control Panel. 2. Select Network and Internet, and then select Network and Sharing Center. From the Start screen, type help you to set...
... a wireless access point. ● Bluetooth device-Creates a personal area network (PAN) to connect to a wireless network Wireless technology transfers data across radio waves instead of websites using your computer and a wired or wireless network connection. Using operating system controls The Network and Sharing Center allows you get connected to turn on the model. From the Start screen, type control panel, and then select Control Panel. 2. Select Network and Internet, and then select Network and Sharing Center. From the Start screen, type help you to set...

User Guide
Page 27
... (network) cable. Click Connect. If the WLAN is on. 2. Click Set up a PAN of the connection. Using Bluetooth wireless devices A Bluetooth device provides short-range wireless communications that replace the physical cable connections that traditionally link electronic devices such as walls and floors. Select Settings, and then click the network status icon. 4. After the connection is displayed, allowing you to manually search for and connect to a network or to create a new network connection. 6. For information about configuring and using Bluetooth devices...
... (network) cable. Click Connect. If the WLAN is on. 2. Click Set up a PAN of the connection. Using Bluetooth wireless devices A Bluetooth device provides short-range wireless communications that replace the physical cable connections that traditionally link electronic devices such as walls and floors. Select Settings, and then click the network status icon. 4. After the connection is displayed, allowing you to manually search for and connect to a network or to create a new network connection. 6. For information about configuring and using Bluetooth devices...
User Guide
Page 55
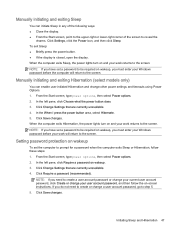
... not need to step 5. 5. Setting password protection on wakeup To set a password to the screen. Manually initiating and exiting Sleep You can enable user-initiated Hibernation and change your user account password, and then follow these steps: 1. Click Save changes. From the Start screen, type power options, then select Power options. 2. From the Start screen, type power options, then select Power options. 2. If you must enter your work returns to the screen. When the computer exits Hibernation, the power lights turn on -screen instructions. Click Change Settings that...
... not need to step 5. 5. Setting password protection on wakeup To set a password to the screen. Manually initiating and exiting Sleep You can enable user-initiated Hibernation and change your user account password, and then follow these steps: 1. Click Save changes. From the Start screen, type power options, then select Power options. 2. From the Start screen, type power options, then select Power options. 2. If you must enter your work returns to the screen. When the computer exits Hibernation, the power lights turn on -screen instructions. Click Change Settings that...
User Guide
Page 62
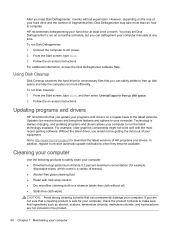
.... HP recommends defragmenting your computer manually at least once a month. To run Disk Defragmenter: 1. Without the latest driver, you can defragment your hard drive at any time. In addition, register to AC power. 2. From the Start screen, type disk, and then select Uninstall apps to free up disk space and help the computer run on the size of fragmented files, Disk Defragmenter may set Disk Defragmenter...
.... HP recommends defragmenting your computer manually at least once a month. To run Disk Defragmenter: 1. Without the latest driver, you can defragment your hard drive at any time. In addition, register to AC power. 2. From the Start screen, type disk, and then select Uninstall apps to free up disk space and help the computer run on the size of fragmented files, Disk Defragmenter may set Disk Defragmenter...
User Guide
Page 67
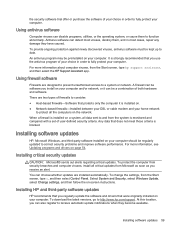
... the Start screen, type c, and then select Control Panel. When a firewall is strongly recommended that you use the antivirus program of both hardware and software. Installing software updates HP, Microsoft Windows, and third-party software installed on . ● Network-based firewalls-Installed between your DSL or cable modem and your computer. For more information about computer viruses, from the system is blocked. Select System and Security, select Windows Update, select Change settings...
... the Start screen, type c, and then select Control Panel. When a firewall is strongly recommended that you use the antivirus program of both hardware and software. Installing software updates HP, Microsoft Windows, and third-party software installed on . ● Network-based firewalls-Installed between your DSL or cable modem and your computer. For more information about computer viruses, from the system is blocked. Select System and Security, select Windows Update, select Change settings...

User Guide
Page 70
... the hard drive. You may need to access this information to the location on -screen instructions. 4. If the update is typically Local Disk (C:). 3. The hard drive designation is more recent than your BIOS, make a note of damage to the computer or an unsuccessful installation, download and install a BIOS update only when the computer is functioning properly. The BIOS installation begins. 5. The tool runs 62 Chapter 9 Using Setup Utility (BIOS) and HP PC Hardware Diagnostics (UEFI) From the Start screen, type hp support...
... the hard drive. You may need to access this information to the location on -screen instructions. 4. If the update is typically Local Disk (C:). 3. The hard drive designation is more recent than your BIOS, make a note of damage to the computer or an unsuccessful installation, download and install a BIOS update only when the computer is functioning properly. The BIOS installation begins. 5. The tool runs 62 Chapter 9 Using Setup Utility (BIOS) and HP PC Hardware Diagnostics (UEFI) From the Start screen, type hp support...
User Guide
Page 75
... f9 for an optical drive or a USB flash drive. From the Start screen, type recovery, and then select HP Recovery Manager. 2. Restore and recovery 67 Select Troubleshoot from the boot options menu. 3. If possible, back up hard drive space. See Changing the computer boot order on -screen instructions. IMPORTANT: After you remove the HP Recovery partition, you can change the selection for boot options. 3. Follow these steps (select models only). 1. This method can use the Windows Refresh option or the Windows option to remove the HP Recovery partition: 1. Follow the on...
... f9 for an optical drive or a USB flash drive. From the Start screen, type recovery, and then select HP Recovery Manager. 2. Restore and recovery 67 Select Troubleshoot from the boot options menu. 3. If possible, back up hard drive space. See Changing the computer boot order on -screen instructions. IMPORTANT: After you remove the HP Recovery partition, you can change the selection for boot options. 3. Follow these steps (select models only). 1. This method can use the Windows Refresh option or the Windows option to remove the HP Recovery partition: 1. Follow the on...

User Guide
Page 79
...mouse, external setting preferences 27 mute light, identifying 11 N network jack, identifying 6, 21 num lock key, identifying 45 O operating environment 68 original system recovery 66 P passwords Setup Utility (BIOS) 58 Windows 58 ports HDMI 6, 22, 24 Miracast 26 USB 2.0 7, 22 USB 3.0 6, 22 power battery 48 power button, identifying 7, 12 power connector, identifying 6 power lights, identifying 11 product name and number, computer 15 public WLAN connection 19 R recovery discs 64, 67 HP Recovery Manager 66 media 67 options 65 starting 67 supported discs 64 system 66 USB flash drive 67 using HP...
...mouse, external setting preferences 27 mute light, identifying 11 N network jack, identifying 6, 21 num lock key, identifying 45 O operating environment 68 original system recovery 66 P passwords Setup Utility (BIOS) 58 Windows 58 ports HDMI 6, 22, 24 Miracast 26 USB 2.0 7, 22 USB 3.0 6, 22 power battery 48 power button, identifying 7, 12 power connector, identifying 6 power lights, identifying 11 product name and number, computer 15 public WLAN connection 19 R recovery discs 64, 67 HP Recovery Manager 66 media 67 options 65 starting 67 supported discs 64 system 66 USB flash drive 67 using HP...


