
ENVY m6 Notebook PC ENVY Notebook PC Maintenance and Service Guide
Page 5
... description ...1 2 External component identification ...5 Finding your hardware and software information 5 Locating hardware ...5 Locating software ...5 Display ...6 Top ...7 TouchPad ...7 Lights ...8 Buttons, speakers, and fingerprint reader (select models only 9 Keys ...10 Using the action keys ...10 Left side ...12 Right side ...13 Bottom ...14 Service tag ...15 3 Illustrated parts catalog ...16 Computer major components ...16 Miscellaneous parts ...20 Display assembly subcomponents ...21 Mass storage devices ...22 Sequential part number listing ...23 4 Removal and replacement procedures...
... description ...1 2 External component identification ...5 Finding your hardware and software information 5 Locating hardware ...5 Locating software ...5 Display ...6 Top ...7 TouchPad ...7 Lights ...8 Buttons, speakers, and fingerprint reader (select models only 9 Keys ...10 Using the action keys ...10 Left side ...12 Right side ...13 Bottom ...14 Service tag ...15 3 Illustrated parts catalog ...16 Computer major components ...16 Miscellaneous parts ...20 Display assembly subcomponents ...21 Mass storage devices ...22 Sequential part number listing ...23 4 Removal and replacement procedures...
ENVY m6 Notebook PC ENVY Notebook PC Maintenance and Service Guide
Page 49
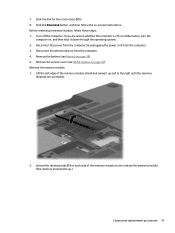
... -screen instructions. If you are accessible. 2. Click the link for the most recent BIOS. 8. Disconnect the power from the computer by unplugging the power cord from the computer. 4. Disconnect all external devices from the computer. 3. Remove the memory module: 1. Before removing a memory module, follow the on , and then shut it up .) Component replacement procedures 41 Spread the retaining tabs (1) on page 35). Remove the service cover (see Battery on...
... -screen instructions. If you are accessible. 2. Click the link for the most recent BIOS. 8. Disconnect the power from the computer by unplugging the power cord from the computer. 4. Disconnect all external devices from the computer. 3. Remove the memory module: 1. Before removing a memory module, follow the on , and then shut it up .) Component replacement procedures 41 Spread the retaining tabs (1) on page 35). Remove the service cover (see Battery on...
ENVY m6 Notebook PC ENVY Notebook PC Maintenance and Service Guide
Page 51
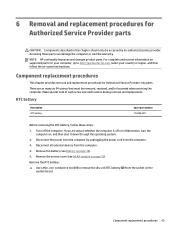
... and location during removal and replacement. Turn off or in this chapter should only be removed, replaced, and/or loosened when servicing the computer. Disconnect the power from the computer by an authorized service provider. Remove the service cover (see Battery on page 34). 5. RTC battery Description RTC battery Spare part number 718440-001 Before removing the RTC battery, follow the on-screen instructions. For complete and current information on supported parts for...
... and location during removal and replacement. Turn off or in this chapter should only be removed, replaced, and/or loosened when servicing the computer. Disconnect the power from the computer by an authorized service provider. Remove the service cover (see Battery on page 34). 5. RTC battery Description RTC battery Spare part number 718440-001 Before removing the RTC battery, follow the on-screen instructions. For complete and current information on supported parts for...
ENVY m6 Notebook PC ENVY Notebook PC Maintenance and Service Guide
Page 91
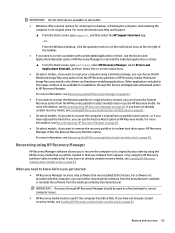
... Image Recovery installs only drivers and hardware-enabling applications. For more information, see Creating HP Recovery media (select models only) on page 83. ● If you want to reset your computer using the HP Recovery partition (select models only). For more information, see Help and Support. ▲ From the Start screen, type support, and then select the HP Support Assistant app. - What you need to correct a problem with this computer, you can use the HP Recovery media. Restore and recovery 83...
... Image Recovery installs only drivers and hardware-enabling applications. For more information, see Creating HP Recovery media (select models only) on page 83. ● If you want to reset your computer using the HP Recovery partition (select models only). For more information, see Help and Support. ▲ From the Start screen, type support, and then select the HP Support Assistant app. - What you need to correct a problem with this computer, you can use the HP Recovery media. Restore and recovery 83...
ENVY m6 Notebook PC ENVY Notebook PC Maintenance and Service Guide
Page 93
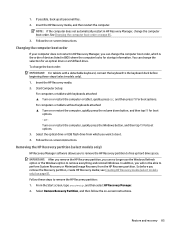
... Recovery Manager, change the boot order: IMPORTANT: For tablets with keyboards attached: ▲ Turn on -screen instructions. see Creating HP Recovery media (select models only) on -screen instructions. From the Start screen, type recovery, and then select HP Recovery Manager. 2. 1. NOTE: If the computer does not automatically restart in BIOS where the computer looks for startup information. Changing the computer boot order If your computer does not restart in HP Recovery Manager, you remove the Recovery partition, create HP Recovery media; Insert the HP Recovery media. 2. Restore...
... Recovery Manager, change the boot order: IMPORTANT: For tablets with keyboards attached: ▲ Turn on -screen instructions. see Creating HP Recovery media (select models only) on -screen instructions. From the Start screen, type recovery, and then select HP Recovery Manager. 2. 1. NOTE: If the computer does not automatically restart in BIOS where the computer looks for startup information. Changing the computer boot order If your computer does not restart in HP Recovery Manager, you remove the Recovery partition, create HP Recovery media; Insert the HP Recovery media. 2. Restore...

ENVY m6 Notebook PC ENVY Notebook PC Maintenance and Service Guide
Page 98
..., creating 83 model name 1 mute light, identifying 8 N network jack, identifying 13 O operating system, product description 3 optical drive precautions 29 spare part number 22, 25 original system recovery 83 P packaging guidelines 31 plastic parts, service considerations 28 pointing device, product description 3 ports HDMI 12 product description 3 USB 2.0 13 USB 3.0 12 USB 3.0 (powered) charging 12 power button board removal 72 spare part number 17, 24, 72 power button, identifying 9 power connector cable removal 65 spare part number 17, 24, 65 power connector, identifying 14 power cord set...
..., creating 83 model name 1 mute light, identifying 8 N network jack, identifying 13 O operating system, product description 3 optical drive precautions 29 spare part number 22, 25 original system recovery 83 P packaging guidelines 31 plastic parts, service considerations 28 pointing device, product description 3 ports HDMI 12 product description 3 USB 2.0 13 USB 3.0 12 USB 3.0 (powered) charging 12 power button board removal 72 spare part number 17, 24, 72 power button, identifying 9 power connector cable removal 65 spare part number 17, 24, 65 power connector, identifying 14 power cord set...
ENVY m6 Notebook PC ENVY Notebook PC Maintenance and Service Guide
Page 99
recovery discs 82, 84 HP Recovery Manager 83 media 84 starting 84 supported discs 82 system 83 USB flash drive 84 using HP Recovery media 82 recovery media creating 81 creating using HP Recovery Manager 82 recovery partition removing 85 removal/replacement procedures 33, 43 right control zone, identifying 7 RJ-45 (network) jack, identifying 13 RJ-45 (network) status lights, identifying 13 RTC battery removal 43 spare part numbers 18, 23, 43 rubber feet removal 45 spare part number 45 Rubber Kit, spare part number 18, 24 S Screw Kit, spare part number 20, 24 security cable slot, identifying...
recovery discs 82, 84 HP Recovery Manager 83 media 84 starting 84 supported discs 82 system 83 USB flash drive 84 using HP Recovery media 82 recovery media creating 81 creating using HP Recovery Manager 82 recovery partition removing 85 removal/replacement procedures 33, 43 right control zone, identifying 7 RJ-45 (network) jack, identifying 13 RJ-45 (network) status lights, identifying 13 RTC battery removal 43 spare part numbers 18, 23, 43 rubber feet removal 45 spare part number 45 Rubber Kit, spare part number 18, 24 S Screw Kit, spare part number 20, 24 security cable slot, identifying...
ENVY m6 Notebook PC Maintenance and Service Guide
Page 42
... the operating system, and then click Next. 6. Click the Download button, and then follow these steps: 1. Under Step 2: Select a Download, click the BIOS link. 7. If you are accessible. 34 Chapter 5 Removal and replacement procedures for Customer Self-Repair parts Turn off or in various system problems. To update BIOS: 1. Remove the service cover (see Battery on page 30). Remove the battery (see WLAN module on page 29). 5. Click Support & Drivers > click Drivers & Software. 3. Disconnect all external devices...
... the operating system, and then click Next. 6. Click the Download button, and then follow these steps: 1. Under Step 2: Select a Download, click the BIOS link. 7. If you are accessible. 34 Chapter 5 Removal and replacement procedures for Customer Self-Repair parts Turn off or in various system problems. To update BIOS: 1. Remove the service cover (see Battery on page 30). Remove the battery (see WLAN module on page 29). 5. Click Support & Drivers > click Drivers & Software. 3. Disconnect all external devices...
ENVY m6 Notebook PC Maintenance and Service Guide
Page 72
... BIOS update and compare it has been downloaded to install the update. The hard drive designation is connected to an optional power source. Do not download or install a BIOS update while the computer is running on -screen instructions. 4. From the Start screen, type support, and then select the HP Support Assistant app. ‒ or - From the Windows desktop, click the question mark icon in an optional docking device, or connected to a network, consult the network administrator before installing any device, cable...
... BIOS update and compare it has been downloaded to install the update. The hard drive designation is connected to an optional power source. Do not download or install a BIOS update while the computer is running on -screen instructions. 4. From the Start screen, type support, and then select the HP Support Assistant app. ‒ or - From the Windows desktop, click the question mark icon in an optional docking device, or connected to a network, consult the network administrator before installing any device, cable...
ENVY m6 Notebook PC Maintenance and Service Guide
Page 78
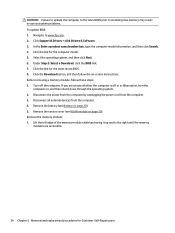
... Backing up, restoring, and recovering If you can use the Factory Reset option of HP Recovery media. Minimized Image Recovery installs only drivers and hardware-enabling applications. For more information, see Recovering using the HP Recovery partition (select models only). If you want to recover the computer's original factory partition and content , or if you have replaced the hard drive, you have not already created recovery media, see Help and Support. ▲ From the Start screen, type support, and then select the HP Support Assistant app...
... Backing up, restoring, and recovering If you can use the Factory Reset option of HP Recovery media. Minimized Image Recovery installs only drivers and hardware-enabling applications. For more information, see Recovering using the HP Recovery partition (select models only). If you want to recover the computer's original factory partition and content , or if you have replaced the hard drive, you have not already created recovery media, see Help and Support. ▲ From the Start screen, type support, and then select the HP Support Assistant app...
ENVY m6 Notebook PC Maintenance and Service Guide
Page 80
... HP Recovery partition (select models only) HP Recovery Manager software allows you remove the Recovery partition, create HP Recovery media; So before beginning these steps to free up hard drive space. NOTE: If the computer does not automatically restart in HP Recovery Manager, you can change the boot order: IMPORTANT: For tablets with keyboards attached: ▲ Turn on or restart the computer, quickly press the volume down button, and then tap f9 for boot options. 3. See Changing the computer boot order on -screen instructions. From the Start screen, type recovery...
... HP Recovery partition (select models only) HP Recovery Manager software allows you remove the Recovery partition, create HP Recovery media; So before beginning these steps to free up hard drive space. NOTE: If the computer does not automatically restart in HP Recovery Manager, you can change the boot order: IMPORTANT: For tablets with keyboards attached: ▲ Turn on or restart the computer, quickly press the volume down button, and then tap f9 for boot options. 3. See Changing the computer boot order on -screen instructions. From the Start screen, type recovery...

ENVY m6 Notebook PC Maintenance and Service Guide
Page 85
... audio 2 chipset 1 display panel 1 Ethernet 2 external media cards 2 graphics 1 hard drive 1 internal card expansion 2 keyboard 2 memory module 1 microphone 2 operating system 3 pointing device 2 ports 2 power requirements 2 processors 1 product name 1 security 3 serviceability 3 video 2 wireless 2 product name 1 R recover options 69 recovery discs 69, 71 HP Recovery Manager 70 media 71 starting 71 supported discs 69 system 70 USB flash drive 71 using HP Recovery media 69 recovery media creating 68 creating using HP Recovery Manager 69 recovery partition removing 72 removal/replacement...
... audio 2 chipset 1 display panel 1 Ethernet 2 external media cards 2 graphics 1 hard drive 1 internal card expansion 2 keyboard 2 memory module 1 microphone 2 operating system 3 pointing device 2 ports 2 power requirements 2 processors 1 product name 1 security 3 serviceability 3 video 2 wireless 2 product name 1 R recover options 69 recovery discs 69, 71 HP Recovery Manager 70 media 71 starting 71 supported discs 69 system 70 USB flash drive 71 using HP Recovery media 69 recovery media creating 68 creating using HP Recovery Manager 69 recovery partition removing 72 removal/replacement...
User Guide
Page 9
...50 Using passwords ...50 Setting Windows passwords ...50 Setting Setup Utility (BIOS) passwords 51 Using the fingerprint reader (select models only 51 Using Internet security software ...52 Using antivirus software ...52 Using firewall software ...52 Installing software updates ...52 Installing critical security updates ...52 Using HP Touchpoint Manager (select models only 53 Securing your wireless network ...53 Backing up your software applications and information 53 Using an optional security cable lock ...53 9 Using Setup Utility (BIOS) ...55 Starting Setup Utility (BIOS) ...55 Updating...
...50 Using passwords ...50 Setting Windows passwords ...50 Setting Setup Utility (BIOS) passwords 51 Using the fingerprint reader (select models only 51 Using Internet security software ...52 Using antivirus software ...52 Using firewall software ...52 Installing software updates ...52 Installing critical security updates ...52 Using HP Touchpoint Manager (select models only 53 Securing your wireless network ...53 Backing up your software applications and information 53 Using an optional security cable lock ...53 9 Using Setup Utility (BIOS) ...55 Starting Setup Utility (BIOS) ...55 Updating...

User Guide
Page 49
...; Briefly press the power button. ● If the computer is closed, raise the display. ● Press a key on the keyboard. ● Tap or swipe the TouchPad. When the computer exits Hibernation, the power lights turn on and your work returns to the screen. ENWW Initiating and exiting Sleep and Hibernation 39 You can enable user-initiated Hibernation and change other power settings and timeouts using Power Options. 1. In the left...
...; Briefly press the power button. ● If the computer is closed, raise the display. ● Press a key on the keyboard. ● Tap or swipe the TouchPad. When the computer exits Hibernation, the power lights turn on and your work returns to the screen. ENWW Initiating and exiting Sleep and Hibernation 39 You can enable user-initiated Hibernation and change other power settings and timeouts using Power Options. 1. In the left...
User Guide
Page 63
... set up , restoring, and recovering on your network from being mishandled or stolen. To view or change the settings: 1. Select System and Security, select Windows Update, select Change settings, and then follow the onscreen instructions. Using HP Touchpoint Manager (select models only) HP Touchpoint Manager is highly cost effective relative to traditional in this section. From the Start screen, type control panel. ‒ or - Loop the security cable lock around a secured object. 2. The security cable slot...
... set up , restoring, and recovering on your network from being mishandled or stolen. To view or change the settings: 1. Select System and Security, select Windows Update, select Change settings, and then follow the onscreen instructions. Using HP Touchpoint Manager (select models only) HP Touchpoint Manager is highly cost effective relative to traditional in this section. From the Start screen, type control panel. ‒ or - Loop the security cable lock around a secured object. 2. The security cable slot...

User Guide
Page 66
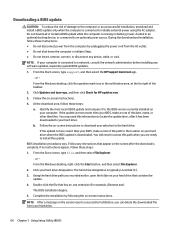
... Start screen, type file, and then select File Explorer. ‒ or - During the download and installation, follow these steps: a. You may need to access this information to locate the update later, after the download is downloaded. The hard drive designation is connected to reliable external power using the AC adapter. Follow the on -screen instructions. Do not download or install a BIOS update while the computer is connected to a network, consult the network administrator before installing any device, cable, or cord. Downloading a BIOS update...
... Start screen, type file, and then select File Explorer. ‒ or - During the download and installation, follow these steps: a. You may need to access this information to locate the update later, after the download is downloaded. The hard drive designation is connected to reliable external power using the AC adapter. Follow the on -screen instructions. Do not download or install a BIOS update while the computer is connected to a network, consult the network administrator before installing any device, cable, or cord. Downloading a BIOS update...
User Guide
Page 71
... resetting the computer to its original factory state by using the HP Recovery media that you either download the software from the manufacturer's website or reinstall the software from the media provided by using a minimized image, you get started ● HP Recovery Manager recovers only software that you can use the HP Recovery media. If you have replaced the hard drive, you obtained from the HP Recovery partition or HP Recovery media. or - ENWW Restore and recovery 61 For more information, see Recovering using HP Recovery Manager...
... resetting the computer to its original factory state by using the HP Recovery media that you either download the software from the manufacturer's website or reinstall the software from the media provided by using a minimized image, you get started ● HP Recovery Manager recovers only software that you can use the HP Recovery media. If you have replaced the hard drive, you obtained from the HP Recovery partition or HP Recovery media. or - ENWW Restore and recovery 61 For more information, see Recovering using HP Recovery Manager...

User Guide
Page 73
...: ▲ Turn on -screen instructions. Insert the HP Recovery media. 2. Removing the HP Recovery partition (select models only) HP Recovery Manager software allows you remove the Recovery partition, create HP Recovery media; Select Remove Recovery Partition, and then follow the on page 59. 1. For computers or tablets without keyboards attached: ▲ Turn on or restart the computer, quickly press the Windows button, and then tap f9 for an optical drive or a USB flash drive. ENWW Restore and recovery 63 In addition, you can change the computer boot order. Changing the...
...: ▲ Turn on -screen instructions. Insert the HP Recovery media. 2. Removing the HP Recovery partition (select models only) HP Recovery Manager software allows you remove the Recovery partition, create HP Recovery media; Select Remove Recovery Partition, and then follow the on page 59. 1. For computers or tablets without keyboards attached: ▲ Turn on or restart the computer, quickly press the Windows button, and then tap f9 for an optical drive or a USB flash drive. ENWW Restore and recovery 63 In addition, you can change the computer boot order. Changing the...

User Guide
Page 77
...-definition devices, connecting 23 HP 3D DriveGuard 46 HP Apps Store, visiting 1 HP PC Hardware Diagnostics (UEFI) downloading 57 HP Recovery Manager correcting boot problems 63 starting 62 HP Recovery media creating 59 recovery 62 HP Recovery partition recovery 62 removing 63 HP resources 2 HP Touchpoint Manager 53 I initiating Sleep and Hibernation 38 input power 64 installing critical security updates 52 optional security cable lock 53 integrated numeric keypad, identifying 14, 37 internal display switch, identifying 9 internal microphones, identifying 9 Internet security software, using 52...
...-definition devices, connecting 23 HP 3D DriveGuard 46 HP Apps Store, visiting 1 HP PC Hardware Diagnostics (UEFI) downloading 57 HP Recovery Manager correcting boot problems 63 starting 62 HP Recovery media creating 59 recovery 62 HP Recovery partition recovery 62 removing 63 HP resources 2 HP Touchpoint Manager 53 I initiating Sleep and Hibernation 38 input power 64 installing critical security updates 52 optional security cable lock 53 integrated numeric keypad, identifying 14, 37 internal display switch, identifying 9 internal microphones, identifying 9 Internet security software, using 52...

User Guide
Page 78
... N network jack, identifying 5 num lock key, identifying 36 O one-finger slide touch screen gesture 36 operating environment 64 original system recovery 61 P passwords Setup Utility (BIOS) 51 Windows 50 ports HDMI 7, 23 USB 2.0 5 USB 3.0 7 USB 3.0 (powered) charging 7 power AC 43 battery 40 power button, identifying 13 power connector, identifying 6 power lights, identifying 7, 12 power meter, using 40 power settings, using 40 product name and number, computer 17 public WLAN connection 19 R recover options 60 recovery discs 60, 62 HP Recovery Manager 61 media 62 starting 62 supported discs 60...
... N network jack, identifying 5 num lock key, identifying 36 O one-finger slide touch screen gesture 36 operating environment 64 original system recovery 61 P passwords Setup Utility (BIOS) 51 Windows 50 ports HDMI 7, 23 USB 2.0 5 USB 3.0 7 USB 3.0 (powered) charging 7 power AC 43 battery 40 power button, identifying 13 power connector, identifying 6 power lights, identifying 7, 12 power meter, using 40 power settings, using 40 product name and number, computer 17 public WLAN connection 19 R recover options 60 recovery discs 60, 62 HP Recovery Manager 61 media 62 starting 62 supported discs 60...


