
User Guide
Page 4
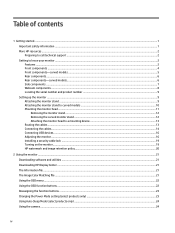
... a mounting device 13 Routing the cables ...13 Connecting the cables...14 Connecting USB devices...16 Adjusting the monitor...16 Installing a security cable lock ...19 Turning on the monitor...19 HP watermark and image retention policy...20 2 Using the monitor ...21 Downloading software and utilities ...21 Downloading HP Display Center ...21 The Information file ...21 The Image Color Matching file ...21 Using the OSD menu ...22 Using the OSD function buttons ...22 Reassigning the function buttons ...23 Changing the Power Mode setting (select products only 23 Using Auto-Sleep Mode...
... a mounting device 13 Routing the cables ...13 Connecting the cables...14 Connecting USB devices...16 Adjusting the monitor...16 Installing a security cable lock ...19 Turning on the monitor...19 HP watermark and image retention policy...20 2 Using the monitor ...21 Downloading software and utilities ...21 Downloading HP Display Center ...21 The Information file ...21 The Image Color Matching file ...21 Using the OSD menu ...22 Using the OSD function buttons ...22 Reassigning the function buttons ...23 Changing the Power Mode setting (select products only 23 Using Auto-Sleep Mode...
User Guide
Page 5
... v Setting up Windows Hello facial recognition ...25 Using the computer camera for Windows Hello...25 Using the monitor camera for Windows Hello ...26 DisplayPort multistreaming (select models) ...26 3 USB Type-C mode and Display Only mode ...28 USB Type-C mode ...28 Display Only mode ...28 4 Support and troubleshooting ...29 Solving common issues ...29 Button lockouts...30 5 Maintaining the monitor ...31 Maintenance guidelines...31 Cleaning the monitor ...31 Shipping the monitor ...32 Appendix A Technical specifications ...33...
... v Setting up Windows Hello facial recognition ...25 Using the computer camera for Windows Hello...25 Using the monitor camera for Windows Hello ...26 DisplayPort multistreaming (select models) ...26 3 USB Type-C mode and Display Only mode ...28 USB Type-C mode ...28 Display Only mode ...28 4 Support and troubleshooting ...29 Solving common issues ...29 Button lockouts...30 5 Maintaining the monitor ...31 Maintenance guidelines...31 Cleaning the monitor ...31 Shipping the monitor ...32 Appendix A Technical specifications ...33...
User Guide
Page 7
...; Plug the power cord into a grounded (earthed) three-pin outlet. ● Disconnect power from the computer by the plug. Use the appropriate and correctly sized furniture designed to the floor or wall in accordance with your monitor. To prevent injury, securely attach the monitor to properly support your user guides. WARNING! Getting started Read this monitor. It describes proper workstation setup and proper posture, health, and work...
...; Plug the power cord into a grounded (earthed) three-pin outlet. ● Disconnect power from the computer by the plug. Use the appropriate and correctly sized furniture designed to the floor or wall in accordance with your monitor. To prevent injury, securely attach the monitor to properly support your user guides. WARNING! Getting started Read this monitor. It describes proper workstation setup and proper posture, health, and work...
User Guide
Page 9
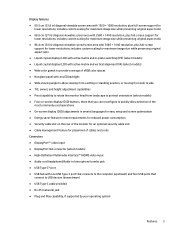
...; Nonglare panel with an LED backlight ● Wide viewing angle to allow viewing from a sitting or standing position, or moving from side to side ● Tilt, swivel, and height adjustment capabilities ● Pivot capability to rotate the monitor head from landscape to portrait orientation (select models) ● Four on-screen display (OSD) buttons, three that you can reconfigure to quickly allow selection of cables and cords Connectors ● DisplayPort™ video input ●...
...; Nonglare panel with an LED backlight ● Wide viewing angle to allow viewing from a sitting or standing position, or moving from side to side ● Tilt, swivel, and height adjustment capabilities ● Pivot capability to rotate the monitor head from landscape to portrait orientation (select models) ● Four on-screen display (OSD) buttons, three that you can reconfigure to quickly allow selection of cables and cords Connectors ● DisplayPort™ video input ●...

User Guide
Page 10
...://www.hp.com/support, and follow the instructions to find your documentation kit. Then select Manuals. Off: Volume from the speaker is muted. See Reassigning the function buttons on page 23. (9) Power button Turns the monitor on . 4 Chapter 1 Getting started Off: Microphone is not muted. (7) OSD menu button Press to open the OSD menu. (8) OSD buttons (assignable) When the OSD menu is on or off. (10) Power light On: Monitor power is open, press the buttons to quickly select...
...://www.hp.com/support, and follow the instructions to find your documentation kit. Then select Manuals. Off: Volume from the speaker is muted. See Reassigning the function buttons on page 23. (9) Power button Turns the monitor on . 4 Chapter 1 Getting started Off: Microphone is not muted. (7) OSD menu button Press to open the OSD menu. (8) OSD buttons (assignable) When the OSD menu is on or off. (10) Power light On: Monitor power is open, press the buttons to quickly select...
User Guide
Page 15
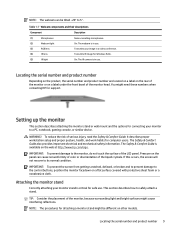
..., the serial number and product number are located on a label on the rear of the monitor or on a flat surface covered with protective sheet foam or a nonabrasive cloth. It describes proper workstation setup and proper posture, health, and work habits for support. This section describes how to the control buttons, position the monitor facedown on a label under the front bezel of the LCD panel. The...
..., the serial number and product number are located on a label on the rear of the monitor or on a flat surface covered with protective sheet foam or a nonabrasive cloth. It describes proper workstation setup and proper posture, health, and work habits for support. This section describes how to the control buttons, position the monitor facedown on a label under the front bezel of the LCD panel. The...
User Guide
Page 22
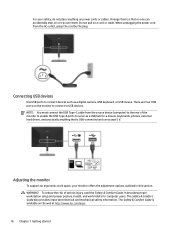
... connect devices such as a USB hub for computer users. Connecting USB devices Use USB ports to USB devices. There are four USB ports on a cord or cable. NOTE: You must connect the USB Type-C cable from the AC outlet, grasp the cord by the plug. WARNING! The Safety & Comfort Guide also provides important electrical and mechanical safety information. When unplugging the power cord from the source device (computer) to serve as a digital camera, USB...
... connect devices such as a USB hub for computer users. Connecting USB devices Use USB ports to USB devices. There are four USB ports on a cord or cable. NOTE: You must connect the USB Type-C cable from the AC outlet, grasp the cord by the plug. WARNING! The Safety & Comfort Guide also provides important electrical and mechanical safety information. When unplugging the power cord from the source device (computer) to serve as a digital camera, USB...

User Guide
Page 25
... will not be enabled. Installing a security cable lock As a security measure, you can disable the power light in use for 12 or more hours. Use the key that might be in the OSD menu. To disable this feature, press and hold the monitor power button for 10 seconds. Image retention is not covered under the HP warranty. Press the Menu button to open the OSD, select Power, select Power LED, and then select Off...
... will not be enabled. Installing a security cable lock As a security measure, you can disable the power light in use for 12 or more hours. Use the key that might be in the OSD menu. To disable this feature, press and hold the monitor power button for 10 seconds. Image retention is not covered under the HP warranty. Press the Menu button to open the OSD, select Power, select Power LED, and then select Off...
User Guide
Page 26
... images can cause image retention damage that input for long periods of the auto-switch source setting (On or Off; Though suitable for many applications, this panel technology is idle. 20 Chapter 1 Getting started HP watermark and image retention policy Some monitors are in use, or use the power management setting, if supported on your monitor, a monitor status message is On), the current preset display resolution, and the recommended preset display resolution. default setting is displayed...
... images can cause image retention damage that input for long periods of the auto-switch source setting (On or Off; Though suitable for many applications, this panel technology is idle. 20 Chapter 1 Getting started HP watermark and image retention policy Some monitors are in use, or use the power management setting, if supported on your monitor, a monitor status message is On), the current preset display resolution, and the recommended preset display resolution. default setting is displayed...

User Guide
Page 27
.... 4. Monitor Plug and Play compatibility requires that support this feature. Downloading software and utilities You can download and install the HP Display Center software from within graphics programs that the computer's graphics card is Plug and Play compatible, and the monitor will work through separate BNC-type connectors or through distribution buffers, boxes, or both. Select your monitor and its features, including software and utilities, the OSD menu, the function buttons, power modes, and Windows...
.... 4. Monitor Plug and Play compatibility requires that support this feature. Downloading software and utilities You can download and install the HP Display Center software from within graphics programs that the computer's graphics card is Plug and Play compatible, and the monitor will work through separate BNC-type connectors or through distribution buffers, boxes, or both. Select your monitor and its features, including software and utilities, the OSD menu, the function buttons, power modes, and Windows...
User Guide
Page 28
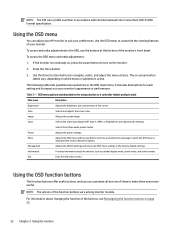
... displayed (the factory default is English). Selects the video input signal (USB Type-C, HDMI, or DisplayPort) and adjusts audio settings. Adjusts the power settings. Adjusts the OSD menu and function button controls, and selects the language in the OSD, use the buttons at the bottom of them even more useful. Management Information Exit Adjusts the DDC/CI settings and returns all but one of the monitor's front bezel. For information about the monitor, such as optimal display mode, power mode, and serial number. Selects and adjusts the screen color...
... displayed (the factory default is English). Selects the video input signal (USB Type-C, HDMI, or DisplayPort) and adjusts audio settings. Adjusts the power settings. Adjusts the OSD menu and function button controls, and selects the language in the OSD, use the buttons at the bottom of them even more useful. Management Information Exit Adjusts the DDC/CI settings and returns all but one of the monitor's front bezel. For information about the monitor, such as optimal display mode, power mode, and serial number. Selects and adjusts the screen color...

User Guide
Page 31
... supported on your monitor. Download the HP Windows Hello software driver from the video conferencing interface. Under Windows Hello, select Set up Windows Hello facial recognition In select products, you can close the camera by using either the camera on your computer or the camera on the Windows 10 operating system. Select the Make this display. 6. NOTE: For video conferencing, connect the computer to this my main display check...
... supported on your monitor. Download the HP Windows Hello software driver from the video conferencing interface. Under Windows Hello, select Set up Windows Hello facial recognition In select products, you can close the camera by using either the camera on your computer or the camera on the Windows 10 operating system. Select the Make this display. 6. NOTE: For video conferencing, connect the computer to this my main display check...

User Guide
Page 35
... Preset display resolutions on the screen. Video card is not connected to AC power. If your monitor is not working as expected, you use Windows Hello. The monitor does not enter The monitor's power saving control is too low. Disconnect the USB cable from Device Manager. Brightness setting is Open the OSD menu and select Power, select Auto-Sleep into a low-power sleep state. "Input Signal Not Found" is in this section. Connect the power cord to the monitor and to the port Disconnect the...
... Preset display resolutions on the screen. Video card is not connected to AC power. If your monitor is not working as expected, you use Windows Hello. The monitor does not enter The monitor's power saving control is too low. Disconnect the USB cable from Device Manager. Brightness setting is Open the OSD menu and select Power, select Auto-Sleep into a low-power sleep state. "Input Signal Not Found" is in this section. Connect the power cord to the monitor and to the port Disconnect the...

User Guide
Page 37
... authorized HP dealer, reseller, or service provider. ● Use only a power source and connection appropriate for each device. ● Install the monitor near an outlet that you can easily reach. Adjust only those controls that the total ampere rating of the products connected to the cord does not exceed the rating of the cord. Disconnect the monitor by wiping the screen and the cabinet with a soft, clean antistatic...
... authorized HP dealer, reseller, or service provider. ● Use only a power source and connection appropriate for each device. ● Install the monitor near an outlet that you can easily reach. Adjust only those controls that the total ampere rating of the products connected to the cord does not exceed the rating of the cord. Disconnect the monitor by wiping the screen and the cabinet with a soft, clean antistatic...
User Guide
Page 44
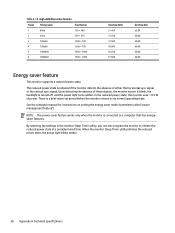
... is connected to its normal operating state. NOTE: This power saver feature works only when the monitor is a brief warm-up period before the monitor returns to a computer that has energysaver features. When the monitor Sleep Timer utility initiates the reduced power state, the power light blinks amber. 38 Appendix A Technical specifications In the reduced power state, the monitor uses < 0.5 W of either the horizontal sync signal or the vertical sync signal...
... is connected to its normal operating state. NOTE: This power saver feature works only when the monitor is a brief warm-up period before the monitor returns to a computer that has energysaver features. When the monitor Sleep Timer utility initiates the reduced power state, the power light blinks amber. 38 Appendix A Technical specifications In the reduced power state, the monitor uses < 0.5 W of either the horizontal sync signal or the vertical sync signal...

Maintenance and Service Guide
Page 1
Maintenance and Service Guide E27m G4 model SUMMARY This guide provides information about spare parts, removal and replacement of parts, diagnostic tests, problem troubleshooting, and more.
Maintenance and Service Guide E27m G4 model SUMMARY This guide provides information about spare parts, removal and replacement of parts, diagnostic tests, problem troubleshooting, and more.

Maintenance and Service Guide
Page 5
..., the replacement parts can cause a short circuit that covers liabilities resulting from repairs, regardless of service: Level 1: Cosmetic/appearance/alignment service Level 2: Circuit board or standard parts replacement Firmware updates Firmware updates for the monitor are two levels of whether required by the EU (European Union) for repairers of electrical equipment in the EU and other countries. There are available at support.hp.com. A professional repairer must have...
..., the replacement parts can cause a short circuit that covers liabilities resulting from repairs, regardless of service: Level 1: Cosmetic/appearance/alignment service Level 2: Circuit board or standard parts replacement Firmware updates Firmware updates for the monitor are two levels of whether required by the EU (European Union) for repairers of electrical equipment in the EU and other countries. There are available at support.hp.com. A professional repairer must have...

Maintenance and Service Guide
Page 6
... four USB ports that connect to USB devices (downstream). 1 of the monitor's features. includes custom scaling for maximum image size while preserving original aspect ratio ● Wide color gamut to provide coverage of NTSC color spaces ● Nonglare panel with an LED backlight ● Antiglare panel with an LED backlight ● Wide viewing angle to allow viewing from a sitting or standing position, or moving from side to side ● Tilt, swivel and height adjustment...
... four USB ports that connect to USB devices (downstream). 1 of the monitor's features. includes custom scaling for maximum image size while preserving original aspect ratio ● Wide color gamut to provide coverage of NTSC color spaces ● Nonglare panel with an LED backlight ● Antiglare panel with an LED backlight ● Wide viewing angle to allow viewing from a sitting or standing position, or moving from side to side ● Tilt, swivel and height adjustment...

Maintenance and Service Guide
Page 22
... and lead to remove as much solder as you confirm the steady soldering condition. • Keep the soldering iron tip clean and well tinned and when replacing parts. • A close inspection of Lead-Free solder is ordinary. Note: (The requirement of electrical equipment in good condition. • After repaired, must connect source to each port to repair electronic displays and complies with...
... and lead to remove as much solder as you confirm the steady soldering condition. • Keep the soldering iron tip clean and well tinned and when replacing parts. • A close inspection of Lead-Free solder is ordinary. Note: (The requirement of electrical equipment in good condition. • After repaired, must connect source to each port to repair electronic displays and complies with...

Maintenance and Service Guide
Page 27
... problems Problem Possible cause Screen is blank or video is in Auto-Sleep Mode. System is flashing. NOTE: If pressing the Power button has no effect, press and hold the power button for 10 seconds to confirm that all functions are working. Tool used Computer or DVD player DP test Confirm whether image displays and sound plays correctly on the monitor. Power the power button. Power cord is improperly connected. Open the OSD menu and select the Input menu. Video cable...
... problems Problem Possible cause Screen is blank or video is in Auto-Sleep Mode. System is flashing. NOTE: If pressing the Power button has no effect, press and hold the power button for 10 seconds to confirm that all functions are working. Tool used Computer or DVD player DP test Confirm whether image displays and sound plays correctly on the monitor. Power the power button. Power cord is improperly connected. Open the OSD menu and select the Input menu. Video cable...


