User Guide
Page 5
... monitor stand ...5 Mounting the monitor head ...7 Removing the monitor stand 7 Attaching the monitor head to a mounting device 8 Connecting the cables ...9 Connecting USB devices ...12 Adjusting the monitor (select products only 13 Installing a security cable ...15 Turning on the monitor ...15 HP watermark and image retention policy 16 Docking an HP notebook or desktop computer 16 2 Using the monitor ...18 Downloading software and utilities ...18 The Information file ...18 The Image Color Matching file ...18 Using the OSD menu ...18 Using the OSD function buttons...
... monitor stand ...5 Mounting the monitor head ...7 Removing the monitor stand 7 Attaching the monitor head to a mounting device 8 Connecting the cables ...9 Connecting USB devices ...12 Adjusting the monitor (select products only 13 Installing a security cable ...15 Turning on the monitor ...15 HP watermark and image retention policy 16 Docking an HP notebook or desktop computer 16 2 Using the monitor ...18 Downloading software and utilities ...18 The Information file ...18 The Image Color Matching file ...18 Using the OSD menu ...18 Using the OSD function buttons...

User Guide
Page 6
... Other disability resources ...35 HP links ...36 Contacting support ...36 Index ...37 vi 3 Support and troubleshooting ...23 Solving common issues ...23 Button lockouts ...24 Optimizing image performance (analog input 24 4 Maintaining the monitor ...26 Maintenance guidelines ...26 Cleaning the monitor ...26 Shipping the monitor ...27 Appendix A Technical specifications ...28 68.6 cm (27.0 in) QHD model specifications ...28 60.5 cm (23.8 in) FHD model specifications ...29 Preset display resolutions ...29 High-definition video...
... Other disability resources ...35 HP links ...36 Contacting support ...36 Index ...37 vi 3 Support and troubleshooting ...23 Solving common issues ...23 Button lockouts ...24 Optimizing image performance (analog input 24 4 Maintaining the monitor ...26 Maintenance guidelines ...26 Cleaning the monitor ...26 Shipping the monitor ...27 Appendix A Technical specifications ...28 68.6 cm (27.0 in) QHD model specifications ...28 60.5 cm (23.8 in) FHD model specifications ...29 Preset display resolutions ...29 High-definition video...
User Guide
Page 7
... outlet. Use a power strip whose manufacturer offers a damage replacement policy so that might be specifically labeled as a power strip or uninterruptible power supply (UPS). Important safety information An AC adapter and power cord might cause disturbing reflections from the AC outlet, grasp the cord by unplugging the power cord from surrounding light and bright surfaces that you use another cord, use only a power source and connection appropriate for use with the installation instructions. To...
... outlet. Use a power strip whose manufacturer offers a damage replacement policy so that might be specifically labeled as a power strip or uninterruptible power supply (UPS). Important safety information An AC adapter and power cord might cause disturbing reflections from the AC outlet, grasp the cord by unplugging the power cord from surrounding light and bright surfaces that you use another cord, use only a power source and connection appropriate for use with the installation instructions. To...
User Guide
Page 8
... troubleshooting on page 23, a call to replace the power cord, the AC adapter (select products only), or any other cables that you cannot solve a problem using Getting to troubleshoot an issue. includes custom scaling for lower resolutions; or - Then select Support. - NOTE: Contact customer support to technical support can provide additional help. This section provides details about your product. - Preparing to call . ● Monitor model number ● Monitor serial number...
... troubleshooting on page 23, a call to replace the power cord, the AC adapter (select products only), or any other cables that you cannot solve a problem using Getting to troubleshoot an issue. includes custom scaling for lower resolutions; or - Then select Support. - NOTE: Contact customer support to technical support can provide additional help. This section provides details about your product. - Preparing to call . ● Monitor model number ● Monitor serial number...
User Guide
Page 9
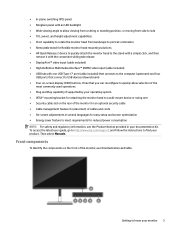
...-plane switching (IPS) panel ● Nonglare panel with an LED backlight ● Wide viewing angle to allow viewing from a sitting or standing position, or moving from side to side ● Tilt, swivel, and height adjustment capabilities ● Pivot capability to rotate the monitor head from landscape to portrait orientation ● Removable stand for flexible monitor head mounting solutions ● HP Quick Release 2 device to quickly attach the monitor head to the stand with...
...-plane switching (IPS) panel ● Nonglare panel with an LED backlight ● Wide viewing angle to allow viewing from a sitting or standing position, or moving from side to side ● Tilt, swivel, and height adjustment capabilities ● Pivot capability to rotate the monitor head from landscape to portrait orientation ● Removable stand for flexible monitor head mounting solutions ● HP Quick Release 2 device to quickly attach the monitor head to the stand with...

User Guide
Page 10
... game console. (6) USB Type-C port (upstream) Connects a USB Type-C cable to a source device such as a USB 3.0 connection. You can also be used operations. NOTE: Be sure that the master power switch on the monitor is in a reduced power state because of power to a device. It can reassign the function buttons to quickly select the most commonly used to deliver up to turn on the monitor. (6) Power light White: The monitor is open , the Menu light turns on page...
... game console. (6) USB Type-C port (upstream) Connects a USB Type-C cable to a source device such as a USB 3.0 connection. You can also be used operations. NOTE: Be sure that the master power switch on the monitor is in a reduced power state because of power to a device. It can reassign the function buttons to quickly select the most commonly used to deliver up to turn on the monitor. (6) Power light White: The monitor is open , the Menu light turns on page...
User Guide
Page 11
... USB hard drive. (9) USB ports (2) (downstream) Connect a USB cable to the control buttons, position the monitor facedown on a flat surface covered with protective sheet foam or a nonabrasive cloth. NOTE: The procedures for computer users. With the monitor placed facedown inside the box, tear open the packaging bag along the tear line. Setting up the monitor 5 It describes proper workstation setup and proper posture, health, and work habits for attaching a monitor stand...
... USB hard drive. (9) USB ports (2) (downstream) Connect a USB cable to the control buttons, position the monitor facedown on a flat surface covered with protective sheet foam or a nonabrasive cloth. NOTE: The procedures for computer users. With the monitor placed facedown inside the box, tear open the packaging bag along the tear line. Setting up the monitor 5 It describes proper workstation setup and proper posture, health, and work habits for attaching a monitor stand...
User Guide
Page 13
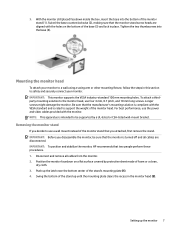
... base into the base (4). Removing the monitor stand If you decide to safely and securely connect your monitor to the monitor head, use the power and video cables provided with the VESA standard and is compliant with the monitor. Position the monitor facedown on the bottom of foam or a clean, dry cloth. 3. Setting up until the mounting plate clears the recess in this section to use a wall mount instead of the monitor stand (1). Longer screws...
... base into the base (4). Removing the monitor stand If you decide to safely and securely connect your monitor to the monitor head, use the power and video cables provided with the VESA standard and is compliant with the monitor. Position the monitor facedown on the bottom of foam or a clean, dry cloth. 3. Setting up until the mounting plate clears the recess in this section to use a wall mount instead of the monitor stand (1). Longer screws...

User Guide
Page 18
... 1 Getting started The grounding plug is one USB Type-C port on the side. Arrange them . There are used to the power connector on a cord or cable. There is an important safety feature. 4. To reduce the risk of the power cord to the AC adapter and the other end to act as a digital camera, USB keyboard, or USB mouse. Connecting USB devices USB ports are four USB ports on the monitor to connect to...
... 1 Getting started The grounding plug is one USB Type-C port on the side. Arrange them . There are used to the power connector on a cord or cable. There is an important safety feature. 4. To reduce the risk of the power cord to the AC adapter and the other end to act as a digital camera, USB keyboard, or USB mouse. Connecting USB devices USB ports are four USB ports on the monitor to connect to...

User Guide
Page 21
... optional speaker bar to attach and remove the lock. Installing a security cable Use the key that came with the base when the monitor pivots and potentially cause damage to the monitor. b. IMPORTANT: If the monitor is not in full height and full tilt position when pivoting, the bottom right corner of the monitor panel will come in contact with the optional security cable to the monitor, install it...
... optional speaker bar to attach and remove the lock. Installing a security cable Use the key that came with the base when the monitor pivots and potentially cause damage to the monitor. b. IMPORTANT: If the monitor is not in full height and full tilt position when pivoting, the bottom right corner of the monitor panel will come in contact with the optional security cable to the monitor, install it...
User Guide
Page 22
... is not covered under the HP warranty. NOTE: On select HP monitors, you use the power management setting, if supported on the monitor's screen. The USB Type-C port provides network, data, video, and power delivery when you should always activate a screen saver application or turn off the monitor when it is On), the current preset display resolution, and the recommended preset display resolution. Static images can cause image retention damage that input for a prolonged...
... is not covered under the HP warranty. NOTE: On select HP monitors, you use the power management setting, if supported on the monitor's screen. The USB Type-C port provides network, data, video, and power delivery when you should always activate a screen saver application or turn off the monitor when it is On), the current preset display resolution, and the recommended preset display resolution. Static images can cause image retention damage that input for a prolonged...
User Guide
Page 24
..., including software and utilities, the OSD menu, the function buttons, power modes, and Windows Hello. Select Software and Drivers. 3. Monitor Plug and Play compatibility requires that the computer's graphics card is VESA DDC2 compliant and that support this feature. NOTE: The ICM color profile is Plug and Play compatible, and the monitor will work through separate BNCtype connectors or through distribution buffers, boxes, or both. To access the OSD menu and make adjustments in accordance...
..., including software and utilities, the OSD menu, the function buttons, power modes, and Windows Hello. Select Software and Drivers. 3. Monitor Plug and Play compatibility requires that the computer's graphics card is VESA DDC2 compliant and that support this feature. NOTE: The ICM color profile is Plug and Play compatible, and the monitor will work through separate BNCtype connectors or through distribution buffers, boxes, or both. To access the OSD menu and make adjustments in accordance...

User Guide
Page 25
... controls. Using the OSD function buttons 19 Brightness Button-Adjusts the brightness level of the buttons, see Reassigning the function buttons on the monitor. 2. Color Button-Selects and adjusts the screen color. Power Adjusts the power settings. Exit Exits the OSD menu screen. Image Button-Adjusts the screen image. For information about changing the function of the screen. The on-screen button labels vary, depending on which the OSD menu is displayed (the factory default is English), and returns all but one of them to turn on page 20. Contrast Button-Adjusts...
... controls. Using the OSD function buttons 19 Brightness Button-Adjusts the brightness level of the buttons, see Reassigning the function buttons on the monitor. 2. Color Button-Selects and adjusts the screen color. Power Adjusts the power settings. Exit Exits the OSD menu screen. Image Button-Adjusts the screen image. For information about changing the function of the screen. The on-screen button labels vary, depending on which the OSD menu is displayed (the factory default is English), and returns all but one of them to turn on page 20. Contrast Button-Adjusts...

User Guide
Page 26
... by default), the monitor enters a reduced power state when the computer signals low power mode (absence of the available options for the Menu button, you can change the power mode setting: 1. Select Menu, select Assign Buttons, and then select one of either horizontal or vertical sync signal). 20 Chapter 2 Using the monitor When Auto-Sleep Mode is not battery powered, the Power Mode setting must be active. If your monitor might require Performance mode to open the OSD menu. 2. Select Power, select Power Mode, and...
... by default), the monitor enters a reduced power state when the computer signals low power mode (absence of the available options for the Menu button, you can change the power mode setting: 1. Select Menu, select Assign Buttons, and then select one of either horizontal or vertical sync signal). 20 Chapter 2 Using the monitor When Auto-Sleep Mode is not battery powered, the Power Mode setting must be active. If your monitor might require Performance mode to open the OSD menu. 2. Select Power, select Power Mode, and...

User Guide
Page 27
... the Menu button to open the OSD. 2. In the default setting mode, this configuration if the graphics card in a daisy-chain configuration. Select Color. Select Cancel if you can connect up to save your eyes. Select Auto-Sleep Mode, and then select Off. Press one of monitors you do not want to four monitors in this monitor's low blue light panel is blanked, the backlight turns off, and the power light turns amber. Select Save and...
... the Menu button to open the OSD. 2. In the default setting mode, this configuration if the graphics card in a daisy-chain configuration. Select Color. Select Cancel if you can connect up to save your eyes. Select Auto-Sleep Mode, and then select Off. Press one of monitors you do not want to four monitors in this monitor's low blue light panel is blanked, the backlight turns off, and the power light turns amber. Select Save and...
User Guide
Page 29
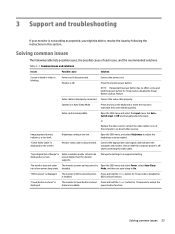
... solutions. disabled. power button function. Power cord is improperly connected. "Input Signal Out of the computer's on the screen. Connect the video cable properly. The monitor does not enter The monitor's power saving control is Video resolution and/or refresh rate displayed on the keyboard or move the mouse to one of Range" is Open the OSD menu and select Power, select Auto-Sleep into a low-power sleep state. Monitor video cable is incompatible. Video card is disconnected. Open the OSD menu, and select Brightness to disable the OSD Lockout function...
... solutions. disabled. power button function. Power cord is improperly connected. "Input Signal Out of the computer's on the screen. Connect the video cable properly. The monitor does not enter The monitor's power saving control is Video resolution and/or refresh rate displayed on the keyboard or move the mouse to one of Range" is Open the OSD menu and select Power, select Auto-Sleep into a low-power sleep state. Monitor video cable is incompatible. Video card is disconnected. Open the OSD menu, and select Brightness to disable the OSD Lockout function...
User Guide
Page 30
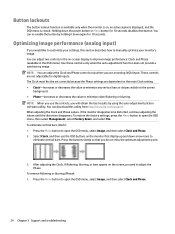
... open the OSD menu, then select Management, select Factory Reset, and select Yes. You can download this section describes how to minimize video flickering or blurring. The Clock must first be set correctly because the Phase settings are not adjustable for 10 seconds. NOTE: When you use the OSD buttons on the screen background. ● Phase-Increases or decreases the value to manually optimize your monitor's image. You can adjust...
... open the OSD menu, then select Management, select Factory Reset, and select Yes. You can download this section describes how to minimize video flickering or blurring. The Clock must first be set correctly because the Phase settings are not adjustable for 10 seconds. NOTE: When you use the OSD buttons on the screen background. ● Phase-Increases or decreases the value to manually optimize your monitor's image. You can adjust...

User Guide
Page 32
... more difficult cleaning situations, use cleaners that are covered in image on the power label to clean the monitor screen or cabinet. If the monitor is not operating properly or has been dropped or damaged, contact an authorized HP dealer, reseller, or service provider. ● Use only a power source and connection appropriate for this monitor, as benzene, thinner, or any external devices. 3. Cleaning the monitor Use these instructions to enhance...
... more difficult cleaning situations, use cleaners that are covered in image on the power label to clean the monitor screen or cabinet. If the monitor is not operating properly or has been dropped or damaged, contact an authorized HP dealer, reseller, or service provider. ● Use only a power source and connection appropriate for this monitor, as benzene, thinner, or any external devices. 3. Cleaning the monitor Use these instructions to enhance...

User Guide
Page 35
... display resolutions The following display resolutions are the most commonly used modes and are set as factory defaults. Table A-2 60.5 cm (27.0 in) FHD monitor specifications Specification Measurement Display, wide-screen Type Viewable image size Maximum weight (unpacked) Dimensions (include base) Height (highest position) Height (lowest position) Depth Width Height adjustment range Tilt adjustment range Swivel adjustment range Pivot adjustment range Environmental requirements temperature Operating temperature Storage temperature Storage humidity Operating humidity Power source Input...
... display resolutions The following display resolutions are the most commonly used modes and are set as factory defaults. Table A-2 60.5 cm (27.0 in) FHD monitor specifications Specification Measurement Display, wide-screen Type Viewable image size Maximum weight (unpacked) Dimensions (include base) Height (highest position) Height (lowest position) Depth Width Height adjustment range Tilt adjustment range Swivel adjustment range Pivot adjustment range Environmental requirements temperature Operating temperature Storage temperature Storage humidity Operating humidity Power source Input...
User Guide
Page 37
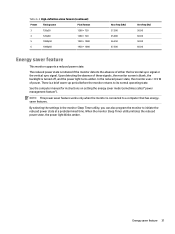
In the reduced power state, the monitor uses < 0.5 W of these signals, the monitor screen is blank, the backlight is a brief warm-up period before the monitor returns to initiate the reduced power state at a predetermined time. See the computer manual for instructions on setting the energy saver mode (sometimes called "power management feature"). Energy saver feature 31 The reduced power state is connected to a computer that has...
In the reduced power state, the monitor uses < 0.5 W of these signals, the monitor screen is blank, the backlight is a brief warm-up period before the monitor returns to initiate the reduced power state at a predetermined time. See the computer manual for instructions on setting the energy saver mode (sometimes called "power management feature"). Energy saver feature 31 The reduced power state is connected to a computer that has...


