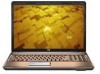
Notebook Tour - Windows VIsta
Page 18
Record sound. Display components Component (1) Internal display switch (2) Internal microphones (2) (3) Integrated webcam light (4) Integrated webcam Description Turns off the display and initiates Sleep if the display is closed while the power is in use. On: The integrated webcam is on. Records video and captures still photographs. 12 Chapter 2 Components
Notebook Tour - Windows VIsta
Page 19
... that is turned on. ● Amber: All wireless devices are fully charged. On: The volume scroll zone is being used to decrease speaker volume. Display components 13 On: Caps lock is on. ● White: Computer sound is turned on . ● Blinking: The computer is in the Sleep state.... ● Off: The computer is plugged into an external power source, the light stays off . When the battery reaches a critical battery level, the battery light begins blinking rapidly. ● Off: If the computer...
Notebook Tour - Windows VIsta
Page 20
... Chapter 2 Components NOTE: If the computer has been set up to require a logon password, you log on. The light on the power button is visible only when the computer is open or closed. QuickPlay launches after you may be asked to log on to the QuickPlay software... lock light On: Num lock is on or the integrated numeric keypad is open . Refer to Windows. The power light on the front of the computer is visible whether the computer is enabled. *The 2 power lights display the same information. Media button Component Description Media button Launches the QuickPlay program.
Notebook Tour - Windows VIsta
Page 26
...memory module 11 WLAN module 11 components additional hardware 18 bottom 11 display 12 front 7 left-side 10 rear 8 right-side 9 top 3 connectors, power 9 cord, power 18 D Digital Media Slot, identifying 10 display switch, identifying 12 drive light, identifying 7, 13 drives, hard ... identifying 11 HDMI port, identifying 10 headphone (audio-out) jack 7 HP Broadband Wireless Module serial number label 19 I IEEE 1394 port, identifying 10 infrared lens, identifying 7 integrated webcam, identifying 12 internal display switch, identifying 12 internal microphone, identifying 12 J jacks audio-in (...
HP Pavilion dv7 Entertainment PC - Maintenance and Service Guide
Page 8
... ...61 RTC battery ...63 WLAN module ...64 Memory module ...67 Switch cover ...69 Keyboard ...71 Bluetooth module ...74 Speaker assembly ...75 Display assembly ...76 Top cover ...85 Fingerprint reader board ...88 TouchPad on/off button board 89 TouchPad button board ...90 Bluetooth module cable ...91... Modem module ...93 System board ...94 Audio/infrared board ...97 USB board ...98 Fan ...99 Subwoofer ...100 Power connector cable ...102 Modem module cable ...103 TV tuner module cable ...104 Heat sink ...105 Processor ...109 5 Setup Utility Starting the Setup ...
HP Pavilion dv7 Entertainment PC - Maintenance and Service Guide
Page 10
...-in (microphone) ...158 Audio-out (headphone) ...158 External monitor ...159 HDMI ...160 RJ-11 (modem) ...161 RJ-45 (network) ...161 Universal Serial Bus ...162 10 Power cord set requirements Requirements for all countries or regions 163 Requirements for specific countries or regions 164 11 Recycling Battery ...165...
HP Pavilion dv7 Entertainment PC - Maintenance and Service Guide
Page 17
... the antennae free from one or more wireless devices. 2 External component identification Top components Display components Item (1) (2) Component Internal display switch Wireless antennae (select models only) Description Turns off the display and initiates Sleep if the display is closed while the power is on. Top components 7 NOTE: To see wireless regulatory notices, refer to your...
HP Pavilion dv7 Entertainment PC - Maintenance and Service Guide
Page 29
Switch covers (include power button board and cable and LED board and cable) For use only with computer models equipped with AMD processors 480469-001 For use only with ... 483275-141 483275-031 483275-001 For use in Belgium 483275-371 483275-A41 Computer major components 19 Item (1) (2) (3) Description Spare part number 17.0-inch display assemblies (include webcam, microphone, and wireless antenna transceivers and cables): For use only with computer models equipped with AMD processors: ● WSXGA+ AntiGlare...
HP Pavilion dv7 Entertainment PC - Maintenance and Service Guide
Page 51
... Cable Kit spare part information. RTC battery Switch cover for use only with computer models equipped with AMD processors (includes power button board and cable and LED board and cable) Speaker assembly Subwoofer (includes 2 mounting grommets) Heat sink for use...with AntiGlare display assembies and 802.11a/b/g and 802.11b/g WLAN modules (includes 2 wireless antenna transceivers and cables) AMD Turion Ultra ZM80 2.10-GHz processor (includes replacement thermal material) AMD Turion Ultra ZM82 2.20-GHz processor (includes replacement thermal material) AMD Turion Ultra ZM86 2.40-GHz processor (...
HP Pavilion dv7 Entertainment PC - Maintenance and Service Guide
Page 53
... AMD processors in Denmark, Norway, and Sweden Switch cover for use only with computer models equipped with Intel processors (includes power button board and cable and LED board and cable) Display inverter cover System board with RX781 Northbridge and ATI HD3450 graphics subsystem with discrete memory for use only with computer models...
HP Pavilion dv7 Entertainment PC - Maintenance and Service Guide
Page 55
... China Power cord for use in South Korea Power cord for use in South Africa Power cord for use in Israel Power cord for use in Argentina Power cord for use in India Display Screw Kit for use only with computer models equipped with AntiGlare display assemblies Heat...includes replacement thermal material) Display enclosure for use only with computer models equipped with an AntiGlare display assembly and an 802.11a/b/g/n WLAN modules (includes 3 wireless antenna transceivers and cables) (includes wireless antenna transceivers and cables) Intel Core2 Duo 2.00-GHz processor (includes replacement ...
HP Pavilion dv7 Entertainment PC - Maintenance and Service Guide
Page 66
... webcam/microphone module, follow these steps: 1. Open the computer as far as possible. 3. For information on replacing the display assembly and other display assembly internal components, see Battery on page 76. Remove the webcam/microphone module: 1. Follow the procedures in Hibernation, turn... right upper corners (2) of the display bezel until the bezel disengages from the display enclosure. 56 Chapter 4 Removal and replacement procedures Shut down through the operating system. 2. Disconnect the power from the computer by first unplugging the power cord from the AC outlet and ...
HP Pavilion dv7 Entertainment PC - Maintenance and Service Guide
Page 67
.... Optical drive NOTE: All optical drive spare part kits include an optical drive bezel and bracket. Disconnect the power from the computer by first unplugging the power cord from the AC outlet and then unplugging the AC adapter from the webcam/microphone module. 7. Remove the...part number 480461-001 480459-001 480458-001 Before removing the optical drive, follow these steps: 1. Release the webcam/microphone module (1) from the display enclosure as far as the webcam/ microphone module cable allows. 6. Disconnect all external devices connected to the computer. 3. Remove the battery (...
HP Pavilion dv7 Entertainment PC - Maintenance and Service Guide
Page 79
... devices connected to the computer. 3. Remove the battery (see Battery on , and then shut it rests at an angle. Turn the computer display-side up, with Intel processors Spare part number 480469-001 485605-001 Before removing the switch cover, follow these steps: 1. Shut down through ...1. If you . 3. Lift the rear edge of the switch cover (1) until it down the computer. Switch cover NOTE: The switch cover includes the power button board and cable and LED board and cable. Remove the following screws: (1) Seven Phillips PM2.5×4.0 screws (2) One Phillips PM2.5×13.0 screw...
HP Pavilion dv7 Entertainment PC - Maintenance and Service Guide
Page 86
... computer by first unplugging the power cord from the AC outlet and then unplugging the AC adapter from the system board. 76 Chapter 4 Removal and replacement procedures Display assembly NOTE: All display assembly spare part include a webcam, microphone, and wireless antenna transceivers and cables. 17.0-inch WSXGA+ AntiGlare display assembly for use only with...
HP Pavilion dv7 Entertainment PC - Maintenance and Service Guide
Page 95
... drive on page 57) c. Component replacement procedures 85 Disconnect the power from the computer by first unplugging the power cord from the AC outlet and then unplugging the AC adapter from the computer. 4. Keyboard (see Display assembly on page 76) Remove the top cover: 1. Display assembly (see Keyboard on page 71) d. If you . 2. Speaker...
HP Pavilion dv7 Entertainment PC - Maintenance and Service Guide
Page 98
... reader board (includes cable) Spare part number 480476-001 Before removing the fingerprint reader board, follow these steps: 1. Disconnect the power from the computer by first unplugging the power cord from the AC outlet and then unplugging the AC Adapter from the computer. 4. Optical drive (see Switch cover on page ... the fingerprint reader board: 1. Remove the battery (see Top cover on , and then shut it down , with the front toward you. 2. Hard drive (see Display assembly on page 59) b. Turn the top cover upside down through the operating system. 2. Shut down the computer...
HP Pavilion dv7 Entertainment PC - Maintenance and Service Guide
Page 99
...Switch cover (see Display assembly on page 69) d. If you are unsure whether the computer is off button board, follow these steps: 1. Remove the battery (see Top cover on page 54). 5. Top cover (see Battery on page 85) Component replacement procedures 89 Disconnect the power from the computer... by first unplugging the power cord from the AC outlet and then unplugging the AC Adapter from the top cover. Keyboard (see Speaker assembly on...
HP Pavilion dv7 Entertainment PC - Maintenance and Service Guide
Page 101
...follow these steps: 1. Shut down , with the front toward you are unsure whether the computer is off button board: 1. Component replacement procedures 91 Display assembly (see Top cover on page 85) Remove the TouchPad on/off or in the Cable Kit, spare part number 480474-001. Remove the two... assembly (see Keyboard on page 75) f. Turn the top cover upside down the computer. Keyboard (see Speaker assembly on page 71) e. Disconnect the power from the computer by first unplugging the power cord from the AC outlet and then unplugging the AC Adapter from the top cover.
HP Pavilion dv7 Entertainment PC - Maintenance and Service Guide
Page 103
... by first unplugging the power cord from the AC outlet and then unplugging the AC Adapter from the modem module. 2. Remove the battery (see Switch cover on page 54). 5. Remove the following components: a. Switch cover (see Battery on page 69) d. Display assembly (see Keyboard on... page 76) g. Component replacement procedures 93 Keyboard (see Display assembly on page 71) e. Remove the two Phillips PM2.0×4.0 screws (2) that secure the modem module ...