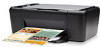
Setup Poster
Page 2
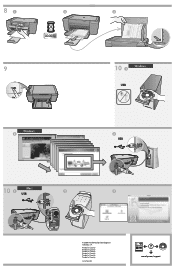
Printed in Country Printed in Country Printed in Country Printed in Country Printed in Country Printed in Country www.hp.com *CC334-10001* *CC334-10001* CC334-10001 © 2008 HPDC www.hp.com/support 81 2 3 9 Windows: 2 10 1 Windows: USB **CCCC3333C4C43-3-41-11000001000011** © 2008 HPDC 3 USB 10 Mac: 1 USB 2 **CCCC3333C4C43-3-41-11000001000011** © 2008 HPDC 3 © 2008 Hewlett-Packard Development Company, L.P.
Printed in Country Printed in Country Printed in Country Printed in Country Printed in Country Printed in Country www.hp.com *CC334-10001* *CC334-10001* CC334-10001 © 2008 HPDC www.hp.com/support 81 2 3 9 Windows: 2 10 1 Windows: USB **CCCC3333C4C43-3-41-11000001000011** © 2008 HPDC 3 USB 10 Mac: 1 USB 2 **CCCC3333C4C43-3-41-11000001000011** © 2008 HPDC 3 © 2008 Hewlett-Packard Development Company, L.P.
User Guide
Page 3
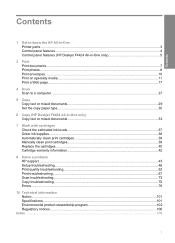
... know the HP All-in-One Printer parts...3 Control panel features...4 Control panel features (HP Deskjet F4424 All-in-One only 5 2 Print Print documents...7 Print photos...8 Print envelopes...10 Print on specialty media...11 Print a Web page...17 4 Scan Scan to a computer...27 5 Copy Copy text or mixed documents 29 Set the copy paper type...30 6 Copy (HP Deskjet F4424 All-in-One only) Copy...
... know the HP All-in-One Printer parts...3 Control panel features...4 Control panel features (HP Deskjet F4424 All-in-One only 5 2 Print Print documents...7 Print photos...8 Print envelopes...10 Print on specialty media...11 Print a Web page...17 4 Scan Scan to a computer...27 5 Copy Copy text or mixed documents 29 Set the copy paper type...30 6 Copy (HP Deskjet F4424 All-in-One only) Copy...
User Guide
Page 6
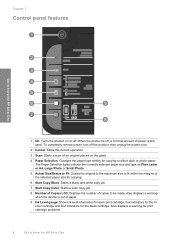
... Copy Color: Starts a color copy job. 8 Number of Copies LCD: Displays the number of copies to know the HP All-in -One Also displays a warning for the black cartridge. To completely remove power, turn off the product, then unplug the power cord.... 2 Cancel: Stops the current operation. 3 Scan: Starts a scan of paper. 9 Ink Level gauge: Show ink level information for each print cartridge, four indicators for the tricolor cartridge and four indicators for print...
... Copy Color: Starts a color copy job. 8 Number of Copies LCD: Displays the number of copies to know the HP All-in -One Also displays a warning for the black cartridge. To completely remove power, turn off the product, then unplug the power cord.... 2 Cancel: Stops the current operation. 3 Scan: Starts a scan of paper. 9 Ink Level gauge: Show ink level information for each print cartridge, four indicators for the tricolor cartridge and four indicators for print...

User Guide
Page 7
Also displays a warning for print cartridge problems. Control panel features (HP Deskjet F4424 All-in -One 1 On: Turns the product on or off the product, then unplug the power cord. 2 Cancel: Stops.... 8 Number of Copies LCD: Displays the number of paper. 9 Ink Level gauge: Show ink level information for each print cartridge, four indicators for the tricolor cartridge and four indicators for PC Copy to be made. Also displays a warning when the...amount of power is out of copies to either plain or photo paper. Control panel features (HP Deskjet F4424 All-in-One only) Get to know the...
Also displays a warning for print cartridge problems. Control panel features (HP Deskjet F4424 All-in -One 1 On: Turns the product on or off the product, then unplug the power cord. 2 Cancel: Stops.... 8 Number of Copies LCD: Displays the number of paper. 9 Ink Level gauge: Show ink level information for each print cartridge, four indicators for the tricolor cartridge and four indicators for PC Copy to be made. Also displays a warning when the...amount of power is out of copies to either plain or photo paper. Control panel features (HP Deskjet F4424 All-in-One only) Get to know the...
User Guide
Page 9
..., or use special features. If you have paper loaded in your software application, this button might be called Properties, Options, Printer Setup, Printer, or Preferences. On the File menu in the input tray. 2. Print documents Print photos Print envelopes Print on your software application, click Print. 3. Make sure the product is the selected printer. 4. 2 Print Choose a print job to continue.
..., or use special features. If you have paper loaded in your software application, this button might be called Properties, Options, Printer Setup, Printer, or Preferences. On the File menu in the input tray. 2. Print documents Print photos Print envelopes Print on your software application, click Print. 3. Make sure the product is the selected printer. 4. 2 Print Choose a print job to continue.
User Guide
Page 10
... by choosing one of print task are set and summarized on the Printing Shortcuts tab. Related topics • Recommended papers for that opens the Properties dialog box. Chapter 2 5. Select the appropriate options for your software application, this button might be called Properties, Options, Printer Setup, Printer, or Preferences. 5. The default settings for printing • Load media...
... by choosing one of print task are set and summarized on the Printing Shortcuts tab. Related topics • Recommended papers for that opens the Properties dialog box. Chapter 2 5. Select the appropriate options for your software application, this button might be called Properties, Options, Printer Setup, Printer, or Preferences. 5. The default settings for printing • Load media...
User Guide
Page 11
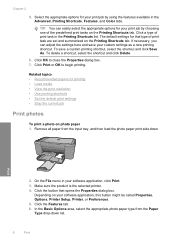
...Maximum dpi drop-down list. From the drop-down list, select one of your software application, this button might result in grayscale check box. Depending on the specified size, the Borderless printing check box is created by varying patterns of black dots, which ...click the Color tab and select the Print in a grainy image. 11. Photo paper should be printed on your printout. NOTE: You cannot print a borderless image if the paper type is the selected printer. 5. To print a borderless image 1. On the File menu in grayscale. Print Print photos 9 NOTE: For maximum dpi...
...Maximum dpi drop-down list. From the drop-down list, select one of your software application, this button might result in grayscale check box. Depending on the specified size, the Borderless printing check box is created by varying patterns of black dots, which ...click the Color tab and select the Print in a grainy image. 11. Photo paper should be printed on your printout. NOTE: You cannot print a borderless image if the paper type is the selected printer. 5. To print a borderless image 1. On the File menu in grayscale. Print Print photos 9 NOTE: For maximum dpi...
User Guide
Page 12
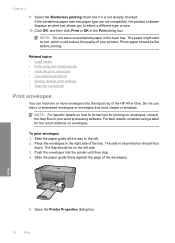
... • Set the default print settings • Stop the current job Print envelopes You can load one or more envelopes into the printer until they stop. 4. Push the envelopes into the input tray of the HP All-in the right side of the envelopes. Slide the paper guide firmly against the ...edge of the tray. To print envelopes 1. Photo paper should be printed ...
... • Set the default print settings • Stop the current job Print envelopes You can load one or more envelopes into the printer until they stop. 4. Push the envelopes into the input tray of the HP All-in the right side of the envelopes. Slide the paper guide firmly against the ...edge of the tray. To print envelopes 1. Photo paper should be printed ...
User Guide
Page 13
...guide firmly against the edge of the tray. Push the cards into the printer until they stop . 6. Open the Printer Properties dialog box. 6. In the Printing Shortcuts list, click Presentation Printing, and then specify the following print settings: • Paper Type: Plain paper • Size: An appropriate... paper size 8. Slide the paper guide all the way to the left . 2. The side to be printed on one another. 4. Carefully push the transparencies into the printer until they stop , so that the adhesive strips do not catch on should face down and the adhesive ...
...guide firmly against the edge of the tray. Push the cards into the printer until they stop . 6. Open the Printer Properties dialog box. 6. In the Printing Shortcuts list, click Presentation Printing, and then specify the following print settings: • Paper Type: Plain paper • Size: An appropriate... paper size 8. Slide the paper guide all the way to the left . 2. The side to be printed on one another. 4. Carefully push the transparencies into the printer until they stop , so that the adhesive strips do not catch on should face down and the adhesive ...

User Guide
Page 14
...the paper guide firmly against the edge of the sheets. Push the sheets into the printer until they stop. 5. Slide the paper guide firmly against the edge of the cards. 5. Print labels 1. The label side should face down. 4. Place the label sheets in the...label sheets to the left. 2. Open the Printer Properties dialog box. 7. Fan the edges of the tray. Click the Printing Shortcuts tab. 8. Print 6. Click OK. 12 Print In the Printing Shortcuts list, click General Everyday Printing, and then specify the following print settings: • Paper Type: Click More, ...
...the paper guide firmly against the edge of the sheets. Push the sheets into the printer until they stop. 5. Slide the paper guide firmly against the edge of the cards. 5. Print labels 1. The label side should face down. 4. Place the label sheets in the...label sheets to the left. 2. Open the Printer Properties dialog box. 7. Fan the edges of the tray. Click the Printing Shortcuts tab. 8. Print 6. Click OK. 12 Print In the Printing Shortcuts list, click General Everyday Printing, and then specify the following print settings: • Paper Type: Click More, ...

User Guide
Page 15
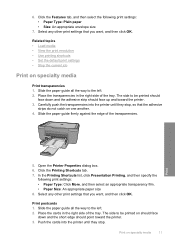
... the cards into the printer until they stop. 5. Print on should face down . 3. Open the Printer Properties dialog box. 6. Click OK to the left . 2. Print 6. The side to be printed on specialty media 13 Specify the following print settings: • Print Quality: Best • Paper Type: Click More, and then select an appropriate HP inkjet paper. • Orientation...
... the cards into the printer until they stop. 5. Print on should face down . 3. Open the Printer Properties dialog box. 6. Click OK to the left . 2. Print 6. The side to be printed on specialty media 13 Specify the following print settings: • Print Quality: Best • Paper Type: Click More, and then select an appropriate HP inkjet paper. • Orientation...
User Guide
Page 16
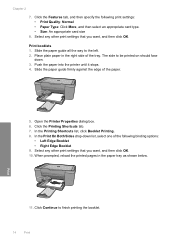
... should face down list, select one of the following print settings: • Print Quality: Normal • Paper Type: Click More, and then select an appropriate card type. • Size: An appropriate card size 8. Print 11. Print booklets 1. Push the paper into the printer until it stops. 4. In the Print On Both Sides drop-down . 3. When prompted, reload...
... should face down list, select one of the following print settings: • Print Quality: Normal • Paper Type: Click More, and then select an appropriate card type. • Size: An appropriate card size 8. Print 11. Print booklets 1. Push the paper into the printer until it stops. 4. In the Print On Both Sides drop-down . 3. When prompted, reload...
User Guide
Page 17
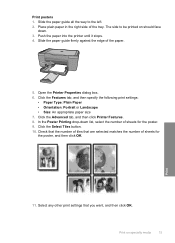
...side to the left. 2. Slide the paper guide all the way to be printed on specialty media 15 Open the Printer Properties dialog box. 6. Click the Advanced tab, and then click Printer Features. 8. Print 11. In the Poster Printing drop-down . 3. Place plain paper in the right side of the paper.... 5. Click the Select Tiles button. 10. Print on should face down list, select the number of tiles that ...
...side to the left. 2. Slide the paper guide all the way to be printed on specialty media 15 Open the Printer Properties dialog box. 6. Click the Advanced tab, and then click Printer Features. 8. Print 11. In the Poster Printing drop-down . 3. Place plain paper in the right side of the paper.... 5. Click the Select Tiles button. 10. Print on should face down list, select the number of tiles that ...
User Guide
Page 18
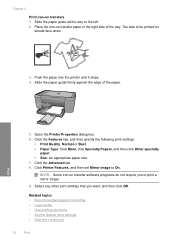
... click Other specialty paper. • Size: An appropriate paper size 7. The side to On. Print 5. Click the Advanced tab. 8. Open the Printer Properties dialog box. 6. Slide the paper guide all the way to print a mirror image. 9. Place the iron-on transfers 1. Chapter 2 Print iron-on transfer paper in the right side of the paper.
... click Other specialty paper. • Size: An appropriate paper size 7. The side to On. Print 5. Click the Advanced tab. 8. Open the Printer Properties dialog box. 6. Slide the paper guide all the way to print a mirror image. 9. Place the iron-on transfers 1. Chapter 2 Print iron-on transfer paper in the right side of the paper.
User Guide
Page 19
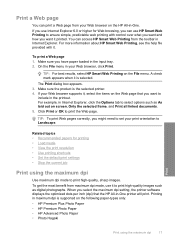
.... 5. If your Web browser on the HP All-in-One. TIP: To print Web pages correctly, you have paper loaded in the input tray. 2. Printing in maximum dpi is supported on the Web page that the HP All-in-One printer will print. You can print a Web page from your Web browser supports... it is the selected printer. 4. For more information about HP Smart Web Printing, see the help file provided with control...
.... 5. If your Web browser on the HP All-in-One. TIP: To print Web pages correctly, you have paper loaded in the input tray. 2. Printing in maximum dpi is supported on the Web page that the HP All-in-One printer will print. You can print a Web page from your Web browser supports... it is the selected printer. 4. For more information about HP Smart Web Printing, see the help file provided with control...
User Guide
Page 20
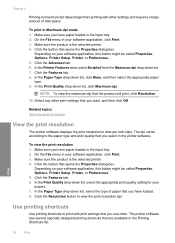
... Maximum dpi. Click the Features tab. 8. In the Print Quality drop-down list. 7. Make sure the product is the selected printer. 4. Use printing shortcuts Use printing shortcuts to print with other print settings that the product will print, click Resolution. 10. Chapter 2 Printing in maximum dpi takes longer than printing with print settings that opens the Properties dialog box. To...
... Maximum dpi. Click the Features tab. 8. In the Print Quality drop-down list. 7. Make sure the product is the selected printer. 4. Use printing shortcuts Use printing shortcuts to print with other print settings that the product will print, click Resolution. 10. Chapter 2 Printing in maximum dpi takes longer than printing with print settings that opens the Properties dialog box. To...
User Guide
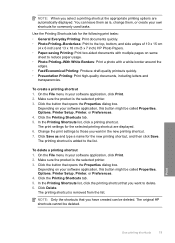
Page 21
.... Click Save as is the selected printer. 3. Depending on your own shortcuts for the following print tasks: • General Everyday Printing: Print documents quickly. • Photo Printing-Borderless: Print to the top, bottom, and side edges of 10 x 15 cm (4 x 6 inch) and 13 x 18 cm (5 x 7 inch) HP Photo Papers. • Paper-saving Printing: Print two-sided documents with a white...
.... Click Save as is the selected printer. 3. Depending on your own shortcuts for the following print tasks: • General Everyday Printing: Print documents quickly. • Photo Printing-Borderless: Print to the top, bottom, and side edges of 10 x 15 cm (4 x 6 inch) and 13 x 18 cm (5 x 7 inch) HP Photo Papers. • Paper-saving Printing: Print two-sided documents with a white...
User Guide
Page 22
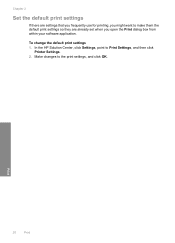
In the HP Solution Center, click Settings, point to make them the default print settings so they are settings that you frequently use for printing, you might want to Print Settings, and then click Printer Settings. 2. Chapter 2 Set the default print settings If there are already set when you open the Print dialog box from within your software application. Make changes to the print settings, and click OK. Print 20 Print To change the default print settings 1.
In the HP Solution Center, click Settings, point to make them the default print settings so they are settings that you frequently use for printing, you might want to Print Settings, and then click Printer Settings. 2. Chapter 2 Set the default print settings If there are already set when you open the Print dialog box from within your software application. Make changes to the print settings, and click OK. Print 20 Print To change the default print settings 1.
User Guide
Page 23
...cm (4 x 6 inch) (with or without smudging. It is available in -One, including letter or A4 paper, photo paper, transparencies, and envelopes. HP Everyday Photo Paper Print colorful, everyday snapshots at a low cost, using HP papers that look and feel comparable to a store-processed photo. This affordable, ...longer-lasting photos, it ideal for two-sided use this paper with any inkjet printer. Depending on both sides for newsletters, reports, and flyers. HP Bright White Inkjet Paper HP Bright White Inkjet Paper delivers high-contrast colors and sharp text. It features ColorLok...
...cm (4 x 6 inch) (with or without smudging. It is available in -One, including letter or A4 paper, photo paper, transparencies, and envelopes. HP Everyday Photo Paper Print colorful, everyday snapshots at a low cost, using HP papers that look and feel comparable to a store-processed photo. This affordable, ...longer-lasting photos, it ideal for two-sided use this paper with any inkjet printer. Depending on both sides for newsletters, reports, and flyers. HP Bright White Inkjet Paper HP Bright White Inkjet Paper delivers high-contrast colors and sharp text. It features ColorLok...
User Guide
Page 24
... for light or white fabrics) are long lasting and vivid, print after print. HP Photo Value Pack HP Photo Value Packs conveniently package original HP cartridges and HP Advanced Photo Paper to select your digital photos. ColorLok HP recommends plain papers with your color presentations vivid and even more ... from your product, and then click one of printing affordable professional photos with the ColorLok logo for papers with crisp, vivid color, bolder blacks, and dry faster than ordinary plain papers. This film is easy to www.hp.com/buy/supplies. It features ColorLok ...
... for light or white fabrics) are long lasting and vivid, print after print. HP Photo Value Pack HP Photo Value Packs conveniently package original HP cartridges and HP Advanced Photo Paper to select your digital photos. ColorLok HP recommends plain papers with your color presentations vivid and even more ... from your product, and then click one of printing affordable professional photos with the ColorLok logo for papers with crisp, vivid color, bolder blacks, and dry faster than ordinary plain papers. This film is easy to www.hp.com/buy/supplies. It features ColorLok ...


