User Guide
Page 10
...Properties dialog box. Remove all paper from the paper tray, and then load the photo paper print side down list. 7. Click the button that type of print task are not compatible, the product software displays an alert and allows you can easily select the...Features tab. 6. Click OK to begin printing. Select the appropriate options for printing • Load media • View the print resolution • Create custom printing shortcuts • Set the default print settings • Stop the current job Print photos To print a photo on the Printing Shortcuts tab. Make sure the product is...
...Properties dialog box. Remove all paper from the paper tray, and then load the photo paper print side down list. 7. Click the button that type of print task are not compatible, the product software displays an alert and allows you can easily select the...Features tab. 6. Click OK to begin printing. Select the appropriate options for printing • Load media • View the print resolution • Create custom printing shortcuts • Set the default print settings • Stop the current job Print photos To print a photo on the Printing Shortcuts tab. Make sure the product is...
User Guide
Page 12
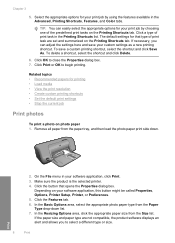
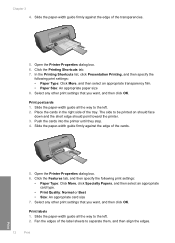
...HP Printer. Depending on envelopes. In the Paper Type drop-down list, click More, and then select the appropriate paper type. Photo paper should be called Properties, Options, Printer Setup, Printer, or Preferences. 6. For best results, consider using the maximum dpi • View the print... resolution • Create custom printing shortcuts • Set the default print settings • Stop the current job Print envelopes You can be printed on envelopes, consult the help files in the paper tray. Click the...
...HP Printer. Depending on envelopes. In the Paper Type drop-down list, click More, and then select the appropriate paper type. Photo paper should be called Properties, Options, Printer Setup, Printer, or Preferences. 6. For best results, consider using the maximum dpi • View the print... resolution • Create custom printing shortcuts • Set the default print settings • Stop the current job Print envelopes You can be printed on envelopes, consult the help files in the paper tray. Click the...
User Guide
Page 13
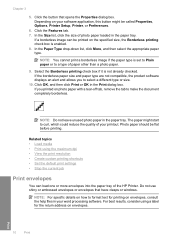
... should face up and toward the printer. 3. The side to be printed on the left side. 3. Push the envelopes into the printer until they stop . 4. Carefully push the transparencies into the printer until they stop , so that you want, and then click OK. Related topics &#...8226; Load media • View the print resolution • Create custom printing shortcuts • Set the default print settings • Stop the current job Print on one another. Place the transparencies in the right side of the envelopes. 5. Slide ...
... should face up and toward the printer. 3. The side to be printed on the left side. 3. Push the envelopes into the printer until they stop . 4. Carefully push the transparencies into the printer until they stop , so that you want, and then click OK. Related topics &#...8226; Load media • View the print resolution • Create custom printing shortcuts • Set the default print settings • Stop the current job Print on one another. Place the transparencies in the right side of the envelopes. 5. Slide ...
User Guide
Page 14
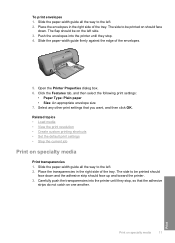
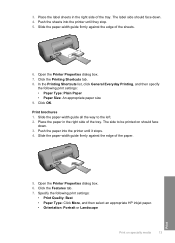
...Size: An appropriate paper size 8. Open the Printer Properties dialog box. 6. Print postcards 1. Push the cards into the printer until they stop. 4. Slide the paper-width guide all the way to the left . 2. Select any other print settings that you want , and then click OK. The side to separate... them, and then align the edges. 12 Print Print Chapter 3 4. Place the cards in...
...Size: An appropriate paper size 8. Open the Printer Properties dialog box. 6. Print postcards 1. Push the cards into the printer until they stop. 4. Slide the paper-width guide all the way to the left . 2. Select any other print settings that you want , and then click OK. The side to separate... them, and then align the edges. 12 Print Print Chapter 3 4. Place the cards in...
User Guide
Page 15
...7. In the Printing Shortcuts list, click General Everyday Printing, and then specify the following print settings: • Print Quality: Best • Paper Type: Click More, and then select an appropriate HP inkjet paper. • Orientation: Portrait or Landscape Print on should face down . 3. Print brochures 1. Place...paper-width guide firmly against the edge of the tray. Click the Printing Shortcuts tab. 8. Push the sheets into the printer until they stop. 5. Push the paper into the printer until it stops. 4. Place the label sheets in the right side of the paper...
...7. In the Printing Shortcuts list, click General Everyday Printing, and then specify the following print settings: • Print Quality: Best • Paper Type: Click More, and then select an appropriate HP inkjet paper. • Orientation: Portrait or Landscape Print on should face down . 3. Print brochures 1. Place...paper-width guide firmly against the edge of the tray. Click the Printing Shortcuts tab. 8. Push the sheets into the printer until they stop. 5. Push the paper into the printer until it stops. 4. Place the label sheets in the right side of the paper...
User Guide
Page 16
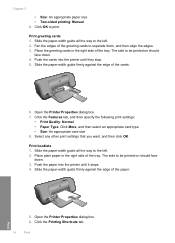
...4. Place the greeting cards in the right side of the tray. Push the cards into the printer until they stop. 5. Click the Features tab, and then specify the following print settings: • Print Quality: Normal • Paper Type: Click More, and then select an appropriate card type. • Size... them, and then align the edges. 3. Push the paper into the printer until it stops. 4. Click the Printing Shortcuts tab. 14 Print Slide the paper-width guide all the way to be printed on should face down . 3. Slide the paper-width guide firmly against the edge of the...
...4. Place the greeting cards in the right side of the tray. Push the cards into the printer until they stop. 5. Click the Features tab, and then specify the following print settings: • Print Quality: Normal • Paper Type: Click More, and then select an appropriate card type. • Size... them, and then align the edges. 3. Push the paper into the printer until it stops. 4. Click the Printing Shortcuts tab. 14 Print Slide the paper-width guide all the way to be printed on should face down . 3. Slide the paper-width guide firmly against the edge of the...
User Guide
Page 17
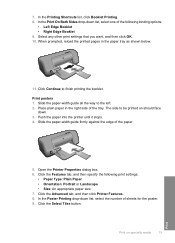
... click OK. 10. In the Printing Shortcuts list, click Booklet Printing. 8. In the Poster Printing drop-down list, select the number of the following print settings: • Paper Type: Plain Paper • Orientation: Portrait or Landscape • Size: An appropriate paper size 7. Push the paper into the printer until it stops. 4. Click the Features tab...
... click OK. 10. In the Printing Shortcuts list, click Booklet Printing. 8. In the Poster Printing drop-down list, select the number of the following print settings: • Paper Type: Plain Paper • Orientation: Portrait or Landscape • Size: An appropriate paper size 7. Push the paper into the printer until it stops. 4. Click the Features tab...
User Guide
Page 18
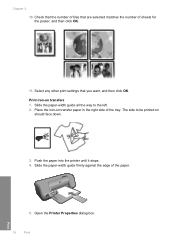
Check that the number of sheets for the poster, and then click OK. 11. Slide the paper-width guide all the way to be printed on should face down. 3. The side to the left. 2. Place the iron-on transfers 1. Select any other print settings that are selected matches the number of tiles that you want, and then click OK. Slide the paper-width guide firmly against the edge of the tray. Open the Printer Properties dialog box. 16 Print Print Push the paper into the printer until it stops. 4. Print iron-on transfer paper in the right side of the paper. 5. Chapter 3 10.
Check that the number of sheets for the poster, and then click OK. 11. Slide the paper-width guide all the way to be printed on should face down. 3. The side to the left. 2. Place the iron-on transfers 1. Select any other print settings that are selected matches the number of tiles that you want, and then click OK. Slide the paper-width guide firmly against the edge of the tray. Open the Printer Properties dialog box. 16 Print Print Push the paper into the printer until it stops. 4. Print iron-on transfer paper in the right side of the paper. 5. Chapter 3 10.
User Guide
Page 19
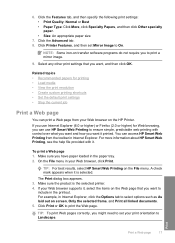
... Firefox (2.0 or higher) for printing • Load media • View the print resolution • Create custom printing shortcuts • Set the default print settings • Stop the current job Print a Web page You can access HP Smart Web Printing from your Web browser supports it printed. The Print dialog box appears. 3. To print a Web page 1. TIP: To print Web pages correctly, you...
... Firefox (2.0 or higher) for printing • Load media • View the print resolution • Create custom printing shortcuts • Set the default print settings • Stop the current job Print a Web page You can access HP Smart Web Printing from your Web browser supports it printed. The Print dialog box appears. 3. To print a Web page 1. TIP: To print Web pages correctly, you...
User Guide
Page 20
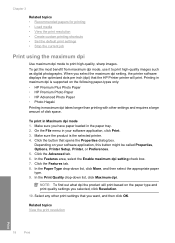
...; HP Advanced Photo Paper • Photo Hagaki Printing in the paper tray. 2. In the Print Quality drop-down list, click More, and then select the appropriate paper type. 9. Chapter 3 Related topics • Recommended papers for printing • Load media • View the print resolution • Create custom printing shortcuts • Set the default print settings • Stop the...
...; HP Advanced Photo Paper • Photo Hagaki Printing in the paper tray. 2. In the Print Quality drop-down list, click More, and then select the appropriate paper type. 9. Chapter 3 Related topics • Recommended papers for printing • Load media • View the print resolution • Create custom printing shortcuts • Set the default print settings • Stop the...

User Guide
Page 25
...the paper tray. Load paper. ❑ Insert stack of photo paper into paper tray with short edge forward and print side down . ❑ Slide stack of paper forward until it stops at edge of paper. Load full-size paper a. Prepare tray. ❑ Slide paper-width guide to continue. ...Load media 23 b. b. Load paper. ❑ Insert stack of paper into paper tray with short edge forward and print side down . ❑ Slide stack of paper forward until it stops. ❑ Slide paper-width guide to the left . ❑ Remove all paper from the paper tray.
...the paper tray. Load paper. ❑ Insert stack of photo paper into paper tray with short edge forward and print side down . ❑ Slide stack of paper forward until it stops at edge of paper. Load full-size paper a. Prepare tray. ❑ Slide paper-width guide to continue. ...Load media 23 b. b. Load paper. ❑ Insert stack of paper into paper tray with short edge forward and print side down . ❑ Slide stack of paper forward until it stops. ❑ Slide paper-width guide to the left . ❑ Remove all paper from the paper tray.
User Guide
Page 42
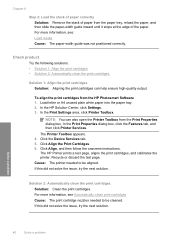
...this did not solve the issue, try the next solution. To align the print cartridges from the paper tray, reload the paper, and then slide the paper-width guide inward until it stops at the edge of the paper. Click Align, and then follow the onscreen ... Step 2: Load the stack of paper correctly Solution: Remove the stack of paper from the HP Photosmart Software 1. Click Align the Print Cartridges. 6. In the HP Solution Center, click Settings. 3. Solution 2: Automatically clean the print cartridges. NOTE: You can help ensure high-quality output. For more information, see : Load ...
...this did not solve the issue, try the next solution. To align the print cartridges from the paper tray, reload the paper, and then slide the paper-width guide inward until it stops at the edge of the paper. Click Align, and then follow the onscreen ... Step 2: Load the stack of paper correctly Solution: Remove the stack of paper from the HP Photosmart Software 1. Click Align the Print Cartridges. 6. In the HP Solution Center, click Settings. 3. Solution 2: Automatically clean the print cartridges. NOTE: You can help ensure high-quality output. For more information, see : Load ...
User Guide
Page 49
Stop the current job Stop the current job 47 7 Stop the current job To stop , press On button again. If the print job does not stop a print job from the HP Printer ▲ Press On button on the control panel. It can take a few moments for printing to be cancelled.
Stop the current job Stop the current job 47 7 Stop the current job To stop , press On button again. If the print job does not stop a print job from the HP Printer ▲ Press On button on the control panel. It can take a few moments for printing to be cancelled.


