HP Printers - Supported Citrix Presentation Server environments
Page 26
... Software tested Citrix XenApp Server 5.0 HP Deskjet D2360 XenApp Plugin for Hosted Apps, version 11.x HP LaserJet 3020 HP Universal, PCL, PS printers & 32-bit/64-bit drivers HP Officejet Pro K5400 HP Officejet Pro L7680 All-in-One HP Deskjet 5440 HP Business Inkjet 1100 HP Officejet 720 HP LaserJet 3200 HP LaserJet 4000 HP Designjet 4000 PostScript HP Color LaserJet 3000 Testing methodology...
... Software tested Citrix XenApp Server 5.0 HP Deskjet D2360 XenApp Plugin for Hosted Apps, version 11.x HP LaserJet 3020 HP Universal, PCL, PS printers & 32-bit/64-bit drivers HP Officejet Pro K5400 HP Officejet Pro L7680 All-in-One HP Deskjet 5440 HP Business Inkjet 1100 HP Officejet 720 HP LaserJet 3200 HP LaserJet 4000 HP Designjet 4000 PostScript HP Color LaserJet 3000 Testing methodology...

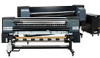
HP Designjet 9000s Printer Series - User Guide
Page 28
Press the POWER ON/OFF key on . How do I perform basic operations? (If a 64" paper roll is displayed on the front panel except in an emergency. Do not turn off the printer while PRINTER READY is loaded). NOTE Only turn the printer power on, the heater front panel display turns on the front panel. 1. When... the front panel to avoid ink drops and damage to use the heater. When the heater power is off switch at the rear of the printer to the printhead. 18 Chapter 2 How do I perform basic operations? POWER ON/OFF key When you turn off the...
Press the POWER ON/OFF key on . How do I perform basic operations? (If a 64" paper roll is displayed on the front panel except in an emergency. Do not turn off the printer while PRINTER READY is loaded). NOTE Only turn the printer power on, the heater front panel display turns on the front panel. 1. When... the front panel to avoid ink drops and damage to use the heater. When the heater power is off switch at the rear of the printer to the printhead. 18 Chapter 2 How do I perform basic operations? POWER ON/OFF key When you turn off the...
HP Designjet 9000s Printer Series - User Guide
Page 123
Solution: set an invalid media size (less than 297 mm wide or 64 inch wide or more). Problem: there is ... (troubleshooting topics) Problem: the temperature of the printheads exceeds the operating temperature range. Solution: Reload the media (... Clean the platen. Solution: Check that the media is loaded correctly. See How do I ... See How do I ... Problem: There is no media loaded in the printer. Solution: close the rear cover. Solution: Load media. See How do I ... Solution: lower the media lever. Other messages Problem: the rear cover is open. Solution...
Solution: set an invalid media size (less than 297 mm wide or 64 inch wide or more). Problem: there is ... (troubleshooting topics) Problem: the temperature of the printheads exceeds the operating temperature range. Solution: Reload the media (... Clean the platen. Solution: Check that the media is loaded correctly. See How do I ... See How do I ... Problem: There is no media loaded in the printer. Solution: close the rear cover. Solution: Load media. See How do I ... Solution: lower the media lever. Other messages Problem: the rear cover is open. Solution...

HP Designjet 9000s Printer Series - User Guide
Page 188
... with 4-pass printing (changes according to surrounding temperature and printhead temperature) Front media supply, rear media delivery PVC, banner, Vinyl chloride, Tarpaulin Maximum 64 inches Six colors (black, cyan, magenta, yellow, light magenta, light cyan) 1000 ml capacity Standby: 45 dB(A) or less, operating: 60 ...dB(A) or less (continuous sound) Printer: 720000 J/H or less, heater: 5148000 J/H or less Area excluding top, bottom margins (5 mm) and right and left margins will be 10 mm...
... with 4-pass printing (changes according to surrounding temperature and printhead temperature) Front media supply, rear media delivery PVC, banner, Vinyl chloride, Tarpaulin Maximum 64 inches Six colors (black, cyan, magenta, yellow, light magenta, light cyan) 1000 ml capacity Standby: 45 dB(A) or less, operating: 60 ...dB(A) or less (continuous sound) Printer: 720000 J/H or less, heater: 5148000 J/H or less Area excluding top, bottom margins (5 mm) and right and left margins will be 10 mm...
Service Manual
Page 63
...Maintenance Mode Entering the Maintenance Mode Enter in this order: W, X, Shift and OK. PRINTER READY ROLL: 64/PAPER 2 When the following keys in to the Maintenance Mode as follows: 1 When the "Printer Ready" message appears on the Front Panel, you will be requested to take the... Printer offline. SINK WMEDIA MEDIA REGT M.ADVX 3 When the following screen is displayed on the Front Panel, press the following screen is displayed on the Front Panel, press the Online key to enter a password. ADJ PH.MAINT HP Designjet 9000s Series Printer Service Manual 4-7
...Maintenance Mode Entering the Maintenance Mode Enter in this order: W, X, Shift and OK. PRINTER READY ROLL: 64/PAPER 2 When the following keys in to the Maintenance Mode as follows: 1 When the "Printer Ready" message appears on the Front Panel, you will be requested to take the... Printer offline. SINK WMEDIA MEDIA REGT M.ADVX 3 When the following screen is displayed on the Front Panel, press the following screen is displayed on the Front Panel, press the Online key to enter a password. ADJ PH.MAINT HP Designjet 9000s Series Printer Service Manual 4-7

Service Manual
Page 115
... ⇒ Page 4-62. „ DRAM ⇒ Page 4-63. „ RSM ⇒ Page 4-64. „ PTC ⇒ Page 4-64. „ PDD ⇒ Page 4-65. „ ALL ⇒ Page 4-66. „ VDD ⇒ Page 4-67. „ Front Panel ⇒ Page 4-67. HP Designjet 9000s Series Printer Service Manual 4-59 To enter in to the Electronics menu, enter in...
... ⇒ Page 4-62. „ DRAM ⇒ Page 4-63. „ RSM ⇒ Page 4-64. „ PTC ⇒ Page 4-64. „ PDD ⇒ Page 4-65. „ ALL ⇒ Page 4-66. „ VDD ⇒ Page 4-67. „ Front Panel ⇒ Page 4-67. HP Designjet 9000s Series Printer Service Manual 4-59 To enter in to the Electronics menu, enter in...

Service Manual
Page 120
... option allows you to test the RSM contained in the Main PCA: 1 In the Elect submenu, scroll to "PTC" and press the OK key. # PTC > 4-64 HP Designjet 9000s Series Printer Service Manual
... option allows you to test the RSM contained in the Main PCA: 1 In the Elect submenu, scroll to "PTC" and press the OK key. # PTC > 4-64 HP Designjet 9000s Series Printer Service Manual

Service Manual
Page 175
... to "IQ Print" and press the OK key. # TEST PRINTS * IQ PRINT 6 You will need to confirm that you want to take the Printer offline. Print Quality Using the IQ Print to Troubleshoot The IQ Print can be used to check for Print Quality problems (like banding) and can... IQ Print by pressing the OK key. # TEST PRINTS * IQ PRINT OK? PRINTER READY ROLL: 64/PAPER 2 When the following screen is displayed on the Front Panel, press the W key to enter into the Adjust Menu. HP Designjet 9000s Series Printer Service Manual 6-3 SINK WMEDIA MEDIA REGT M.ADVX 3 When the following screen is displayed...
... to "IQ Print" and press the OK key. # TEST PRINTS * IQ PRINT 6 You will need to confirm that you want to take the Printer offline. Print Quality Using the IQ Print to Troubleshoot The IQ Print can be used to check for Print Quality problems (like banding) and can... IQ Print by pressing the OK key. # TEST PRINTS * IQ PRINT OK? PRINTER READY ROLL: 64/PAPER 2 When the following screen is displayed on the Front Panel, press the W key to enter into the Adjust Menu. HP Designjet 9000s Series Printer Service Manual 6-3 SINK WMEDIA MEDIA REGT M.ADVX 3 When the following screen is displayed...

Service Manual
Page 213
... 8-49 End-of-Media Sensor 8-52 Front Media Sensor 8-54 Rear Media Sensor 8-56 Media Lever Sensor 8-57 Rear Cover Sensor 8-59 Home Position Sensor 8-64 Paper-Axis Motor and Belt 8-66 Scan-Axis Motor and Belt 8-70 Carriage Drive Assembly (Includes Carriage Belt) 8-73 Encoder Strip 8-76 Trailing Cable 8-77... Unit 8-120 Prime Assembly 8-121 Solenoid Assembly 8-125 Wiping Station Assembly 8-129 Wiper Cleaning Assembly 8-133 Wiper Blade 8-134 Wiper Belts 8-136 Pinchwheel Assembly 8-140 8 HP Designjet 9000s Series Printer Service Manual 8-1
... 8-49 End-of-Media Sensor 8-52 Front Media Sensor 8-54 Rear Media Sensor 8-56 Media Lever Sensor 8-57 Rear Cover Sensor 8-59 Home Position Sensor 8-64 Paper-Axis Motor and Belt 8-66 Scan-Axis Motor and Belt 8-70 Carriage Drive Assembly (Includes Carriage Belt) 8-73 Encoder Strip 8-76 Trailing Cable 8-77... Unit 8-120 Prime Assembly 8-121 Solenoid Assembly 8-125 Wiping Station Assembly 8-129 Wiper Cleaning Assembly 8-133 Wiper Blade 8-134 Wiper Belts 8-136 Pinchwheel Assembly 8-140 8 HP Designjet 9000s Series Printer Service Manual 8-1

Service Manual
Page 276
Remove the Top Side Cover (Right) ⇒ Page 8-5. 3. Remove the Home Position Sensor from the Printer. 8-64 HP Designjet 9000s Series Printer Service Manual Remove two screws that secure the Home Position Sensor to the Printer. 5. Remove the Upper Side Cover (Right) ⇒ Page 8-4. 2. Removal and Installation Home Position Sensor Removal Switch off the product and remove the power cable. 1. Locate the Home Position Sensor. 4.
Remove the Top Side Cover (Right) ⇒ Page 8-5. 3. Remove the Home Position Sensor from the Printer. 8-64 HP Designjet 9000s Series Printer Service Manual Remove two screws that secure the Home Position Sensor to the Printer. 5. Remove the Upper Side Cover (Right) ⇒ Page 8-4. 2. Removal and Installation Home Position Sensor Removal Switch off the product and remove the power cable. 1. Locate the Home Position Sensor. 4.

Service Manual
Page 359
...procedures should be performed on the Front Panel, press the Shift key once. PRINTER READY ROLL: 64/PAPER 2 When the following screen is displayed on a daily basis in order to take the Printer offline. SINK WMEDIA MEDIA REGT M.ADVX 3 When the following screen is ... to confirm that you want to enter into the PH Main Menu. SPH. Wiper Blade Cleaning 1 When the "Printer Ready" message appears on the Front Panel, press the S key to perform the Wiper Cleaning procedure by pressing the OK key. # WIPER CLEANING * OK? HP Designjet 9000s Series Printer Service Manual 9-3
...procedures should be performed on the Front Panel, press the Shift key once. PRINTER READY ROLL: 64/PAPER 2 When the following screen is displayed on a daily basis in order to take the Printer offline. SINK WMEDIA MEDIA REGT M.ADVX 3 When the following screen is ... to confirm that you want to enter into the PH Main Menu. SPH. Wiper Blade Cleaning 1 When the "Printer Ready" message appears on the Front Panel, press the S key to perform the Wiper Cleaning procedure by pressing the OK key. # WIPER CLEANING * OK? HP Designjet 9000s Series Printer Service Manual 9-3

Service Manual
Page 362
... need to confirm that the Capping Unit can easily be accessed, during which the following screen is out of the Capping Station. 9-6 HP Designjet 9000s Series Printer Service Manual PRINTER READY ROLL: 64/PAPER 2 When the following message will be done as quickly as possible so as not to perform the Cap Cleaning procedure by pressing...
... need to confirm that the Capping Unit can easily be accessed, during which the following screen is out of the Capping Station. 9-6 HP Designjet 9000s Series Printer Service Manual PRINTER READY ROLL: 64/PAPER 2 When the following message will be done as quickly as possible so as not to perform the Cap Cleaning procedure by pressing...

Service Manual
Page 366
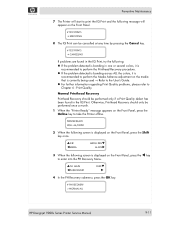
HP Designjet 9000s Series Printer Service Manual SINK WMEDIA MEDIA REGT M.ADVX 3 When the following screen is displayed on the Front Panel, press the Online key to take the Printer offline. SPRINTER WADJUST SETUPT 4 In the Adjust submenu, scroll to "Test Prints" and press the OK key. # TEST PRINTS > IQ ... be used to isolate the root cause of the problem. 9-10 1 When the "Printer Ready" message appears on the Front Panel, press the W key to enter into the Adjust Menu. PRINTER READY ROLL: 64/PAPER 2 When the following screen is displayed on the Front Panel, press the Shift ...
HP Designjet 9000s Series Printer Service Manual SINK WMEDIA MEDIA REGT M.ADVX 3 When the following screen is displayed on the Front Panel, press the Online key to take the Printer offline. SPRINTER WADJUST SETUPT 4 In the Adjust submenu, scroll to "Test Prints" and press the OK key. # TEST PRINTS > IQ ... be used to isolate the root cause of the problem. 9-10 1 When the "Printer Ready" message appears on the Front Panel, press the W key to enter into the Adjust Menu. PRINTER READY ROLL: 64/PAPER 2 When the following screen is displayed on the Front Panel, press the Shift ...
Service Manual
Page 367
... has been found in the IQ Print, try the following: „ If the problem detected is banding in the IQ Print. PRINTER READY ROLL: 64/PAPER 2 When the following screen is displayed on the media that is currently being used ⇒ Refer to the User's Guide....Quality. MAIN WPH RECOVERY FEEDT X 4 In the PH Recovery submenu, press the OK key. # PH RECOVERY > NORMAL ALL HP Designjet 9000s Series Printer Service Manual 9-11 Preventive Maintenance 7 The Printer will start to print the IQ Print and the following message will appear on the Front Panel. # TEST PRINTS * EXECUTING ...
... has been found in the IQ Print, try the following: „ If the problem detected is banding in the IQ Print. PRINTER READY ROLL: 64/PAPER 2 When the following screen is displayed on the media that is currently being used ⇒ Refer to the User's Guide....Quality. MAIN WPH RECOVERY FEEDT X 4 In the PH Recovery submenu, press the OK key. # PH RECOVERY > NORMAL ALL HP Designjet 9000s Series Printer Service Manual 9-11 Preventive Maintenance 7 The Printer will start to print the IQ Print and the following message will appear on the Front Panel. # TEST PRINTS * EXECUTING ...


