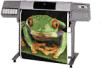
HP DesignJet 5000 Series Printer - Pocket Guide
Page 83
... wheels are locked (the brake lever is finished the front-panel displays: Printhead Removal MAINTAIN THE INK SYSTEM file:///D|/hydra/ug_loc/f The printer moves the carriage into the correct position. pocket.book Page 81 Sunday, October 29, 2000 5:09 PM 81 - Printhead replacement must be performed with the printer switched on...
HP DesignJet 5000 Series Printer - Pocket Guide
Page 84
pocket.book Page 82 Sunday, October 29, 2000 5:09 PM 82 - Lift the window and locate the Carriage Assembly. Pull up and release the latch on top of the carriage assembly. Window Printhead Removal 5. file:///D|/hydra/ug_loc/f Maintain The Ink System 4.
HP DesignJet 5000 Series Printer - Pocket Guide
Page 86
Gentle pull the blue handle upward until the printhead is released from the carriage assembly. 10.The front-panel displays: Printhead Removal file:///D|/hydra/ug_loc/f Place your index finger through the loop of the blue handle. 9. pocket.book Page 84 Sunday, October 29, 2000 5:09 PM 84 - Maintain The Ink System 8.
HP DesignJet 5000 Series Printer - Pocket Guide
Page 87
... the printhead is new, remove the: blue protective cap by pulling on the printhead matches the colored label of the carriage assembly position that the colored label MAINTAIN THE INK SYSTEM file:///D|/hydra/ug_loc/f Printhead Installation on the paper tab. Blue Protective Cap... is to prevent you from accidentally inserting it . clear protective tape from the printhead's nozzles by pulling down on it into the correct carriage assembly position. Insert the new printhead into the wrong position. Check that the printhead is designed to be inserted in. 2. Maintain The Ink...
HP DesignJet 5000 Series Printer - Pocket Guide
Page 89
... Printhead Installation Leaving the old printhead cleaner in the printer will prompt you insert the printhead and the "Reseat" or "Failed" message appears on the carriage and lower the window. 7. Only when all the printheads and close the cover on the front-panel, the printhead may need to close the cover...
HP DesignJet 5000 Series Printer - Pocket Guide
Page 99
... INK SYSTEM file:///D|/hydra/ug_loc/f Change The Ink System Removing the Ink Supplies Use the following procedure to the main menu. 2. The printer moves the carriage into the correct position. pocket.book Page 97 Sunday, October 29, 2000 5:09 PM 97 - Select YES to replace the ink system. 3. Select the Printer...
HP DesignJet 5000 Series Printer - Pocket Guide
Page 100
file:///D|/hydra/ug_loc/f Change The Ink System 7. Lift the window and locate the carriage assembly Window Carriage Ink System Removal 8. Pull up and release the latch on top of the carriage assembly. pocket.book Page 98 Sunday, October 29, 2000 5:09 PM 98 -
HP DesignJet 5000 Series Printer - Pocket Guide
Page 102
Gently pull the blue handle upward until the printhead is released from the carriage assembly. Ink System Removal 12. Place your index finger through the loop of the blue handle. file:///D|/hydra/ug_loc/f Change The Ink System 11. pocket.book Page 100 Sunday, October 29, 2000 5:09 PM 100 -
HP DesignJet 5000 Series Printer - Pocket Guide
Page 103
When you can store them in the HP Printhead Storage container. Repeat steps 10 through 12 for the other five printheads. NOTE: Put the removed printheads in the container into the printer. 16. ...-panel displays: CHANGE THE INK SYSTEM file:///D|/hydra/ug_loc/f pocket.book Page 101 Sunday, October 29, 2000 5:09 PM 101 - Close the cover on the carriage and close the window to OK. 15. Change The Ink System 13. When all the printheads have installed the supplies that are already in a safe...
HP DesignJet 5000 Series Printer - Pocket Guide
Page 110
Ink System Removal 6. Push down on the gray button and slide it to the left to release the clip securing the tubes to the carriage as shown below in the top view of the printer. Change The Ink System 5. Pull the printhead tube connector between the two tube guides. pocket.book Page 108 Sunday, October 29, 2000 5:09 PM 108 - file:///D|/hydra/ug_loc/f
HP DesignJet 5000 Series Printer - Pocket Guide
Page 115
...Ink Tubes The installation of this procedure provided on the animation icon to display the correct topic in the HP Designjet 5000/5000PS User's Guide. CHANGE THE INK SYSTEM file:///D|/hydra/ug_loc/f Insert the HP Designjet 5000/5000PS Using Your Printer CD-ROM in reverse order, start at the back of the printer then work ... Ink System Ink System Installation Ink System Installation Animation NOTE: Before starting the procedure for Ink System Removal. Use the following procedure to the carriage. Do not bend or twist the tubes excessively. If you do I Switch Ink Types". 3.
HP DesignJet 5000 Series Printer - Pocket Guide
Page 120
Route the tubes over the top of the left hand cover. The tubes must be installed so that the tubes are not twisted and are correctly positioned in the tube guides. file:///D|/hydra/ug_loc/f pocket.book Page 118 Sunday, October 29, 2000 5:09 PM 118 - CAUTION It is very important to the correct operation of the printer that they do not interfere with the path of the carriage. Close the door at the back of the printer. Ink System Installation 10. Change The Ink System 9.
HP DesignJet 5000 Series Printer - Pocket Guide
Page 121
pocket.book Page 119 Sunday, October 29, 2000 5:09 PM 119 - Change The Ink System Ink System Installation 11. Slide the assembly to the right until it is locked to the carriage as shown below. Install the tubes to the the carriage CHANGE THE INK SYSTEM file:///D|/hydra/ug_loc/f
HP DesignJet 5000 Series Printer - Pocket Guide
Page 122
file:///D|/hydra/ug_loc/f Ink System Installation 13.Carefully place the previously removed ink tubes in the HP Ink Tubes container (see Using the Printheads and Ink Tubes Containers, on page 135). Install the printhead tube connector onto the carriage assembly. Change The Ink System 12. pocket.book Page 120 Sunday, October 29, 2000 5:09 PM 120 -
HP DesignJet 5000 Series Printer - Pocket Guide
Page 124
When this is finished the front-panel displays: Ink System Installation file:///D|/hydra/ug_loc/f The front-panel displays: 4. The front-panel displays: 6. Use the ↑ and ↓ keys to select the Printhead Menu, and then press the ENTER key. 5. The printer moves the carriage into the correct position. pocket.book Page 122 Sunday, October 29, 2000 5:09 PM 122 - Change The Ink System 3. Select the "Replace printhead" option by using the ↑ and ↓ keys, and then and press the ENTER key. 7.
HP DesignJet 5000 Series Printer - Pocket Guide
Page 125
CHANGE THE INK SYSTEM file:///D|/hydra/ug_loc/f Window Ink System Installation 9. Lift the window and locate the Carriage Assembly. Change The Ink System 8. Pull up and release the latch on top of the carriage assembly. pocket.book Page 123 Sunday, October 29, 2000 5:09 PM 123 -
HP DesignJet 5000 Series Printer - Pocket Guide
Page 126
pocket.book Page 124 Sunday, October 29, 2000 5:09 PM 124 - Change The Ink System 10.Insert the printhead from the HP Printhead Storage container into the correct carriage assembly position. Ink System Installation 11.Push down in the direction indicated by the printer, will the printer "BEEP". file:///D|/hydra/ug_loc/f Only when all the printheads have been inserted correctly and accepted by the arrow shown below. 12.Insert all the printheads and close the cover.
HP DesignJet 5000 Series Printer - Pocket Guide
Page 127
..., the printhead may need to be reseated. 13.After replacing the printheads successfully the front-panel will prompt you to close the cover on the carriage and lower the window. 14.After closing the cover over the printheads and closing the window the front-panel displays: Ink System Installation 15.Open...
HP DesignJet 5000 Series Printer - Pocket Guide
Page 135
...more of ink system installed in the printer. You cannot insert a printhead into the carriage assembly labelled with the same color. a Make sure the printhead tube connector is not correctly connected the carriage assembly. Insert the correct type of printheads. CHANGE THE INK SYSTEM file:///D|/hydra/ug_loc/f... Insert the correct type of printhead cleaners. Change The Ink System Troubleshooting Problem Reason and solution When you try to carriage assembly (see step 12 on page 120). pocket.book Page 133 Sunday, October 29, 2000 5:09 PM 133 - b Insert the printheads....
HP DesignJet 5000 Series Printer - Pocket Guide
Page 158
... 2000 5:09 PM 6 - Error processing job Flushing rest of job Full ink cartridges needed Have ink tube replaced or risk printer damage Contact HP Front Panel Messages Description Procedure The line sensor on -site visit to the "Using Your Printer CD" Remove the ink cartridges and replace with... ink cartridges that are full of ink. file:///D|/hydra/ug_loc/f Front Panel Messages Status Edge not found. Contact your HP representative to arrange for an on the carriage cannot see the edge of the complete ink system. This maybe because the media is displayed, clean the lens cover...