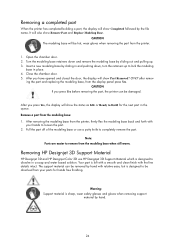
HP Designjet 3D Printer Series Introductory Information
Page 2
.... See Support section of User Guide. • Use only the power cord supplied with multiple devices. • Ensure the printer is available at a later date • Maintaining the printer • Troubleshooting printer issues • HP Customer Care You can also find legal and warranty information on the following topics: • Printer specifications • Printing • Reloading material...
HP Designjet 3D Printer Series Introductory Information
Page 3
From 3D CAD data, pre-processing software automatically slices, calculates support structures and creates tool paths that are built layer by layer in a water-based solution. Parts are optimized for the printer. 2. Temporary support structures are easily removed. Soluble support material automatically dissolves in an additive process. Dual extrusion heads precisely lay down thermoplastic model and support material to...
HP Designjet 3D Printer Series Introductory Information
Page 5
Rear view of printer 8 1 9 2 10 11 3 12 4 13 5 14 6 15 7 16 1 Model Material Y Connector 2 Model Material Tube 3 AC Power Cord Connector 4 Circuit Breaker 5 Material Bay 6 Optional Model Material Tube 7 Optional Material Bay 8 Support Material Y Connector 9 Support Material Tube 10 UPS Connection (Future) 11 Material Bay Cable Connector 12 RJ-45 Network Connector 13 Diagnostics Cable Connector 14 Material Bay Communications Cable 15 Optional Material Bay Communications Cable 16 Optional Support Material Tube 5
HP Designjet 3D Removal System - Introductory Information: English
Page 5
... may damage the system. 1. The model basket lid ensures the models remain submerged during the cleaning process with HP Designjet 3D printers. Consult your area. The HP Designjet 3D Removal System is specifically developed to use. Other models should not be cleaned and may be cleaned at one ... system using the On/Off switch just above the power cord receptacle on the back of the HP Designjet 3D Removal System effluent prior to provide efficient removal of support material from models built with the model basket lid in your area's requirements regarding the disposal of the...
HP Designjet 3D Printer Series - User Guide (English)
Page 3
... printer 12 Adding the second HP Designjet 3D Material Bay 13 Installing the HP Designjet 3D Material Bay 13 Operation Display panel and keypad 17 System firmware overview 18 HP Designjet 3D Software Solution overview 19 Processing your STL file for printing 20 Opening your STL file with HP Designjet 3D Software Solution 20 Selecting layer resolution 20 Selecting model interior fill style 20 Selecting support...
HP Designjet 3D Printer Series - User Guide (English)
Page 4
... power ...48 Diagnosing loss of extrusion 48 Clogged tip ...49 Material Jam ...50 Recovering from loss of extrusion 53 Support Introduction ...58 HP Professional Services 58 Contact HP Support 59 Recycling Removing the EEproms from the material guides 60 Removing the desiccant from the material spool 61 Printer Specifications Physical specifications 62 Facility specifications 62 Workstation specifications 62...
HP Designjet 3D Printer Series - User Guide (English)
Page 7
... runs on Windows XP Pro, Windows Vista or Windows 7 platforms. HP Designjet 3D Printer builds a maximum part size of two primary components - HP Designjet Color 3D Printer builds a maximum part size of printer. 1 6 2 5 3 Front view 4 Left side view 1 Display Panel 2 Material Bay, Support Side 3 Optional Material Bay, Support Side 4 Optional Material Bay, Model Side 5 Material Bay, Model Side 6 Power ON/OFF Switch 3 enough to use...
HP Designjet 3D Printer Series - User Guide (English)
Page 9
Figure 3: Rear view of printer 1 2 3 4 5 6 7 1 Model Material Y Connector 2 Model Material Tube 3 AC Power Cord Connector 4 Circuit Breaker 5 Material Bay 6 Optional Model Material Tube 7 Optional Material Bay 8 Support Material Y Connector 8 9 10 11 12 13 14 15 16 9 Support Material Tube 10 UPS Connection (Future) 11 Material Bay Cable Connector 12 RJ-45 Network Connector 13 Diagnostics Cable Connector 14 Material Bay Communications Cable 15 Optional Material Bay Communications Cable 16 Optional Support Material Tube 5
HP Designjet 3D Printer Series - User Guide (English)
Page 17
... tangled. 5. Remove the model and support material carriers from the printer. 3. See Figure 7 Figure 7: Rewinding the material spool 7. Disconnect the power cable, network cable and material bay cable. 11. Disconnect the model and support material tubes from the box. 2. Remove the HP Designjet 3D Material Bay, material bay cable, material spools and material carriers from the printer and the material bay by pressing in on the...
HP Designjet 3D Printer Series - User Guide (English)
Page 18
Be sure the feet and pins are properly aligned. With 2 people, position the printer on top of the material bays. See Figure 10 Figure 10: Positioning printer 15. See Figure 9 Figure 9: Positioning material bays 14. Be sure the feet and pins are properly aligned. See Figure 11 14 Position the second material bay on to the top of the existing material bay. Remove the black plugs from the model and support Y blocks by pushing in on the coupler rings and pulling outward. Figure 8: Separating the printer and material bay 13.
HP Designjet 3D Printer Series - User Guide (English)
Page 20
... the power switch. 25. Display will show Add/Remove. 28. Insert model and support material spools into right side of the material bays until they latch. 30. Press Load Selected. The printer will load the first material bay and prepare the second material bay for model and support in both red handled model carriers into the new...
HP Designjet 3D Printer Series - User Guide (English)
Page 24
...less material will affect the support strength and build time of the part. Typically used . • Sparse High Density - From the File menu select Open STL... 4. Changing layer resolution will be used for the interior areas of the print. Printer type HP Designjet 3D HP Designjet Color 3D ...surface finish and build times. Selecting support style: HP Designjet 3D Support Material is surrounded by changing the scale. May be "honeycombed" or "hatched". minimizes the amount of the part. As the supports descend from the STL file by support material. The entire model is used and...
HP Designjet 3D Printer Series - User Guide (English)
Page 26
... material remaining Dual material bay Printer status Model file name Support material remaining in bay 1 Support material remaining in bay 2 Model material remaining in bay1 Model material remaining in bay2 Note: If a material amount is in the carriers. Figure 18: Display panel during build The top two lines of the display panel will ask Is Model Base Installed? 2. From your HP Designjet 3D...
HP Designjet 3D Printer Series - User Guide (English)
Page 28
... based solution. ing the part and replacing the modeling base, from the printer, firmly flex the modeling base back and forth with the fine details intact. After removing the modeling base from the display panel press Yes. Removing HP Designjet 3D Support Material HP Designjet 3D and HP Designjet Color 3D use a putty knife to Build for hands free finishing. Remove a part...
HP Designjet 3D Printer Series - User Guide (English)
Page 32
... No carrier present Carrier present and ready to break or become tangled. 3. Install a new material spool into the carrier, doing so can cause material to be using the printer for more than 72 hours, unload and store model and support material in the car- See Figure 22 28 See "Recycling" on a flat stable surface. Open...
HP Designjet 3D Printer Series - User Guide (English)
Page 52
Close HP Designjet 3D Software Solution. When the display is blank and the printer has shut down , the display will go blank. 3. Once the display shows Idle or Ready to Print, you wish to save the configuration file. 5. This ... either tip • The height of the model and support materials are not equal • Sagging structures due to the ON position. 5. Click on the Save button. 6. Watch the model tip (right tip) for any extrusion (material purge). 48 Open HP Designjet 3D Software Solution from the printer. 2. Turn the power switch to the center of the...
HP Designjet 3D Printer Series - User Guide (English)
Page 53
.... 9. Press Done, then press Yes when the printer displays Is Material Loaded? 14. A clogged tip will begin as the tip may need to wait up to 30 seconds before extrusion will prohibit material load and part building. 1. Test the support material tip by pressing the tabs in and pulling away ... back at Idle. Press Stop to the Maintenance state - Return the printer to stop the extrusion. 12. Remove the head cover by choosing: Select Drive. 10. See Figure 47 WARNING The head area is a support material extrusion problem by pressing Forward. This will often result in this area of...
HP Designjet 3D Printer Series - User Guide (English)
Page 60
.... v. C. Note: Make sure that is loaded or press Both if both model and support material are loaded. 56 Repeat for the opposite side as needed. 7. Display will ask Which Materials Loaded? Ease pressure on the display panel. 9. Move idler wheel assembly by pushing with ...its original position - port if only support material is now accessible using a cutters. Figure 54: Holding access space open - model side shown Insert 1/8 inch T-Handle into fixture hole. iv. Clean the area that all loose material is not replaced the printer may not function properly. 8. Reposition ...
HP Designjet 3D Removal System - User's Guide: English
Page 6
... for their intended purpose. The system heats and circulates solution around the models in a bath of water with a specific amount of support material from models built with HP Designjet 3D printers. 2 Overview Overview The HP Designjet 3D Removal System is dissolved and the models are ready to be removed, dried and used for user selectable short, medium, or long...
HP Designjet 3D Removal System - User's Guide: English
Page 30
... Glossary Allows for circulation of water added to the HP Designjet 3D Removal System to facilitate support removal from models produced with HP Designjet 3D printers. Strainer A filter to prevent larger pieces of terms Cleaning agent bag A package containing the chemical substances used to activate dissolving support material from models produced with HP Designjet 3D printers. Used for one complete cleaning cycle. Model basket...