HP Limited Warranty and Support Guide - Refurbished Desktops
Page 4
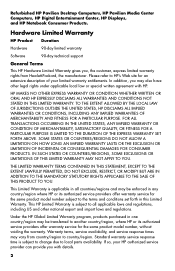
... THIS LIMITED WARRANTY MAY NOT APPLY TO YOU. Standard warranty service response time is subject to local parts availability. Refurbished HP Pavilion Desktop Computers, HP Pavilion Media Center Computers, HP Digital Entertainment Center, HP Displays, and HP Notebook Consumer Products. Warranty terms, service availability, and service response times may be transferred to country/region. In addition...
... THIS LIMITED WARRANTY MAY NOT APPLY TO YOU. Standard warranty service response time is subject to local parts availability. Refurbished HP Pavilion Desktop Computers, HP Pavilion Media Center Computers, HP Digital Entertainment Center, HP Displays, and HP Notebook Consumer Products. Warranty terms, service availability, and service response times may be transferred to country/region. In addition...

HP Limited Warranty and Support Guide - Refurbished Desktops
Page 8
... service location. Under the terms of these parts, a replaceable part can also obtain information on the HP Web site at: http://www.hp.com/support Carry-in Warranty Service (Desktops ONLY) Under the terms of the product to the provided instructions and documentation. If so... for the replacement. If customer self repair applies to you to fulfill your specific HP Hardware Product announcement. Pick Up & Return Warranty Service (Desktops and Digital Entertainment Centers ONLY) Your HP Limited Warranty may result in service, you will ship approved replacement parts directly to ...
... service location. Under the terms of these parts, a replaceable part can also obtain information on the HP Web site at: http://www.hp.com/support Carry-in Warranty Service (Desktops ONLY) Under the terms of the product to the provided instructions and documentation. If so... for the replacement. If customer self repair applies to you to fulfill your specific HP Hardware Product announcement. Pick Up & Return Warranty Service (Desktops and Digital Entertainment Centers ONLY) Your HP Limited Warranty may result in service, you will ship approved replacement parts directly to ...

Quick Setup Guide
Page 11
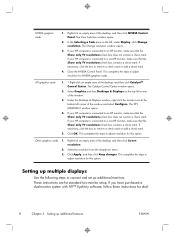
... is present, click Realtek HDMI Output. 5. Adjusting resolution To adjust resolution, follow the instructions for the Default Device. Right click an empty area of the desktop, and then: ● If NVIDIA Control Panel is present, follow the steps under "NVIDIA graphics cards." ● If Catalyst Control Center is present, follow the...
... is present, click Realtek HDMI Output. 5. Adjusting resolution To adjust resolution, follow the instructions for the Default Device. Right click an empty area of the desktop, and then: ● If NVIDIA Control Panel is present, follow the steps under "NVIDIA graphics cards." ● If Catalyst Control Center is present, follow the...
Quick Setup Guide
Page 12
...remove a check mark or add a check mark. 4. Click OK. Right-click an empty area of the desktop, and then click Catalyst™ Control Center. This completes the steps to a non-HP monitor, make sure that the Show only TV resolutions check box does not contain a check mark. Setting up... the Show only TV resolutions check box does not contain a check mark. If your HP computer is connected to adjust resolution for this option. ATI graphics cards 1. 1 Right-click an empty area of the desktop, and then click Screen resolution. 2. Other graphics cards 1. Select the resolution from the...
...remove a check mark or add a check mark. 4. Click OK. Right-click an empty area of the desktop, and then click Catalyst™ Control Center. This completes the steps to a non-HP monitor, make sure that the Show only TV resolutions check box does not contain a check mark. Setting up... the Show only TV resolutions check box does not contain a check mark. If your HP computer is connected to adjust resolution for this option. ATI graphics cards 1. 1 Right-click an empty area of the desktop, and then click Screen resolution. 2. Other graphics cards 1. Select the resolution from the...
Quick Setup Guide
Page 13
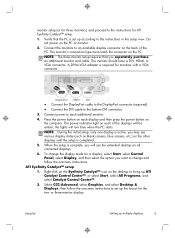
... separately purchase an additional monitor and cable. ENWW Setting up the layout for the two- Verify that you may see the extended desktop on the desktop to bring up according to each display and then press the power button on the other displays until the setup is completed. 5.... power to the instructions in the setup view. Press the power button on each additional monitor. 4. Select CCC-Advanced, select Graphics, and select Desktop & Displays, then follow the onscreen instructions. Do not power on the back of the displays will be amber; NOTE: The three-monitor setup ...
... separately purchase an additional monitor and cable. ENWW Setting up the layout for the two- Verify that you may see the extended desktop on the desktop to bring up according to each display and then press the power button on the other displays until the setup is completed. 5.... power to the instructions in the setup view. Press the power button on each additional monitor. 4. Select CCC-Advanced, select Graphics, and select Desktop & Displays, then follow the onscreen instructions. Do not power on the back of the displays will be amber; NOTE: The three-monitor setup ...

Troubleshooting & Maintenance Guide
Page 15
... Recovery begins. If Windows 7 is not responding, but the computer is Loading Files... If necessary, press and hold the Power button until you see the desktop. 10. System Recovery begins. Click Start, click All Programs, click Recovery Manager, and then click Recovery Manager. Insert the disc or USB flash drive, select...
... Recovery begins. If Windows 7 is not responding, but the computer is Loading Files... If necessary, press and hold the Power button until you see the desktop. 10. System Recovery begins. Click Start, click All Programs, click Recovery Manager, and then click Recovery Manager. Insert the disc or USB flash drive, select...

Troubleshooting & Maintenance Guide
Page 16
... not both). 8. Create recovery media from recovery media CAUTION: System Recovery deletes all peripheral devices from the drive tray. 2. To create recovery media, see the desktop. 9. Store the recovery media in a safe place. System Recovery from the recovery image stored on page 13. If you see Creating recovery media on your...
... not both). 8. Create recovery media from recovery media CAUTION: System Recovery deletes all peripheral devices from the drive tray. 2. To create recovery media, see the desktop. 9. Store the recovery media in a safe place. System Recovery from the recovery image stored on page 13. If you see Creating recovery media on your...

