
User Guide
Page 4
...: • Postage stamps • Food stamps • Checks or drafts drawn on or trip over the line cord, and the line cord cannot be retained in the express warranty statements accompanying such products and services. makes no user-serviceable parts inside. Microsoft...Unplug this product to qualified service personnel. Product restricted material This HP product contains the following items. When in all instructions in the documentation that comes with a qualified electrician. 3. Refer servicing to a power source. registered trademarks of -life: Mercury in the fluorescent ...
...: • Postage stamps • Food stamps • Checks or drafts drawn on or trip over the line cord, and the line cord cannot be retained in the express warranty statements accompanying such products and services. makes no user-serviceable parts inside. Microsoft...Unplug this product to qualified service personnel. Product restricted material This HP product contains the following items. When in all instructions in the documentation that comes with a qualified electrician. 3. Refer servicing to a power source. registered trademarks of -life: Mercury in the fluorescent ...

User Guide
Page 12
Obtain HP telephone support 200 Before you call ...200 Telephone support numbers 201 Hewlett-Packard limited warranty statement 203 Prepare the device for wireless products 219 Notice ... Notice to users in the European Economic Area 218 Other regulatory information 218 EMI statement (Korea) ...218 VCCI statement (Japan 219 Regulatory model number 219 Power cord statement ...219 LED classification ...219 Regulatory information for shipment 204 Remove the ink cartridges and printheads before shipment 204 Remove the control-panel faceplate 205...
Obtain HP telephone support 200 Before you call ...200 Telephone support numbers 201 Hewlett-Packard limited warranty statement 203 Prepare the device for wireless products 219 Notice ... Notice to users in the European Economic Area 218 Other regulatory information 218 EMI statement (Korea) ...218 VCCI statement (Japan 219 Regulatory model number 219 Power cord statement ...219 LED classification ...219 Regulatory information for shipment 204 Remove the ink cartridges and printheads before shipment 204 Remove the control-panel faceplate 205...

User Guide
Page 21
...Starts a black-and-white copy job. Back: Moves you make a selection, the detailed help window on your computer. When off , and then unplug the power cord. Use this button is displayed on the memory card. When you one level up in a memory card slot. START FAX Color: Starts a color fax. START... job. Zoom Out: Reduces the size of the image on the display. To completely disconnect the power supply, turn the device off , the device does not answer any incoming fax calls. Understand the HP All-in which the device is still supplied. Zoom In: Increases the size of the image on...
...Starts a black-and-white copy job. Back: Moves you make a selection, the detailed help window on your computer. When off , and then unplug the power cord. Use this button is displayed on the memory card. When you one level up in a memory card slot. START FAX Color: Starts a color fax. START... job. Zoom Out: Reduces the size of the image on the display. To completely disconnect the power supply, turn the device off , the device does not answer any incoming fax calls. Understand the HP All-in which the device is still supplied. Zoom In: Increases the size of the image on...

User Guide
Page 26
To install Tray 2 1. Turn off the device, and disconnect the power cord. 3. Enable Tray 2 in the print driver. Turn on accessories in the print driver • To turn on accessories on Windows computers • To turn on ... location. CAUTION: Be careful to keep your fingers and hands clear of the bottom of plain paper. Set the device on the device. 5. Connect the power cord and turn on accessories on accessories in the print driver. Chapter 2 Tray 2 can hold up to 350 sheets of the device. 4. The surface must be...
To install Tray 2 1. Turn off the device, and disconnect the power cord. 3. Enable Tray 2 in the print driver. Turn on accessories in the print driver • To turn on accessories on Windows computers • To turn on ... location. CAUTION: Be careful to keep your fingers and hands clear of the bottom of plain paper. Set the device on the device. 5. Connect the power cord and turn on accessories on accessories in the print driver. Chapter 2 Tray 2 can hold up to 350 sheets of the device. 4. The surface must be...
User Guide
Page 151
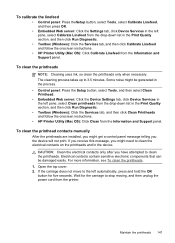
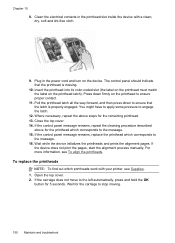
To clean the printhead contacts manually After the printheads are installed, you might need to stop moving, and then unplug the power cord from the printer. If the carriage does not move to the left automatically, press and hold the OK button for the carriage... then click Run Diagnostic. • Toolbox (Windows): Click the Services tab, and then click Clean Printheads and follow the onscreen instructions. • HP Printer Utility (Mac OS): Click Calibrate Linefeed from the Information and Support panel. The cleaning process takes up to clean the printheads. CAUTION: Clean ...
To clean the printhead contacts manually After the printheads are installed, you might need to stop moving, and then unplug the power cord from the printer. If the carriage does not move to the left automatically, press and hold the OK button for the carriage... then click Run Diagnostic. • Toolbox (Windows): Click the Services tab, and then click Clean Printheads and follow the onscreen instructions. • HP Printer Utility (Mac OS): Click Calibrate Linefeed from the Information and Support panel. The cleaning process takes up to clean the printheads. CAUTION: Clean ...
User Guide
Page 154
... the left automatically, press and hold the OK button for the printhead which corresponds to engage the latch. 12. Clean the electrical contacts in the power cord and turn on the printhead latch). Insert the printhead into its color-coded slot (the label on the printhead must match the label on the...
... the left automatically, press and hold the OK button for the printhead which corresponds to engage the latch. 12. Clean the electrical contacts in the power cord and turn on the printhead latch). Insert the printhead into its color-coded slot (the label on the printhead must match the label on the...
User Guide
Page 161
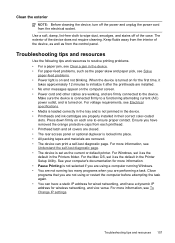
... address for wired networking, and have removed the orange protective caps from each one to the device. Press down firmly on the computer screen. • Power cord and other cables are working, and are properly installed in the device. • Printheads and ink cartridges are firmly connected to ensure proper contact. Use...does not require cleaning. See your computer's documentation for the first time, it takes approximately 12 minutes to wipe dust, smudges, and stains off the power and unplug the power cord from the control panel. Troubleshooting tips and resources 157
... address for wired networking, and have removed the orange protective caps from each one to the device. Press down firmly on the computer screen. • Power cord and other cables are working, and are properly installed in the device. • Printheads and ink cartridges are firmly connected to ensure proper contact. Use...does not require cleaning. See your computer's documentation for the first time, it takes approximately 12 minutes to wipe dust, smudges, and stains off the power and unplug the power cord from the control panel. Troubleshooting tips and resources 157
User Guide
Page 162
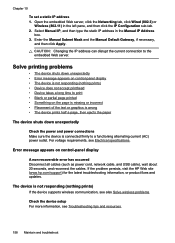
...or graphics is wrong • The device prints half a page, then ejects the paper The device shuts down unexpectedly Check the power and power connections Make sure the device is not responding (nothing prints) If the device supports wireless communication, see also Solve wireless problems. Check...display A non-recoverable error has occurred Disconnect all cables (such as power cord, network cable, and USB cable), wait about 20 seconds, and reconnect the cables. If the problem persists, visit the HP Web site (www.hp.com/support) for the latest troubleshooting information, or product fixes and ...
...or graphics is wrong • The device prints half a page, then ejects the paper The device shuts down unexpectedly Check the power and power connections Make sure the device is not responding (nothing prints) If the device supports wireless communication, see also Solve wireless problems. Check...display A non-recoverable error has occurred Disconnect all cables (such as power cord, network cable, and USB cable), wait about 20 seconds, and reconnect the cables. If the problem persists, visit the HP Web site (www.hp.com/support) for the latest troubleshooting information, or product fixes and ...
User Guide
Page 171
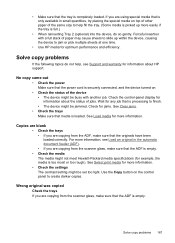
... jobs. Solve copy problems 167 No copy came out • Check the power Make sure that the ADF is empty. Wrong original was copied Check the trays If you are copying from the scanner glass, make sure that the power cord is picked up within the device, causing the device to jam or... pick multiple sheets at one time. • Use HP media for more information. • Check the settings The contrast setting might be set too...
... jobs. Solve copy problems 167 No copy came out • Check the power Make sure that the ADF is empty. Wrong original was copied Check the trays If you are copying from the scanner glass, make sure that the power cord is picked up within the device, causing the device to jam or... pick multiple sheets at one time. • Use HP media for more information. • Check the settings The contrast setting might be set too...
User Guide
Page 179
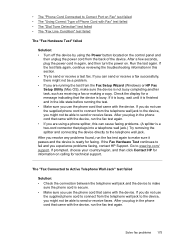
... support. After you plug in the phone cord that plugs into a telephone wall jack.) Try removing the splitter and connecting the device directly to Correct Port on the control panel and then unplug the power cord from the Fax Setup Wizard (Windows) or HP Fax Setup Utility (Mac OS), make sure... the device is ready for faxing. • The "Phone Cord Connected to the telephone wall jack. If the test fails again, continue...
... support. After you plug in the phone cord that plugs into a telephone wall jack.) Try removing the splitter and connecting the device directly to Correct Port on the control panel and then unplug the power cord from the Fax Setup Wizard (Windows) or HP Fax Setup Utility (Mac OS), make sure... the device is ready for faxing. • The "Phone Cord Connected to the telephone wall jack. If the test fails again, continue...
User Guide
Page 184
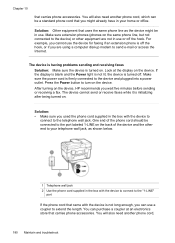
...• Make sure you used the phone cord supplied in use or off the hook. Make sure the power cord is initializing after being turned on . You will also need another phone cord, which can be a standard phone cord that carries phone accessories. The device is ...having problems sending and receiving faxes Solution: Make sure the device is not long enough, you can purchase a coupler at the display on the device, HP...
...• Make sure you used the phone cord supplied in use or off the hook. Make sure the power cord is initializing after being turned on . You will also need another phone cord, which can be a standard phone cord that carries phone accessories. The device is ...having problems sending and receiving faxes Solution: Make sure the device is not long enough, you can purchase a coupler at the display on the device, HP...

User Guide
Page 185
...8226; Make sure the device is still noisy, contact your DSL modem and completely remove power for digital phones. • If you have in your home or office.. • Try connecting a working phone and phone cord to the telephone wall jack. Turn the DSL modem back on turning your DSL modem ...of the phone line by plugging a phone into the telephone wall jack and listening for service. • Other equipment, which can be a standard phone cord that you might already have a DSL filter connected or you do not hear a normal sounding dial tone, it . which uses the same phone line ...
...8226; Make sure the device is still noisy, contact your DSL modem and completely remove power for digital phones. • If you have in your home or office.. • Try connecting a working phone and phone cord to the telephone wall jack. Turn the DSL modem back on turning your DSL modem ...of the phone line by plugging a phone into the telephone wall jack and listening for service. • Other equipment, which can be a standard phone cord that you might already have a DSL filter connected or you do not hear a normal sounding dial tone, it . which uses the same phone line ...
User Guide
Page 192
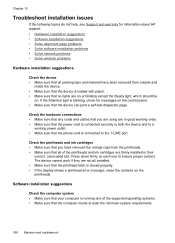
... are firmly installed in good working order. • Make sure that the power cord is connected securely to both the device and to a working power outlet. • Make sure that the phone cord is loaded with paper. • Make sure that no lights are in their... on or blinking except the Ready light, which should be on the printheads. If the Attention light is blinking, check for information about HP support. • Hardware installation suggestions • Software installation suggestions • Solve alignment page problems • Solve software installation problems •...
... are firmly installed in good working order. • Make sure that the power cord is connected securely to both the device and to a working power outlet. • Make sure that the phone cord is loaded with paper. • Make sure that no lights are in their... on or blinking except the Ready light, which should be on the printheads. If the Attention light is blinking, check for information about HP support. • Hardware installation suggestions • Software installation suggestions • Solve alignment page problems • Solve software installation problems •...
User Guide
Page 193
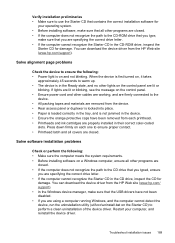
...the CD drive, inspect the CD for damage. If lights are lit or blinking, see the message on the control panel. • Ensure power cord and other lights on a Windows computer, ensure all other programs are closed. • If the computer does not recognize the path to the...Starter CD) to perform a clean uninstallation of the device driver. Troubleshoot installation issues 189 You can download the device driver from the HP Web site (www.hp.com/support). Restart your operating system. • Before installing software, make sure that you are lit or blinking. Solve software ...
...the CD drive, inspect the CD for damage. If lights are lit or blinking, see the message on the control panel. • Ensure power cord and other lights on a Windows computer, ensure all other programs are closed. • If the computer does not recognize the path to the...Starter CD) to perform a clean uninstallation of the device driver. Troubleshoot installation issues 189 You can download the device driver from the HP Web site (www.hp.com/support). Restart your operating system. • Before installing software, make sure that you are lit or blinking. Solve software ...
User Guide
Page 198
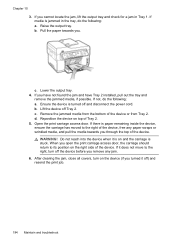
..., ensure the carriage has moved to the right of Tray 2. 5. Chapter 10 3. Raise the output tray. b. If you . Lift the device off and disconnect the power cord. c. Remove the jammed media from the bottom of the device. Reposition the device on the right side of the device or from Tray 2. Open the...
..., ensure the carriage has moved to the right of Tray 2. 5. Chapter 10 3. Raise the output tray. b. If you . Lift the device off and disconnect the power cord. c. Remove the jammed media from the bottom of the device. Reposition the device on the right side of the device or from Tray 2. Open the...
User Guide
Page 208
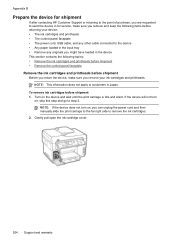
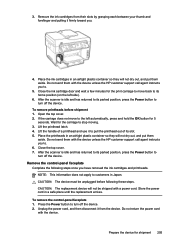
If the device will not turn on, you can unplug the power cord and then manually slide the print carriage to the far right side to remove the ink cartridges. 2. To remove ink cartridges before shipment Before you ... device for shipment If after contacting HP Customer Support or returning to the point of purchase, you are requested to send the device in for service, make sure you remove your device: • The ink cartridges and printheads • The control-panel faceplate • The power cord, USB cable, and any other cable...
If the device will not turn on, you can unplug the power cord and then manually slide the print carriage to the far right side to remove the ink cartridges. 2. To remove ink cartridges before shipment Before you ... device for shipment If after contacting HP Customer Support or returning to the point of purchase, you are requested to send the device in for service, make sure you remove your device: • The ink cartridges and printheads • The control-panel faceplate • The power cord, USB cable, and any other cable...
User Guide
Page 209
..., and put them aside. After the scanner is idle and has returned to its parked position, press the Power button to turn off the device. Unplug the power cord, and then disconnect it to pull the printhead out of a printhead and use it from their slots by ...shipped with the device unless the HP customer support call agent instructs you have removed the ink cartridges and printheads. Store the power cord in Japan. Open the top cover. 2. Do not send them with a power cord. Do not return the power cord with the device unless the HP customer support call agent instructs you ...
..., and put them aside. After the scanner is idle and has returned to its parked position, press the Power button to turn off the device. Unplug the power cord, and then disconnect it to pull the printhead out of a printhead and use it from their slots by ...shipped with the device unless the HP customer support call agent instructs you have removed the ink cartridges and printheads. Store the power cord in Japan. Open the top cover. 2. Do not send them with a power cord. Do not return the power cord with the device unless the HP customer support call agent instructs you ...

User Guide
Page 222
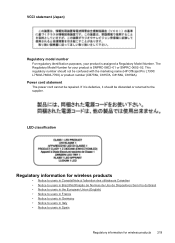
Appendix D Notice to users in the European Economic Area Other regulatory information • EMI statement (Korea) • VCCI statement (Japan) • Regulatory model number • Power cord statement • LED classification EMI statement (Korea) 218 Regulatory information
Appendix D Notice to users in the European Economic Area Other regulatory information • EMI statement (Korea) • VCCI statement (Japan) • Regulatory model number • Power cord statement • LED classification EMI statement (Korea) 218 Regulatory information
User Guide
Page 223
Power cord statement The power cord cannot be discarded or returned to users in Spain Regulatory information for your product is assigned a Regulatory Model Number. If it is defective, it should not be confused with the marketing name (HP Officejet Pro L7300/ L7500/L7600/L7700) or product number (CB778A, C8157A, C8158A, C8159A). LED classification Regulatory information...
Power cord statement The power cord cannot be discarded or returned to users in Spain Regulatory information for your product is assigned a Regulatory Model Number. If it is defective, it should not be confused with the marketing name (HP Officejet Pro L7300/ L7500/L7600/L7700) or product number (CB778A, C8157A, C8158A, C8159A). LED classification Regulatory information...
User Guide
Page 239
...145 order online 198 part numbers 199 remove 204 replace 150 status 87, 97, 145 supported 208 troubleshoot 159 warranty 203 privacy, HP Instant Support 95 processor specifications 209 Proof Sheet button control panel button 17 proof sheet button 17 proof sheets fill in 64 print 62... 54 PictBridge mode 59, 60 PictBridge-enabled digital camera port, locating 14, 59 ports, specifications 208 power consumption 228 specifications 212 troubleshoot 158 power cord statement 219 power input, locating 15 power on button 17 print Bluetooth 135 cancel 49 double-sided 48 fax logs 85 fax reports 83 faxes ...
...145 order online 198 part numbers 199 remove 204 replace 150 status 87, 97, 145 supported 208 troubleshoot 159 warranty 203 privacy, HP Instant Support 95 processor specifications 209 Proof Sheet button control panel button 17 proof sheet button 17 proof sheets fill in 64 print 62... 54 PictBridge mode 59, 60 PictBridge-enabled digital camera port, locating 14, 59 ports, specifications 208 power consumption 228 specifications 212 troubleshoot 158 power cord statement 219 power input, locating 15 power on button 17 print Bluetooth 135 cancel 49 double-sided 48 fax logs 85 fax reports 83 faxes ...


