Setup Guide
Page 12
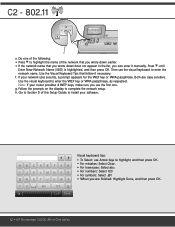
.... C L R Done Visual keyboard tips: • To Select: use Arrow keys to Section D of the network that you wrote down does not appear in -One series C2 - 802.11 e. Press until Enter New Network Name (SSID) is highlighted, and then press OK. g. Go to highlight, and then press OK. ...abc • For numbers: Select 123 • For symbols: Select .@! • When you can enter it manually. Do one . Both are finished: Highlight Done, and then press OK. 12 • HP Photosmart C6300 All-in the list, you are case sensitive. If your software. Note: If your router provides 4 WEP ...
.... C L R Done Visual keyboard tips: • To Select: use Arrow keys to Section D of the network that you wrote down does not appear in -One series C2 - 802.11 e. Press until Enter New Network Name (SSID) is highlighted, and then press OK. g. Go to highlight, and then press OK. ...abc • For numbers: Select 123 • For symbols: Select .@! • When you can enter it manually. Do one . Both are finished: Highlight Done, and then press OK. 12 • HP Photosmart C6300 All-in the list, you are case sensitive. If your software. Note: If your router provides 4 WEP ...
Setup Guide
Page 15
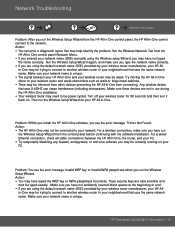
...you may help identify the problem. HP Photosmart C6300 All-in -One cannot connect to your network name is unique. Network Troubleshooting www.hp.com/support Problem: After you run the Wireless Setup Wizard from the HP All-in-One control panel, the HP All-in -One series • 15 Run the...correctly. • If you entered your network name (SSID) manually using the default network name (SSID) provided by your wireless router manufacturer, your HP All- Try moving the HP All-in-One closer to another wireless router in One control panel Network Menu. • If you are using ...
...you may help identify the problem. HP Photosmart C6300 All-in -One cannot connect to your network name is unique. Network Troubleshooting www.hp.com/support Problem: After you run the Wireless Setup Wizard from the HP All-in-One control panel, the HP All-in -One series • 15 Run the...correctly. • If you entered your network name (SSID) manually using the default network name (SSID) provided by your wireless router manufacturer, your HP All- Try moving the HP All-in-One closer to another wireless router in One control panel Network Menu. • If you are using ...
User Guide
Page 43
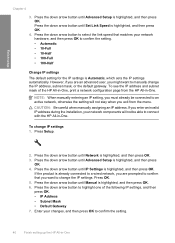
To change the IP address, subnet mask, or the default gateway. Enter your changes, and then press OK to highlight one of the HP All-in -One. NOTE: When manually entering an IP setting, you must already be connected to an active network, otherwise the setting will not stay when you ...enter an invalid IP address during the installation, your network hardware, and then press OK to manually change IP settings 1. If you exit from the HP All-in -One, print a network configuration page from the menu. Press the down arrow button to confirm the setting. 40 ...
To change the IP address, subnet mask, or the default gateway. Enter your changes, and then press OK to highlight one of the HP All-in -One. NOTE: When manually entering an IP setting, you must already be connected to an active network, otherwise the setting will not stay when you ...enter an invalid IP address during the installation, your network hardware, and then press OK to manually change IP settings 1. If you exit from the HP All-in -One, print a network configuration page from the menu. Press the down arrow button to confirm the setting. 40 ...
User Guide
Page 47
... IP address during installation. NOTE: It is shown, obtain the DNS IP address from your network components from seeing the HP All-in-One. A node in -One: • AutoIP: The installation software automatically determines the configuration parameters. • DHCP: The configuration parameters are specified by... use the IP addresses to refer to networking hardware for the network. You can be a router. • Manual: The configuration parameters are assigned dynamically through DHCP or AutoIP. NOTE: The address of the HP All-in -One On small networks, this instance can also set...
... IP address during installation. NOTE: It is shown, obtain the DNS IP address from your network components from seeing the HP All-in-One. A node in -One: • AutoIP: The installation software automatically determines the configuration parameters. • DHCP: The configuration parameters are specified by... use the IP addresses to refer to networking hardware for the network. You can be a router. • Manual: The configuration parameters are assigned dynamically through DHCP or AutoIP. NOTE: The address of the HP All-in -One On small networks, this instance can also set...

User Guide
Page 48
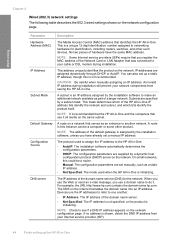
...Link Configuration Total Packets transmitted Total Packets received Description The speed at which bits identify the product itself. The number of the HP All-in -One is not recommended. IP Address This address uniquely identifies the device on the network configuration page. NOTE: It is turned off...following table describes the 802.11 wireless settings shown on the network. NOTE: Manually assigning an invalid IP address during installation. Default Gateway A node on . The counter clears after the HP All-in -One IP address bits identify the network and subnet, and which data is a ...
...Link Configuration Total Packets transmitted Total Packets received Description The speed at which bits identify the product itself. The number of the HP All-in -One is not recommended. IP Address This address uniquely identifies the device on the network configuration page. NOTE: It is turned off...following table describes the 802.11 wireless settings shown on the network. NOTE: Manually assigning an invalid IP address during installation. Default Gateway A node on . The counter clears after the HP All-in -One IP address bits identify the network and subnet, and which data is a ...
User Guide
Page 49
... Status Communication Mode Network Name (SSID) Signal Strength (1-5) Channel Description • Manual: The configuration parameters are set manually, such as a wireless router or base station. • Ad hoc: The HP All-in-One communicates directly with each other: • Infrastructure: The HP All-in-One communicates with other network devices through a wireless access point, such as...
... Status Communication Mode Network Name (SSID) Signal Strength (1-5) Channel Description • Manual: The configuration parameters are set manually, such as a wireless router or base station. • Ad hoc: The HP All-in-One communicates directly with each other: • Infrastructure: The HP All-in-One communicates with other network devices through a wireless access point, such as...
User Guide
Page 62
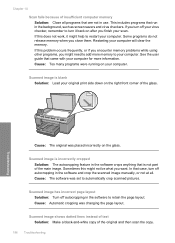
... using special papers, such as photo paper, transparency film, envelopes, or labels, or if you experience poor print quality using the automatic setting, you can manually set to detect the size and type of paper you load in the input tray automatically and then adjust its settings to the engraved guides... copy or scan up to the open position. 6 Load originals and load paper You can load many different types and sizes of paper in the HP All-in -One is set the paper size and type for print and copy jobs. By default, the...
... using special papers, such as photo paper, transparency film, envelopes, or labels, or if you experience poor print quality using the automatic setting, you can manually set to detect the size and type of paper you load in the input tray automatically and then adjust its settings to the engraved guides... copy or scan up to the open position. 6 Load originals and load paper You can load many different types and sizes of paper in the HP All-in -One is set the paper size and type for print and copy jobs. By default, the...
User Guide
Page 73
...on transfers" on page 87 • "Print a group of HP greeting card paper into the input tray with arrows and the HP logo) is inserted first, print side down ; the entire stack of the transfer paper and then manually feed one sheet at a time into the input tray first. Flatten the ...transfer sheet completely before printing onto transparency film. Locate the blue stripe on older sheets might peel off when the paper is going into the input tray with the blue stripe facing up. Chapter 6 HP Premium Inkjet ...
...on transfers" on page 87 • "Print a group of HP greeting card paper into the input tray with arrows and the HP logo) is inserted first, print side down ; the entire stack of the transfer paper and then manually feed one sheet at a time into the input tray first. Flatten the ...transfer sheet completely before printing onto transparency film. Locate the blue stripe on older sheets might peel off when the paper is going into the input tray with the blue stripe facing up. Chapter 6 HP Premium Inkjet ...
User Guide
Page 76
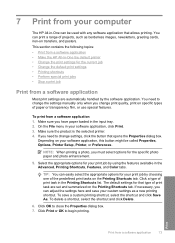
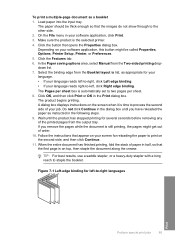
... Preferences. This section contains the following topics: • Print from a software application • Make the HP All-in -One can print a range of the predefined print tasks on transfers, and posters. TIP: You can adjust the...select the appropriate options for that opens the Properties dialog box. You need to change the settings manually only when you must select options for your custom settings as borderless images, newsletters, greeting cards... print task in the Advanced, Printing Shortcuts, Features, and Color tabs. Print Print from a software application 1.
... Preferences. This section contains the following topics: • Print from a software application • Make the HP All-in -One can print a range of the predefined print tasks on transfers, and posters. TIP: You can adjust the...select the appropriate options for that opens the Properties dialog box. You need to change the settings manually only when you must select options for your custom settings as borderless images, newsletters, greeting cards... print task in the Advanced, Printing Shortcuts, Features, and Color tabs. Print Print from a software application 1.
User Guide
Page 78
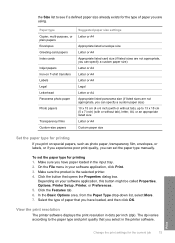
... type and print quality that you have paper loaded in the input tray. 2. To set the paper type manually. Paper type Copier, multi-purpose, or plain papers Envelopes Greeting-card papers Index cards Inkjet papers Iron-on special papers, such as photo paper, transparency film, envelopes, or labels, or if you experience...
... type and print quality that you have paper loaded in the input tray. 2. To set the paper type manually. Paper type Copier, multi-purpose, or plain papers Envelopes Greeting-card papers Index cards Inkjet papers Iron-on special papers, such as photo paper, transparency film, envelopes, or labels, or if you experience...
User Guide
Page 82
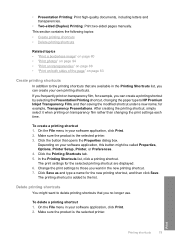
... Printing: Print high-quality documents, including letters and transparencies. • Two-sided (Duplex) Printing: Print two-sided pages manually. for the selected printing shortcut are available in your own printing shortcuts. To create a printing shortcut 1. Depending on transparency...menu in the Printing Shortcuts list, you frequently print on your software application, click Print. 2. The printing shortcut is added to HP Premium Inkjet Transparency Film, and then saving the modified shortcut under a new name; Click the Printing Shortcuts tab. 5. After creating the printing...
... Printing: Print high-quality documents, including letters and transparencies. • Two-sided (Duplex) Printing: Print two-sided pages manually. for the selected printing shortcut are available in your own printing shortcuts. To create a printing shortcut 1. Depending on transparency...menu in the Printing Shortcuts list, you frequently print on your software application, click Print. 2. The printing shortcut is added to HP Premium Inkjet Transparency Film, and then saving the modified shortcut under a new name; Click the Printing Shortcuts tab. 5. After creating the printing...
User Guide
Page 86
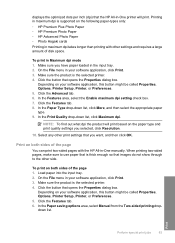
...click Print. 3. In the Paper saving options area, select Manual from the Two-sided printing dropdown list. Click the button that opens the Properties dialog box. Select any other print settings that the HP All-in -One manually. Click the Features tab. 6. Click the Advanced tab. ...6. Click the Features tab. 8. Print on the following paper-types only: • HP Premium Plus Photo Paper • HP Premium Photo Paper • HP Advanced Photo Paper • Photo...
...click Print. 3. In the Paper saving options area, select Manual from the Two-sided printing dropdown list. Click the button that opens the Properties dialog box. Select any other print settings that the HP All-in -One manually. Click the Features tab. 6. Click the Advanced tab. ...6. Click the Features tab. 8. Print on the following paper-types only: • HP Premium Plus Photo Paper • HP Premium Photo Paper • HP Advanced Photo Paper • Photo...
User Guide
Page 88
Make sure the product is time to the other side. 2. In the Paper saving options area, select Manual from the output tray. The Pages per sheet box is automatically set to staple the booklet. Do not click Continue in the dialog box until ...
Make sure the product is time to the other side. 2. In the Paper saving options area, select Manual from the output tray. The Pages per sheet box is automatically set to staple the booklet. Do not click Continue in the dialog box until ...
User Guide
Page 91
... Features area, select the Mirror Image check box. 9. NOTE: To prevent jams, manually feed the iron-on plain paper. Then select the appropriate paper type. TIP: If you use HP transparency products with the HP Allin-One. Ink dries slower on film than on transfer sheets into the input tray. 2....envelope, a group of addresses on the back of the transparencies and erase them . Print a group of envelopes, or label sheets designed for inkjet printers. On the File menu in your computer Depending on Transfer from the Paper Type drop-down list, select More. Print 88 Print from...
... Features area, select the Mirror Image check box. 9. NOTE: To prevent jams, manually feed the iron-on plain paper. Then select the appropriate paper type. TIP: If you use HP transparency products with the HP Allin-One. Ink dries slower on film than on transfer sheets into the input tray. 2....envelope, a group of addresses on the back of the transparencies and erase them . Print a group of envelopes, or label sheets designed for inkjet printers. On the File menu in your computer Depending on Transfer from the Paper Type drop-down list, select More. Print 88 Print from...

User Guide
Page 100
...Save is network-connected, a list of your photos • Apply special color effects to your photos Remove red-eye The flash on a camera (especially on page 94 Edit photos using the control panel The HP All-in-One offers several basic editing features that you can sometimes cause a subject's ...to edit your photos. NOTE: This feature is only available when a memory card or storage device is automatically applied to automatically enhance your photos manually before you want to transfer the photos, and then continue to the next step. 3. To remove red-eye from photos ▲ By default...
...Save is network-connected, a list of your photos • Apply special color effects to your photos Remove red-eye The flash on a camera (especially on page 94 Edit photos using the control panel The HP All-in-One offers several basic editing features that you can sometimes cause a subject's ...to edit your photos. NOTE: This feature is only available when a memory card or storage device is automatically applied to automatically enhance your photos manually before you want to transfer the photos, and then continue to the next step. 3. To remove red-eye from photos ▲ By default...
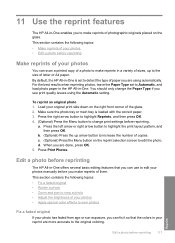
User Guide
Page 120
... the correct paper. 3. Load your reprint are using the Automatic setting. a. Edit a photo before reprinting The HP All-in-One offers several basic editing features that the colors in your original print side down on the glass. This section contains the following topics: • Make reprints...8226; Apply special color effects to change the Paper Type if you make reprints of copies. Press the right arrow button to highlight Reprints, and then press OK. 4. (Optional) Press the Menu button to your photos Fix a faded original If your photos manually before reprinting 117 ...
... the correct paper. 3. Load your reprint are using the Automatic setting. a. Edit a photo before reprinting The HP All-in-One offers several basic editing features that the colors in your original print side down on the glass. This section contains the following topics: • Make reprints...8226; Apply special color effects to change the Paper Type if you make reprints of copies. Press the right arrow button to highlight Reprints, and then press OK. 4. (Optional) Press the Menu button to your photos Fix a faded original If your photos manually before reprinting 117 ...
User Guide
Page 147
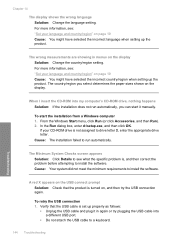
... language setting. For more information, see : "Set your CD-ROM drive is set up properly as follows: • Unplug the USB cable and plug it manually. To start it in menus on the display. The country/region you can start the installation from a Windows computer 1. When I insert the CD-ROM into...
... language setting. For more information, see : "Set your CD-ROM drive is set up properly as follows: • Unplug the USB cable and plug it manually. To start it in menus on the display. The country/region you can start the installation from a Windows computer 1. When I insert the CD-ROM into...

User Guide
Page 159
... address filtering on how to four WEP keys. If you must have entered the WEP key incorrectly. Cause: During the wireless setup process, you had manually entered your network name (SSID) carefully.
... address filtering on how to four WEP keys. If you must have entered the WEP key incorrectly. Cause: During the wireless setup process, you had manually entered your network name (SSID) carefully.
User Guide
Page 199
... memory to restart your original print side down on the glass. See the user guide that run in the software and crop the scanned image manually, or not at all programs that are not in the software to automatically crop scanned pictures. Cause: Too many programs were running on after you...
... memory to restart your original print side down on the glass. See the user guide that run in the software and crop the scanned image manually, or not at all programs that are not in the software to automatically crop scanned pictures. Cause: Too many programs were running on after you...
User Guide
Page 227
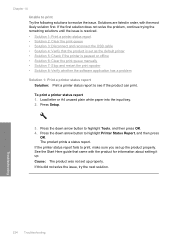
... first solution does not solve the problem, continue trying the remaining solutions until the issue is paused or offline • Solution 6: Clear the print queue manually • Solution 7: Stop and restart the print spooler • Solution 8: Verify whether the software application has a problem Solution 1: Print a printer status report Solution: Print a printer...
... first solution does not solve the problem, continue trying the remaining solutions until the issue is paused or offline • Solution 6: Clear the print queue manually • Solution 7: Stop and restart the print spooler • Solution 8: Verify whether the software application has a problem Solution 1: Print a printer status report Solution: Print a printer...


