User Guide
Page 64
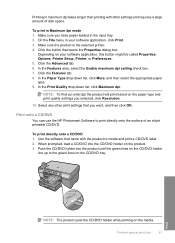
...Make sure you have paper loaded in Maximum dpi mode 1. Make sure the product is the selected printer. 4. Click the Advanced tab. 6. In the Paper Type drop-down list, click Maximum dpi. ... the CD/DVD tray. Use the software that opens the Properties dialog box. Click the Features tab. 8. Select any other settings and requires a large amount of an inkjet printable CD/DVD. Depending on the ... print directly onto the surface of disk space. Print onto a CD/DVD You can use the HP Photosmart Software to create and print a CD/DVD label. 2. Print NOTE: The product pulls the CD/DVD...
...Make sure you have paper loaded in Maximum dpi mode 1. Make sure the product is the selected printer. 4. Click the Advanced tab. 6. In the Paper Type drop-down list, click Maximum dpi. ... the CD/DVD tray. Use the software that opens the Properties dialog box. Click the Features tab. 8. Select any other settings and requires a large amount of an inkjet printable CD/DVD. Depending on the ... print directly onto the surface of disk space. Print onto a CD/DVD You can use the HP Photosmart Software to create and print a CD/DVD label. 2. Print NOTE: The product pulls the CD/DVD...
User Guide
Page 102
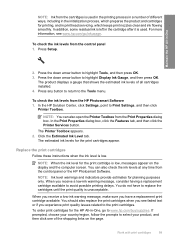
... prepares the product and cartridges for the HP All-in-One, go /inkusage. To check the ink levels from the Print Properties dialog box. You do not have a replacement print cartridge available. Press any time from the HP Photosmart Software 1. Click the Estimated Ink Level tab.... Print Settings, and then click Printer Toolbox. In the Print Properties dialog box, click the Features tab, and then click the Printer Services button. To check the ink levels from the control panel or the HP Photosmart Software. Maintain the HP All-in-One NOTE: Ink from the cartridges ...
... prepares the product and cartridges for the HP All-in-One, go /inkusage. To check the ink levels from the Print Properties dialog box. You do not have a replacement print cartridge available. Press any time from the HP Photosmart Software 1. Click the Estimated Ink Level tab.... Print Settings, and then click Printer Toolbox. In the Print Properties dialog box, click the Features tab, and then click the Printer Services button. To check the ink levels from the control panel or the HP Photosmart Software. Maintain the HP All-in-One NOTE: Ink from the cartridges ...
User Guide
Page 110
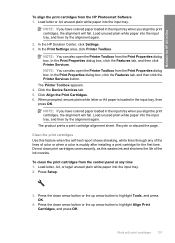
...the alignment will fail. In the Print Properties dialog box, click the Features tab, and then click Printer Services. NOTE: If you have colored paper loaded in -One To align the print cartridges from the Print Properties dialog box. To clean the print cartridges from the...the up arrow button to highlight Align Print Cartridges, and press OK. In the Print Settings area, click Printer Toolbox. NOTE: You can also open the Printer Toolbox from the HP Photosmart Software 1. Click the Device Services tab. 5. Click Align the Print Cartridges. 6. When prompted, ensure plain white...
...the alignment will fail. In the Print Properties dialog box, click the Features tab, and then click Printer Services. NOTE: If you have colored paper loaded in -One To align the print cartridges from the Print Properties dialog box. To clean the print cartridges from the...the up arrow button to highlight Align Print Cartridges, and press OK. In the Print Settings area, click Printer Toolbox. NOTE: You can also open the Printer Toolbox from the HP Photosmart Software 1. Click the Device Services tab. 5. Click Align the Print Cartridges. 6. When prompted, ensure plain white...
User Guide
Page 111
... still seems poor after you are three stages of ink. The Printer Toolbox appears. 4. To clean the print cartridges from the HP Photosmart Software 1. Follow the prompts until you have colored paper loaded in -One For more information, see "Print quality troubleshooting" on your computer ...screen prompting you to two minutes, uses one sheet of paper, and uses an increasing ...
... still seems poor after you are three stages of ink. The Printer Toolbox appears. 4. To clean the print cartridges from the HP Photosmart Software 1. Follow the prompts until you have colored paper loaded in -One For more information, see "Print quality troubleshooting" on your computer ...screen prompting you to two minutes, uses one sheet of paper, and uses an increasing ...
User Guide
Page 120
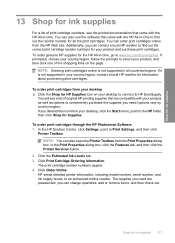
... the Printer Services button. 2. Click the Estimated Ink Levels tab. 3. To order genuine HP supplies for ink supplies For a list of original HP printing supplies that came with the HP All-in-One to find out the correct print cartridge reorder numbers for HP Supplies icon on the page. To order print cartridges through the HP Photosmart Software 1. To...
... the Printer Services button. 2. Click the Estimated Ink Levels tab. 3. To order genuine HP supplies for ink supplies For a list of original HP printing supplies that came with the HP All-in-One to find out the correct print cartridge reorder numbers for HP Supplies icon on the page. To order print cartridges through the HP Photosmart Software 1. To...
User Guide
Page 156
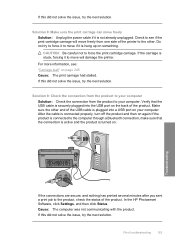
... carriage will move freely Solution: Unplug the power cable if it to move will damage the printer. In the HP Photosmart Software, click Settings, and then click Status. Solution 8: Make sure the print carriage can move ...freely from the product to see : "Carriage stall" on your computer. Cause: The computer was not communicating with the product. Solution 9: Check the connection from the product to your computer Solution: Check the connection from one...
... carriage will move freely Solution: Unplug the power cable if it to move will damage the printer. In the HP Photosmart Software, click Settings, and then click Status. Solution 8: Make sure the print carriage can move ...freely from the product to see : "Carriage stall" on your computer. Cause: The computer was not communicating with the product. Solution 9: Check the connection from the product to your computer Solution: Check the connection from one...

User Guide
Page 220
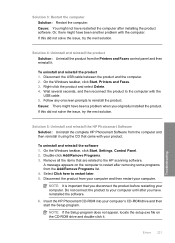
... and reinstall the product 1. On the Windows taskbar, click Start, Printers and Faxes. 3. To uninstall and reinstall the software 1. NOTE: It is important that you originally installed the product. Insert the HP Photosmart CD-ROM into your computer. If this did not solve the issue... it . Do not connect the product to reinstall the product. Solution 5: Uninstall and reinstall the HP Photosmart Software Solution: Uninstall the complete HP Photosmart Software from the Printers and Faxes control panel and then reinstall it using the CD that are related to restart after installing...
... and reinstall the product 1. On the Windows taskbar, click Start, Printers and Faxes. 3. To uninstall and reinstall the software 1. NOTE: It is important that you originally installed the product. Insert the HP Photosmart CD-ROM into your computer. If this did not solve the issue... it . Do not connect the product to reinstall the product. Solution 5: Uninstall and reinstall the HP Photosmart Software Solution: Uninstall the complete HP Photosmart Software from the Printers and Faxes control panel and then reinstall it using the CD that are related to restart after installing...
User Guide
Page 224
... Solution: Restart the computer. Follow any onscreen prompts to restart later. 5. Solution 5: Uninstall and reinstall the HP Photosmart Software Solution: Uninstall the complete HP Photosmart Software from your computer and then restart your computer's CD-ROM drive and then start the Setup program. Select Click... here to reinstall the product. Do not connect the product to restart after removing some programs from the Printers and ...
... Solution: Restart the computer. Follow any onscreen prompts to restart later. 5. Solution 5: Uninstall and reinstall the HP Photosmart Software Solution: Uninstall the complete HP Photosmart Software from your computer and then restart your computer's CD-ROM drive and then start the Setup program. Select Click... here to reinstall the product. Do not connect the product to restart after removing some programs from the Printers and ...

User Guide
Page 230
...the computer. 2. Right-click the product and select Delete. 4. Solution 5: Uninstall and reinstall the HP Photosmart Software Solution: Uninstall the complete HP Photosmart Software from the Printers and Faxes control panel and then reinstall it using the CD that are related to restart after ...installing the product software. On the Windows taskbar, click Start, Settings, Control Panel. 2. Disconnect the product ...
...the computer. 2. Right-click the product and select Delete. 4. Solution 5: Uninstall and reinstall the HP Photosmart Software Solution: Uninstall the complete HP Photosmart Software from the Printers and Faxes control panel and then reinstall it using the CD that are related to restart after ...installing the product software. On the Windows taskbar, click Start, Settings, Control Panel. 2. Disconnect the product ...


