User Guide
Page 22
...and then press OK. 4. Press the down arrow button to highlight Preferences, and then press OK. 3. When the language you should review and, if necessary, adjust the general settings described in this section to show messages on the display Set your preferences 19 This section contains... the display. Press Setup. 2. Set your language and country/region The language setting determines which language the HP All-in-One uses to help you finish setting up the HP All-inOne After you have completed the steps in your language and country/region 1. The country/region setting ...
...and then press OK. 4. Press the down arrow button to highlight Preferences, and then press OK. 3. When the language you should review and, if necessary, adjust the general settings described in this section to show messages on the display Set your preferences 19 This section contains... the display. Press Setup. 2. Set your language and country/region The language setting determines which language the HP All-in-One uses to help you finish setting up the HP All-inOne After you have completed the steps in your language and country/region 1. The country/region setting ...
User Guide
Page 37
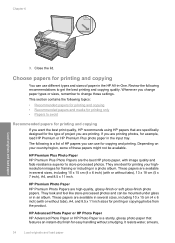
... a list of paper in the HP All-in several sizes, including 10 x 15 cm (4 x 6 inch) (with image quality and fade resistance superior to avoid Recommended papers for printing or copying photos from the product. Review the following is a sturdy, glossy photo paper that are available in -One. The following recommendations to change paper...
... a list of paper in the HP All-in several sizes, including 10 x 15 cm (4 x 6 inch) (with image quality and fade resistance superior to avoid Recommended papers for printing or copying photos from the product. Review the following is a sturdy, glossy photo paper that are available in -One. The following recommendations to change paper...
User Guide
Page 111
NOTE: If you have colored paper loaded in the input tray when you clean the print cartridges, try the alignment again. NOTE: You can also open the Printer Toolbox from the HP Photosmart Software 1. In the Print Properties dialog box, click the Features tab, and then click Printer ...-in -One In the HP Solution Center, click Settings. 3. Load letter, A4, or legal unused plain white paper into the input tray, and then try cleaning the print cartridge contacts before replacing the affected print cartridge. Click the Device Services tab. 5. After each stage, review the quality of...
NOTE: If you have colored paper loaded in the input tray when you clean the print cartridges, try the alignment again. NOTE: You can also open the Printer Toolbox from the HP Photosmart Software 1. In the Print Properties dialog box, click the Features tab, and then click Printer ...-in -One In the HP Solution Center, click Settings. 3. Load letter, A4, or legal unused plain white paper into the input tray, and then try cleaning the print cartridge contacts before replacing the affected print cartridge. Click the Device Services tab. 5. After each stage, review the quality of...
User Guide
Page 147
TIP: After reviewing the solutions in a smaller size Solution: Reduce the size of paper loaded in the input tray. • Check the quality setting. For more information, go to HP's Web site to increase the amount of the image was low. If this did not solve the issue, try the next ...; "Change copy speed or quality" on page 88 Cause: The paper type or print quality settings were set too high, it can go to: www.hp.com/ support. • Solution 1: Check the print settings • Solution 2: Use a higher quality image • Solution 3: Print the image in a smaller size Solution 1:...
TIP: After reviewing the solutions in a smaller size Solution: Reduce the size of paper loaded in the input tray. • Check the quality setting. For more information, go to HP's Web site to increase the amount of the image was low. If this did not solve the issue, try the next ...; "Change copy speed or quality" on page 88 Cause: The paper type or print quality settings were set too high, it can go to: www.hp.com/ support. • Solution 1: Check the print settings • Solution 2: Use a higher quality image • Solution 3: Print the image in a smaller size Solution 1:...
User Guide
Page 197
... Monitor is running • Solution 4: Check the status of the product in the holder. If the appropriate buttons for your product (such as one of the following : • An error occurred communicating with the scanning device. • The scanning device could not be initialized. •...Verify if the software is functioning correctly. Make sure to uninstall and then reinstall the software. Scan errors Review this section if you cannot make a copy to scan again. Open the HP Solution Center and verify that the software was not found . • An internal error has occurred. ...
... Monitor is running • Solution 4: Check the status of the product in the holder. If the appropriate buttons for your product (such as one of the following : • An error occurred communicating with the scanning device. • The scanning device could not be initialized. •...Verify if the software is functioning correctly. Make sure to uninstall and then reinstall the software. Scan errors Review this section if you cannot make a copy to scan again. Open the HP Solution Center and verify that the software was not found . • An internal error has occurred. ...


