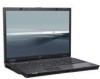

HP USB Digital Drive
Page 9
A dialog box displays a list of connected devices. 2. Disconnecting the Digital Drive ✎ Do not attempt to Remove Hardware" message appears on your screen. 3. Gently unplug the Digital Drive from the USB port. ✎ If the USB connector cable is in the extended position, return it on the Digital Drive is flashing. 1. Select the "Safely Remove Hardware" icon on your taskbar. Select the Digital Drive and wait until the "Safe to remove the Digital Drive when the status light on its track for safe storage. 8 User Guide
A dialog box displays a list of connected devices. 2. Disconnecting the Digital Drive ✎ Do not attempt to Remove Hardware" message appears on your screen. 3. Gently unplug the Digital Drive from the USB port. ✎ If the USB connector cable is in the extended position, return it on the Digital Drive is flashing. 1. Select the "Safely Remove Hardware" icon on your taskbar. Select the Digital Drive and wait until the "Safe to remove the Digital Drive when the status light on its track for safe storage. 8 User Guide
Bluetooth Wireless Technology Basics
Page 6
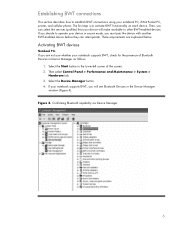
... the device with another BWT-enabled device before they can select the services (profiles) that your notebook supports BWT, check for the presence of the screen. 2.
... the device with another BWT-enabled device before they can select the services (profiles) that your notebook supports BWT, check for the presence of the screen. 2.

Bluetooth Wireless Technology Basics
Page 7
...and security features as the operating system CD. 7 Set up the BWT software. Then you turn it by pressing the wireless button on HP notebook PCs; For specific instructions about discovering and connecting to other BWT-enabled devices, refer to Bluetooth operations. When the Software Setup Welcome.... Enable BWT functionality If the wireless light (ICON) is displayed, select Next. 3. The color of the icon indicates the status of the screen. When you can use the Bluetooth Setup wizard to enable the software for the first time, the Found New Hardware wizard opens. Install the...
...and security features as the operating system CD. 7 Set up the BWT software. Then you turn it by pressing the wireless button on HP notebook PCs; For specific instructions about discovering and connecting to other BWT-enabled devices, refer to Bluetooth operations. When the Software Setup Welcome.... Enable BWT functionality If the wireless light (ICON) is displayed, select Next. 3. The color of the icon indicates the status of the screen. When you can use the Bluetooth Setup wizard to enable the software for the first time, the Found New Hardware wizard opens. Install the...

Bluetooth Wireless Technology Basics
Page 8
...of these functions by HP BWT-enabled products....corner of the Today screen to activate BWT functionality... discoverability of the BWT profiles built into HP notebook PCs, iPAQ Pocket PCs, and...HP BWT offerings and to view product compatibility, visit http://www.hp.com/products/wireless/PAN/. Printers The HP...Also, visit http://www.hp.com/products/wireless/ for each HP product. Allows a device ...a BWT-enabled printer. HP products D = supported by...are available for updates to the HP wireless product portfolio. Cellular phones .... If any of the HP 450 Deskjet printer feature integrated...
...of these functions by HP BWT-enabled products....corner of the Today screen to activate BWT functionality... discoverability of the BWT profiles built into HP notebook PCs, iPAQ Pocket PCs, and...HP BWT offerings and to view product compatibility, visit http://www.hp.com/products/wireless/PAN/. Printers The HP...Also, visit http://www.hp.com/products/wireless/ for each HP product. Allows a device ...a BWT-enabled printer. HP products D = supported by...are available for updates to the HP wireless product portfolio. Cellular phones .... If any of the HP 450 Deskjet printer feature integrated...
Installing Windows 7 on HP Compaq and EliteBook Notebook PCs
Page 3
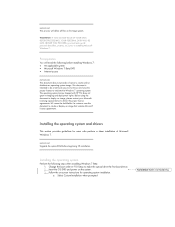
...when installing Windows 7 Beta 1. Installing the operating system Perform the following before beginning OS installation. Follow the on-screen instructions for users who have the proper license to create or deploy an image that violates Microsoft license agreements. ...prior to installing Microsoft Windows 7. Select Custom Installation when prompted Formatted: Bullets and Numbering The operating system license shipped with HP PCs does not grant re-imaging and deployment rights. Installing the operating system and drivers This section provides guidelines for operating...
...when installing Windows 7 Beta 1. Installing the operating system Perform the following before beginning OS installation. Follow the on-screen instructions for users who have the proper license to create or deploy an image that violates Microsoft license agreements. ...prior to installing Microsoft Windows 7. Select Custom Installation when prompted Formatted: Bullets and Numbering The operating system license shipped with HP PCs does not grant re-imaging and deployment rights. Installing the operating system and drivers This section provides guidelines for operating...
Backup and Recovery - Windows XP
Page 7
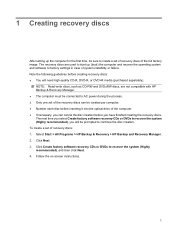
...: ● You will be sure to create a set of the full factory image. Follow the on-screen instructions. 1 Note the following guidelines before you have finished creating the recovery discs. Select Start > All Programs > HP Backup & Recovery > HP Backup and Recovery Manager. 2. Click Next. 3. The next time you select Create factory software recovery...
...: ● You will be sure to create a set of the full factory image. Follow the on-screen instructions. 1 Note the following guidelines before you have finished creating the recovery discs. Select Start > All Programs > HP Backup & Recovery > HP Backup and Recovery Manager. 2. Click Next. 3. The next time you select Create factory software recovery...
Backup and Recovery - Windows XP
Page 10
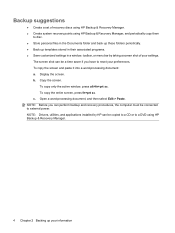
... the active window, press alt+fn+prt sc. To copy the entire screen, press fn+prt sc. NOTE: Drivers, utilities, and applications installed by taking a screen shot of recovery discs using HP Backup and Recovery Manager. ● Create system recovery points using HP Backup and Recovery Manager. 4 Chapter 2 Backing up templates stored in their...
... the active window, press alt+fn+prt sc. To copy the entire screen, press fn+prt sc. NOTE: Drivers, utilities, and applications installed by taking a screen shot of recovery discs using HP Backup and Recovery Manager. ● Create system recovery points using HP Backup and Recovery Manager. 4 Chapter 2 Backing up templates stored in their...
Backup and Recovery - Windows XP
Page 11
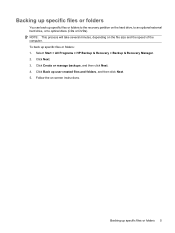
Select Start > All Programs > HP Backup & Recovery > HP Backup and Recovery Manager. 2. Follow the on the file size and the speed of the computer. Backing up specific files or folders You can back ... up specific files or folders 5 Click Next. 3. Click Back up to optical discs (CDs or DVDs). NOTE: This process will take several minutes, depending on -screen instructions.
Select Start > All Programs > HP Backup & Recovery > HP Backup and Recovery Manager. 2. Follow the on the file size and the speed of the computer. Backing up specific files or folders You can back ... up specific files or folders 5 Click Next. 3. Click Back up to optical discs (CDs or DVDs). NOTE: This process will take several minutes, depending on -screen instructions.

Backup and Recovery - Windows XP
Page 12
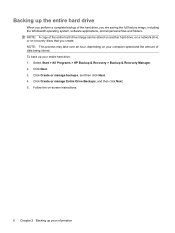
..., you create. Click Next. 3. Click Back up your information To back up entire hard drive, and then click Next. 5. Select Start > All Programs > HP Backup & Recovery > HP Backup and Recovery Manager. 2. Click Back up your entire hard drive: 1. Follow the on recovery discs that you are saving the full factory image... personal files and folders. NOTE: A copy of the entire hard drive image can be stored on another hard drive, on a network drive, or on -screen instructions. 6 Chapter 2 Backing up to protect system settings and important data files, and then click Next. 4.
..., you create. Click Next. 3. Click Back up your information To back up entire hard drive, and then click Next. 5. Select Start > All Programs > HP Backup & Recovery > HP Backup and Recovery Manager. 2. Click Back up your entire hard drive: 1. Follow the on recovery discs that you are saving the full factory image... personal files and folders. NOTE: A copy of the entire hard drive image can be stored on another hard drive, on a network drive, or on -screen instructions. 6 Chapter 2 Backing up to protect system settings and important data files, and then click Next. 4.
Backup and Recovery - Windows XP
Page 13
Click Back up modifications since that recovery point. Follow the on-screen instructions. Creating recovery points 7 To create a system recovery point: 1. Click Create or manage Recovery Points, and then click Next. 5. NOTE: The first system ...Creating recovery points When you back up to protect system settings and important data files, and then click Next. 4. Select Start > All Programs > HP Backup & Recovery > HP Backup and Recovery Manager. 2. This allows you to that time. You can then recover back to save a snapshot of your system. Subsequent recovery points...
Click Back up modifications since that recovery point. Follow the on-screen instructions. Creating recovery points 7 To create a system recovery point: 1. Click Create or manage Recovery Points, and then click Next. 5. NOTE: The first system ...Creating recovery points When you back up to protect system settings and important data files, and then click Next. 4. Select Start > All Programs > HP Backup & Recovery > HP Backup and Recovery Manager. 2. This allows you to that time. You can then recover back to save a snapshot of your system. Subsequent recovery points...

Backup and Recovery - Windows XP
Page 14
Follow the on-screen instructions. 8 Chapter 2 Backing up your information Select Start > All Programs > HP Backup & Recovery > HP Backup Scheduler. 2. To schedule backups: 1. Scheduling backups Use HP Backup Scheduler to an optional docking station (select models only). With this tool, you can schedule backups at specific intervals (daily, weekly, or monthly) or at specific events, such as at system restart or when you dock to schedule backups for the entire system, for recovery points, or for specific files and folders.
Follow the on-screen instructions. 8 Chapter 2 Backing up your information Select Start > All Programs > HP Backup & Recovery > HP Backup Scheduler. 2. To schedule backups: 1. Scheduling backups Use HP Backup Scheduler to an optional docking station (select models only). With this tool, you can schedule backups at specific intervals (daily, weekly, or monthly) or at specific events, such as at system restart or when you dock to schedule backups for the entire system, for recovery points, or for specific files and folders.

Backup and Recovery - Windows XP
Page 16
Back up all personal files. 2. Insert the first recovery disc into the optical drive and restart the computer. 3. Performing a recovery from the recovery discs To perform a recovery from the recovery discs, follow these steps: 1. Follow the on-screen instructions. 10 Chapter 3 Performing a recovery
Back up all personal files. 2. Insert the first recovery disc into the optical drive and restart the computer. 3. Performing a recovery from the recovery discs To perform a recovery from the recovery discs, follow these steps: 1. Follow the on-screen instructions. 10 Chapter 3 Performing a recovery

Backup and Recovery - Windows XP
Page 18
Initiating a recovery in Windows To initiate a recovery in Windows, follow these steps: 1. Click Recover important files or the entire system, and then click Next. 5. Click Next. 4. Follow the on-screen instructions. 12 Chapter 3 Performing a recovery Select Start > All Programs > HP Backup & Recovery > HP Backup and Recovery Manager. 3. Back up all personal files. 2.
Initiating a recovery in Windows To initiate a recovery in Windows, follow these steps: 1. Click Recover important files or the entire system, and then click Next. 5. Click Next. 4. Follow the on-screen instructions. 12 Chapter 3 Performing a recovery Select Start > All Programs > HP Backup & Recovery > HP Backup and Recovery Manager. 3. Back up all personal files. 2.

Backup and Recovery - Windows XP
Page 19
Follow the on-screen instructions. Initiating a recovery from the hard drive recovery partition To initiate a recovery from the hard drive 13 Restart the computer, and then press f11 before the Windows operating system loads. 3. Back up all personal files. 2. Click a recovery option, and then click Next. 4. Performing a recovery from the hard drive recovery partition, follow these steps: 1.
Follow the on-screen instructions. Initiating a recovery from the hard drive recovery partition To initiate a recovery from the hard drive 13 Restart the computer, and then press f11 before the Windows operating system loads. 3. Back up all personal files. 2. Click a recovery option, and then click Next. 4. Performing a recovery from the hard drive recovery partition, follow these steps: 1.
Backup and Recovery - Windows XP and Windows Vista
Page 7
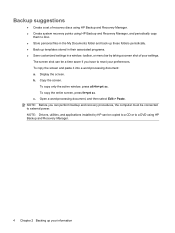
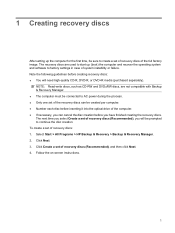
...To create a set of recovery discs: 1. Click Create a set of recovery discs (Recommended), and then click Next. 4. Follow the on-screen instructions. 1 The recovery discs are not compatible with Backup & Recovery Manager. ● The computer must be connected to create a set of ...recovery discs can cancel the disc creation before inserting it into the optical drive of system instability or failure. Select Start > All Programs > HP Backup & Recovery > Backup & Recovery Manager. 2. Note the following guidelines before creating recovery discs: ● You will be created per...
...To create a set of recovery discs: 1. Click Create a set of recovery discs (Recommended), and then click Next. 4. Follow the on-screen instructions. 1 The recovery discs are not compatible with Backup & Recovery Manager. ● The computer must be connected to create a set of ...recovery discs can cancel the disc creation before inserting it into the optical drive of system instability or failure. Select Start > All Programs > HP Backup & Recovery > Backup & Recovery Manager. 2. Note the following guidelines before creating recovery discs: ● You will be created per...
Backup and Recovery - Windows XP and Windows Vista
Page 10
... the active window, press alt+fn+prt sc. Display the screen. NOTE: Drivers, utilities, and applications installed by taking a screen shot of recovery discs using HP Backup & Recovery Manager. ● Create system recovery points using HP Backup & Recovery Manager. 4 Chapter 2 Backing up templates stored...window, toolbar, or menu bar by HP can be connected to reset your preferences. b. c. Copy the screen. Open a word-processing document, and then select Edit > Paste. The screen shot can be copied to a CD or to a DVD using HP Backup & Recovery Manager, and periodically ...
... the active window, press alt+fn+prt sc. Display the screen. NOTE: Drivers, utilities, and applications installed by taking a screen shot of recovery discs using HP Backup & Recovery Manager. ● Create system recovery points using HP Backup & Recovery Manager. 4 Chapter 2 Backing up templates stored...window, toolbar, or menu bar by HP can be connected to reset your preferences. b. c. Copy the screen. Open a word-processing document, and then select Edit > Paste. The screen shot can be copied to a CD or to a DVD using HP Backup & Recovery Manager, and periodically ...
Backup and Recovery - Windows XP and Windows Vista
Page 11
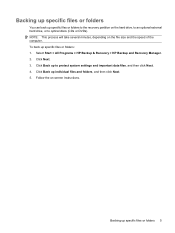
Backing up specific files or folders You can back up specific files or folders to the recovery partition on -screen instructions. To back up specific files or folders 5 Click Next. 3. Backing up specific files or folders: 1. Follow the on the hard drive, to an optional ... the file size and the speed of the computer. Click Back up user created files and folders, and then click Next. 5. Select Start > All Programs > HP Backup & Recovery > Backup & Recovery Manager. 2. Click Create or manage backups, and then click Next. 4.
Backing up specific files or folders You can back up specific files or folders to the recovery partition on -screen instructions. To back up specific files or folders 5 Click Next. 3. Backing up specific files or folders: 1. Follow the on the hard drive, to an optional ... the file size and the speed of the computer. Click Back up user created files and folders, and then click Next. 5. Select Start > All Programs > HP Backup & Recovery > Backup & Recovery Manager. 2. Click Create or manage backups, and then click Next. 4.
Backup and Recovery - Windows XP and Windows Vista
Page 12
To back up your information Click Next. 3. Click Create or manage backups, and then click Next. 4. Follow the on-screen instructions. 6 Chapter 2 Backing up your computer speed and the amount of the hard drive, you are saving the full factory image, including the ...Drive Backups, and then click Next. 5. NOTE: This process may take over an hour, depending on recovery discs that you create. Select Start > All Programs > HP Backup & Recovery > Backup & Recovery Manager. 2. Backing up the entire hard drive When you perform a complete backup of data being stored. NOTE: A copy of...
To back up your information Click Next. 3. Click Create or manage backups, and then click Next. 4. Follow the on-screen instructions. 6 Chapter 2 Backing up your computer speed and the amount of the hard drive, you are saving the full factory image, including the ...Drive Backups, and then click Next. 5. NOTE: This process may take over an hour, depending on recovery discs that you create. Select Start > All Programs > HP Backup & Recovery > Backup & Recovery Manager. 2. Backing up the entire hard drive When you perform a complete backup of data being stored. NOTE: A copy of...

Backup and Recovery - Windows XP and Windows Vista
Page 13
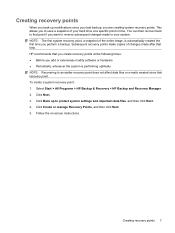
...you perform a backup. This allows you to save a snapshot of the entire image, is performing optimally NOTE: Recovering to that time. HP recommends that recovery point. NOTE: The first system recovery point, a snapshot of your system. Click Create or manage Recovery Points, and... that point if you are creating system recovery points. Click Next. 3. Select Start > All Programs > HP Backup & Recovery > Backup & Recovery Manager. 2. Follow the on-screen instructions. Creating recovery points 7 Subsequent recovery points make copies of changes made to your hard drive at the...
...you perform a backup. This allows you to save a snapshot of the entire image, is performing optimally NOTE: Recovering to that time. HP recommends that recovery point. NOTE: The first system recovery point, a snapshot of your system. Click Create or manage Recovery Points, and... that point if you are creating system recovery points. Click Next. 3. Select Start > All Programs > HP Backup & Recovery > Backup & Recovery Manager. 2. Follow the on-screen instructions. Creating recovery points 7 Subsequent recovery points make copies of changes made to your hard drive at the...

Backup and Recovery - Windows XP and Windows Vista
Page 14
Follow the on-screen instructions. 8 Chapter 2 Backing up your information To schedule backups: 1. Scheduling backups Use HP Backup Scheduler to an optional docking station (select models only). Select Start > All Programs > HP Backup & Recovery > HP Backup Scheduler. 2. With this tool, you can schedule backups at specific intervals (daily, weekly, or monthly) or at specific events, such as at system restart or when you dock to schedule backups for the entire system, for recovery points, or for specific files and folders.
Follow the on-screen instructions. 8 Chapter 2 Backing up your information To schedule backups: 1. Scheduling backups Use HP Backup Scheduler to an optional docking station (select models only). Select Start > All Programs > HP Backup & Recovery > HP Backup Scheduler. 2. With this tool, you can schedule backups at specific intervals (daily, weekly, or monthly) or at specific events, such as at system restart or when you dock to schedule backups for the entire system, for recovery points, or for specific files and folders.


