
HP USB Digital Drive
Page 9
Select the Digital Drive and wait until the "Safe to remove the Digital Drive when the status light on the Digital Drive is in the extended position, return it on its track for safe storage. 8 User Guide Gently unplug the Digital Drive from the USB port. ✎ If the USB connector cable is flashing. 1. Select the "Safely Remove Hardware" icon on your screen. 3. Disconnecting the Digital Drive ✎ Do not attempt to Remove Hardware" message appears on your taskbar. A dialog box displays a list of connected devices. 2.
Select the Digital Drive and wait until the "Safe to remove the Digital Drive when the status light on the Digital Drive is in the extended position, return it on its track for safe storage. 8 User Guide Gently unplug the Digital Drive from the USB port. ✎ If the USB connector cable is flashing. 1. Select the "Safely Remove Hardware" icon on your screen. 3. Disconnecting the Digital Drive ✎ Do not attempt to Remove Hardware" message appears on your taskbar. A dialog box displays a list of connected devices. 2.
Bluetooth Wireless Technology Basics
Page 6
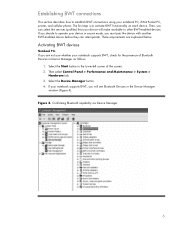
..., iPAQ Pocket PC, printer, and cellular phone. Then, you will make available to other BWT-enabled devices. If your notebook supports BWT, you can interoperate. Select the Start button in the lower-left corner of Bluetooth Devices in Device Manager as follows: ..., you are explained below. Establishing BWT connections This section describes how to establish BWT connections using your notebook supports BWT, check for the presence of the screen. 2. Activating BWT devices Notebook PCs If you must pair the device with another BWT-enabled device before they can select the services ...
..., iPAQ Pocket PC, printer, and cellular phone. Then, you will make available to other BWT-enabled devices. If your notebook supports BWT, you can interoperate. Select the Start button in the lower-left corner of Bluetooth Devices in Device Manager as follows: ..., you are explained below. Establishing BWT connections This section describes how to establish BWT connections using your notebook supports BWT, check for the presence of the screen. 2. Activating BWT devices Notebook PCs If you must pair the device with another BWT-enabled device before they can select the services ...

Bluetooth Wireless Technology Basics
Page 7
These steps are explained below. Select the check box next to Bluetooth by hp to Bluetooth operations. Set up the BWT software. The color of the icon indicates the status of the screen. Then you must install the software as follows: 1. Select Start > All Programs > Software... software. 2. Install the BWT software The required BWT software comes preloaded on your notebook. When the Software Setup Welcome window is disabled (red logo), enable it on by pressing the wireless button on HP notebook PCs; Refer to configure the service and security features as the operating system CD...
These steps are explained below. Select the check box next to Bluetooth by hp to Bluetooth operations. Set up the BWT software. The color of the icon indicates the status of the screen. Then you must install the software as follows: 1. Select Start > All Programs > Software... software. 2. Install the BWT software The required BWT software comes preloaded on your notebook. When the Software Setup Welcome window is disabled (red logo), enable it on by pressing the wireless button on HP notebook PCs; Refer to configure the service and security features as the operating system CD...

Bluetooth Wireless Technology Basics
Page 8
... corner of the BWT profiles built into HP notebook PCs, iPAQ Pocket PCs, and printers. The iPAQ Pocket PC requires a third-party printing application such as pressing Menu > Connect > Bluetooth. HP products D = supported by HP BWT-enabled products. Printers The HP 995c Deskjet printer and some of the Today screen to activate BWT functionality, to create...
... corner of the BWT profiles built into HP notebook PCs, iPAQ Pocket PCs, and printers. The iPAQ Pocket PC requires a third-party printing application such as pressing Menu > Connect > Bluetooth. HP products D = supported by HP BWT-enabled products. Printers The HP 995c Deskjet printer and some of the Today screen to activate BWT functionality, to create...
Installing Windows 7 on HP Compaq and EliteBook Notebook PCs
Page 3
... installing Windows 7 Beta 1. a. Prerequisites You will delete all personal data (files, pictures, etc.) prior to installing Microsoft Windows 7. HP cannot be a technical resource for those who perform a clean installation of Microsoft Windows 7. Installing the operating system Perform the following before ...this document to obtain the proper license agreements. Insert the OS DVD and power on the target system. Follow the on-screen instructions for users who have the proper license to make the optical drive the first boot device. 2. Select Custom Installation...
... installing Windows 7 Beta 1. a. Prerequisites You will delete all personal data (files, pictures, etc.) prior to installing Microsoft Windows 7. HP cannot be a technical resource for those who perform a clean installation of Microsoft Windows 7. Installing the operating system Perform the following before ...this document to obtain the proper license agreements. Insert the OS DVD and power on the target system. Follow the on-screen instructions for users who have the proper license to make the optical drive the first boot device. 2. Select Custom Installation...
Intel Centrino 2 with vProâ„¢ technology Setup and Configuration for HP Business Notebook PCs
Page 4
... accept, then select Save Changes And Exit under the File menu to reboot. 5) Hit Ctrl-P when prompted at the Intel Active Management screen to In-Setup phase. The system will appear. The following characters are case sensitive. The default password is good practice to double check ...password must be the same as a strong password. AMT Setup and Configuration Steps: When going through the options in place. This whitepaper details HP recommended settings on options, some of which may be entered twice for the first time (Factory phase), the default settings are accessible. 8)...
... accept, then select Save Changes And Exit under the File menu to reboot. 5) Hit Ctrl-P when prompted at the Intel Active Management screen to In-Setup phase. The system will appear. The following characters are case sensitive. The default password is good practice to double check ...password must be the same as a strong password. AMT Setup and Configuration Steps: When going through the options in place. This whitepaper details HP recommended settings on options, some of which may be entered twice for the first time (Factory phase), the default settings are accessible. 8)...
Intel Centrino 2 with vProâ„¢ technology Setup and Configuration for HP Business Notebook PCs
Page 11
... into the Intel AMT Configuration. The act of the options will be set differently than could be displayed in one page. The Intel AMT Configuration screen has more information. Go into TCP/IP. b. In this mode, a Setup and Configuration Server (S&CS) is a server that runs an application over a network that performs...
... into the Intel AMT Configuration. The act of the options will be set differently than could be displayed in one page. The Intel AMT Configuration screen has more information. Go into TCP/IP. b. In this mode, a Setup and Configuration Server (S&CS) is a server that runs an application over a network that performs...
Intel Centrino 2 with vProâ„¢ technology Setup and Configuration for HP Business Notebook PCs
Page 15
... will return all AMT Configuration setting to factory defaults. Return to Default Return to the AMT Configuration screen. After unprovisioning is done, control is passed back to Default is done through the AMT Configuration Screen and the Un-Provision option. 1) Go into Un-Provision. For AMT 4.x, once the MEBx password has been...
... will return all AMT Configuration setting to factory defaults. Return to Default Return to the AMT Configuration screen. After unprovisioning is done, control is passed back to Default is done through the AMT Configuration Screen and the Un-Provision option. 1) Go into Un-Provision. For AMT 4.x, once the MEBx password has been...
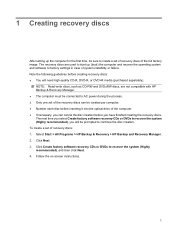
Backup and Recovery - Windows XP
Page 7
... you select Create factory software recovery CDs or DVDs to recover the system (Highly recommended), you have finished creating the recovery discs. Follow the on-screen instructions. 1 To create a set of recovery discs of the full factory image. NOTE: Read-write discs, such as CD-RW and DVD±RW..., are used to start up the computer for the first time, be prompted to continue the disc creation. The recovery discs are not compatible with HP Backup & Recovery Manager. ● The computer must be connected to AC power during the process. ● Only one set of the recovery discs can...
... you select Create factory software recovery CDs or DVDs to recover the system (Highly recommended), you have finished creating the recovery discs. Follow the on-screen instructions. 1 To create a set of recovery discs of the full factory image. NOTE: Read-write discs, such as CD-RW and DVD±RW..., are used to start up the computer for the first time, be prompted to continue the disc creation. The recovery discs are not compatible with HP Backup & Recovery Manager. ● The computer must be connected to AC power during the process. ● Only one set of the recovery discs can...
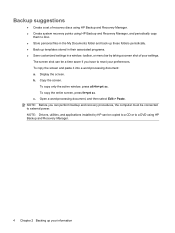
Backup and Recovery - Windows XP
Page 10
... recovery procedures, the computer must be copied to a CD or to a DVD using HP Backup and Recovery Manager, and periodically copy them to disc. ● Store personal files in a window, toolbar, or menu bar by taking a screen shot of your preferences. c. Open a word-processing document, and then select Edit ...> Paste. NOTE: Before you have to external power. Display the screen. To copy only the active window, press alt+fn+prt sc. Copy the screen. To copy the entire screen, press fn+prt sc. b. The screen shot can be a time saver if you can be connected to reset your...
... recovery procedures, the computer must be copied to a CD or to a DVD using HP Backup and Recovery Manager, and periodically copy them to disc. ● Store personal files in a window, toolbar, or menu bar by taking a screen shot of your preferences. c. Open a word-processing document, and then select Edit ...> Paste. NOTE: Before you have to external power. Display the screen. To copy only the active window, press alt+fn+prt sc. Copy the screen. To copy the entire screen, press fn+prt sc. b. The screen shot can be a time saver if you can be connected to reset your...
Backup and Recovery - Windows XP
Page 11
... several minutes, depending on -screen instructions. Click Next. 3. Backing up specific files or folders: 1. To back up specific files or folders 5 Click Back up individual files and folders, and then click Next. 5. Click Back up to optical discs (CDs or DVDs). Select Start > All Programs > HP Backup & Recovery > HP Backup and Recovery Manager...
... several minutes, depending on -screen instructions. Click Next. 3. Backing up specific files or folders: 1. To back up specific files or folders 5 Click Back up individual files and folders, and then click Next. 5. Click Back up to optical discs (CDs or DVDs). Select Start > All Programs > HP Backup & Recovery > HP Backup and Recovery Manager...

Backup and Recovery - Windows XP
Page 12
... all personal files and folders. Follow the on your computer speed and the amount of the hard drive, you create. Select Start > All Programs > HP Backup & Recovery > HP Backup and Recovery Manager. 2. To back up the entire hard drive When you perform a complete backup of data being stored. Click Next. 3. Click Back... Next. 4. Click Back up entire hard drive, and then click Next. 5. Backing up your information NOTE: This process may take over an hour, depending on -screen instructions. 6 Chapter 2 Backing up your entire hard drive: 1.
... all personal files and folders. Follow the on your computer speed and the amount of the hard drive, you create. Select Start > All Programs > HP Backup & Recovery > HP Backup and Recovery Manager. 2. To back up the entire hard drive When you perform a complete backup of data being stored. Click Next. 3. Click Back... Next. 4. Click Back up entire hard drive, and then click Next. 5. Backing up your information NOTE: This process may take over an hour, depending on -screen instructions. 6 Chapter 2 Backing up your entire hard drive: 1.
Backup and Recovery - Windows XP
Page 13
Subsequent recovery points make copies of changes made to your system. Select Start > All Programs > HP Backup & Recovery > HP Backup and Recovery Manager. 2. Click Create or manage Recovery Points, and then click Next. 5. NOTE: The first system recovery point, a snapshot of ...creating system recovery points. Creating recovery points When you back up to protect system settings and important data files, and then click Next. 4. HP recommends that recovery point. Click Back up modifications since that you want to reverse subsequent changes made after that point if you create recovery ...
Subsequent recovery points make copies of changes made to your system. Select Start > All Programs > HP Backup & Recovery > HP Backup and Recovery Manager. 2. Click Create or manage Recovery Points, and then click Next. 5. NOTE: The first system recovery point, a snapshot of ...creating system recovery points. Creating recovery points When you back up to protect system settings and important data files, and then click Next. 4. HP recommends that recovery point. Click Back up modifications since that you want to reverse subsequent changes made after that point if you create recovery ...

Backup and Recovery - Windows XP
Page 14
Follow the on-screen instructions. 8 Chapter 2 Backing up your information With this tool, you can schedule backups at specific intervals (daily, weekly, or monthly) or at specific events, such as at system restart or when you dock to schedule backups for the entire system, for recovery points, or for specific files and folders. Select Start > All Programs > HP Backup & Recovery > HP Backup Scheduler. 2. Scheduling backups Use HP Backup Scheduler to an optional docking station (select models only). To schedule backups: 1.
Follow the on-screen instructions. 8 Chapter 2 Backing up your information With this tool, you can schedule backups at specific intervals (daily, weekly, or monthly) or at specific events, such as at system restart or when you dock to schedule backups for the entire system, for recovery points, or for specific files and folders. Select Start > All Programs > HP Backup & Recovery > HP Backup Scheduler. 2. Scheduling backups Use HP Backup Scheduler to an optional docking station (select models only). To schedule backups: 1.

Backup and Recovery - Windows XP
Page 16
Back up all personal files. 2. Insert the first recovery disc into the optical drive and restart the computer. 3. Follow the on-screen instructions. 10 Chapter 3 Performing a recovery Performing a recovery from the recovery discs To perform a recovery from the recovery discs, follow these steps: 1.
Back up all personal files. 2. Insert the first recovery disc into the optical drive and restart the computer. 3. Follow the on-screen instructions. 10 Chapter 3 Performing a recovery Performing a recovery from the recovery discs To perform a recovery from the recovery discs, follow these steps: 1.

Backup and Recovery - Windows XP
Page 18
Select Start > All Programs > HP Backup & Recovery > HP Backup and Recovery Manager. 3. Back up all personal files. 2. Click Recover important files or the entire system, and then click Next. 5. Initiating a recovery in Windows To initiate a recovery in Windows, follow these steps: 1. Click Next. 4. Follow the on-screen instructions. 12 Chapter 3 Performing a recovery
Select Start > All Programs > HP Backup & Recovery > HP Backup and Recovery Manager. 3. Back up all personal files. 2. Click Recover important files or the entire system, and then click Next. 5. Initiating a recovery in Windows To initiate a recovery in Windows, follow these steps: 1. Click Next. 4. Follow the on-screen instructions. 12 Chapter 3 Performing a recovery

Backup and Recovery - Windows XP
Page 19
Follow the on-screen instructions. Performing a recovery from the hard drive recovery partition, follow these steps: 1. Back up all personal files. 2. Click a recovery option, and then click Next. 4. Restart the computer, and then press f11 before the Windows operating system loads. 3. Initiating a recovery from the hard drive recovery partition To initiate a recovery from the hard drive 13
Follow the on-screen instructions. Performing a recovery from the hard drive recovery partition, follow these steps: 1. Back up all personal files. 2. Click a recovery option, and then click Next. 4. Restart the computer, and then press f11 before the Windows operating system loads. 3. Initiating a recovery from the hard drive recovery partition To initiate a recovery from the hard drive 13
Backup and Recovery - Windows XP and Windows Vista
Page 7
.... Note the following guidelines before you will need high-quality CD-R, DVD-R, or DVD+R media (purchased separately). Select Start > All Programs > HP Backup & Recovery > Backup & Recovery Manager. 2. Follow the on-screen instructions. 1 1 Creating recovery discs After setting up (boot) the computer and recover the operating system and software to create a set of...
.... Note the following guidelines before you will need high-quality CD-R, DVD-R, or DVD+R media (purchased separately). Select Start > All Programs > HP Backup & Recovery > Backup & Recovery Manager. 2. Follow the on-screen instructions. 1 1 Creating recovery discs After setting up (boot) the computer and recover the operating system and software to create a set of...
Backup and Recovery - Windows XP and Windows Vista
Page 10
... of your settings. The screen shot can be a time saver if you can perform backup and recovery procedures, the computer must be copied to a CD or to disc. ● Store personal files in a window, toolbar, or menu bar by HP can be connected to reset your preferences. Backup ... copy them to a DVD using HP Backup & Recovery Manager. 4 Chapter 2 Backing up templates stored in their associated programs. ● Save customized settings in the Documents folder and back up these folders periodically. ● Back up your information To copy the entire screen, press fn+prt sc. To ...
... of your settings. The screen shot can be a time saver if you can perform backup and recovery procedures, the computer must be copied to a CD or to disc. ● Store personal files in a window, toolbar, or menu bar by HP can be connected to reset your preferences. Backup ... copy them to a DVD using HP Backup & Recovery Manager. 4 Chapter 2 Backing up templates stored in their associated programs. ● Save customized settings in the Documents folder and back up these folders periodically. ● Back up your information To copy the entire screen, press fn+prt sc. To ...
Backup and Recovery - Windows XP and Windows Vista
Page 11
... You can back up specific files or folders to the recovery partition on the file size and the speed of the computer. Follow the on-screen instructions. Click Next. 3. Backing up specific files or folders 5 Click Create or manage backups, and then click Next. 4. Select Start > All Programs...
... You can back up specific files or folders to the recovery partition on the file size and the speed of the computer. Follow the on-screen instructions. Click Next. 3. Backing up specific files or folders 5 Click Create or manage backups, and then click Next. 4. Select Start > All Programs...


