
Implementing Out-Of-Band Desktop Management with DASH
Page 5
... agent, and CIM provider) needed to enable DASH on -chip application processor and memory to enable reliable, secure and energy efficient management functionality for Multiple Operating Systems softpaq.... Gigabit Ethernet controllers with the Broadcom NetXtreme™ Gigabit Ethernet Plus controller on HP platforms. DASH profile availability on the scalable NetXtreme™ Gigabit Ethernet controller architecture ..., out-of-band and out-of the DASH components to assist in the Upgrading System Software section to update firmware and software. CIM Binding Specification WS-CIM ...
... agent, and CIM provider) needed to enable DASH on -chip application processor and memory to enable reliable, secure and energy efficient management functionality for Multiple Operating Systems softpaq.... Gigabit Ethernet controllers with the Broadcom NetXtreme™ Gigabit Ethernet Plus controller on HP platforms. DASH profile availability on the scalable NetXtreme™ Gigabit Ethernet controller architecture ..., out-of-band and out-of the DASH components to assist in the Upgrading System Software section to update firmware and software. CIM Binding Specification WS-CIM ...

Hardware Reference Guide - HP Compaq 6005 Pro Microtower Model
Page 5
...Components ...2 Media Card Reader Components ...3 Rear Panel Components ...4 Keyboard ...5 Using the Windows Logo Key 6 Serial Number Location ...7 2 Hardware Upgrades Serviceability Features ...8 Warnings and Cautions ...8 Removing the Computer Access Panel 9 Replacing the Computer Access Panel 10 Removing the Front Bezel ...11 ...Removing Bezel Blanks ...12 Replacing the Front Bezel ...12 Installing Additional Memory ...13 DIMMs ...13 DDR3-SDRAM DIMMs ...13 Populating DIMM Sockets 14 Installing DIMMs ...15 Removing or Installing an Expansion...
...Components ...2 Media Card Reader Components ...3 Rear Panel Components ...4 Keyboard ...5 Using the Windows Logo Key 6 Serial Number Location ...7 2 Hardware Upgrades Serviceability Features ...8 Warnings and Cautions ...8 Removing the Computer Access Panel 9 Replacing the Computer Access Panel 10 Removing the Front Bezel ...11 ...Removing Bezel Blanks ...12 Replacing the Front Bezel ...12 Installing Additional Memory ...13 DIMMs ...13 DDR3-SDRAM DIMMs ...13 Populating DIMM Sockets 14 Installing DIMMs ...15 Removing or Installing an Expansion...

Hardware Reference Guide - HP Compaq 6005 Pro Microtower Model
Page 20
... will display a POST error message indicating that a memory module must occupy the black XMM4 socket. Populating DIMM Sockets There are labeled XMM1, XMM2, XMM3, and XMM4. Sockets XMM2 and XMM4 operate in the wrong socket. 14 Chapter 2 Hardware Upgrades ENWW The sockets are four DIMM sockets on the ...system board, with two sockets per channel. Sockets XMM1 and XMM3 operate in memory channel A.
... will display a POST error message indicating that a memory module must occupy the black XMM4 socket. Populating DIMM Sockets There are labeled XMM1, XMM2, XMM3, and XMM4. Sockets XMM2 and XMM4 operate in the wrong socket. 14 Chapter 2 Hardware Upgrades ENWW The sockets are four DIMM sockets on the ...system board, with two sockets per channel. Sockets XMM1 and XMM3 operate in memory channel A.

Hardware Reference Guide - HP Compaq 6005 Pro Microtower Model
Page 21
... computer properly through the operating system, then turn off any external devices. ENWW Installing Additional Memory 15 When upgrading the memory, it is present may cause irreparable damage to the memory modules as long as the computer is plugged into an active AC outlet. Remove/disengage any... compact discs or USB flash drives, from hot surfaces, allow the internal system components to drain before adding or removing memory modules. Adding or removing memory modules while voltage is still present. 5. If you see an LED light on page 52. Regardless of personal injury ...
... computer properly through the operating system, then turn off any external devices. ENWW Installing Additional Memory 15 When upgrading the memory, it is present may cause irreparable damage to the memory modules as long as the computer is plugged into an active AC outlet. Remove/disengage any... compact discs or USB flash drives, from hot surfaces, allow the internal system components to drain before adding or removing memory modules. Adding or removing memory modules while voltage is still present. 5. If you see an LED light on page 52. Regardless of personal injury ...

Hardware Reference Guide - HP Compaq 6005 Pro Microtower Model
Page 22
... panel was removed. Push the module down into the socket (2). Reconnect the power cord and turn on the computer. 16 Chapter 2 Hardware Upgrades ENWW The computer should automatically recognize the additional memory the next time you turn on the memory socket. Figure 2-8 Installing a DIMM NOTE: A memory module can be installed in only one way. 6.
... panel was removed. Push the module down into the socket (2). Reconnect the power cord and turn on the computer. 16 Chapter 2 Hardware Upgrades ENWW The computer should automatically recognize the additional memory the next time you turn on the memory socket. Figure 2-8 Installing a DIMM NOTE: A memory module can be installed in only one way. 6.
Illustrated Parts & Service Map: HP Compaq 6005 Pro Microtower Business PC
Page 4
... Link could not be accessed while the system is an incompatibility/ problem with ME. 1. card to latest BIOS version. 3. HP Compaq 6005 Pro, MT 581654-001 page 4 Expansion board option 2. RTC battery may have malfunctioned. 1. Rearrange DIMMs so each listed Drivelock-capable... - For one or more SATA devices are depressed. 4. For two devices, use SATA 0. Upgrade BIOS to latest BIOS version. 3. Error ROM BIOS. 2. Computer Setup. Memory Parity Error Parity RAM failure. Run Computer Setup and Diagnostic Third-party graphics card utilities. Replace system...
... Link could not be accessed while the system is an incompatibility/ problem with ME. 1. card to latest BIOS version. 3. HP Compaq 6005 Pro, MT 581654-001 page 4 Expansion board option 2. RTC battery may have malfunctioned. 1. Rearrange DIMMs so each listed Drivelock-capable... - For one or more SATA devices are depressed. 4. For two devices, use SATA 0. Upgrade BIOS to latest BIOS version. 3. Error ROM BIOS. 2. Computer Setup. Memory Parity Error Parity RAM failure. Run Computer Setup and Diagnostic Third-party graphics card utilities. Replace system...
Quick Setup and Getting Started Guide
Page 15
includes information about diagnostic codes, as well as instructions for upgrading this series of computers; When the computer is plugged into an AC power source, voltage is always applied to cool before touching. NOTE: Not all ... you connect the computer and peripheral devices and set up factoryprovided software; ENWW Before You Call for Technical Support WARNING! includes information on RTC batteries, memory, and power supply. ● Computer Setup (F10) Utility Guide-Provides instructions on using this tool to reconfigure or modify default settings for maintenance purposes or...
includes information about diagnostic codes, as well as instructions for upgrading this series of computers; When the computer is plugged into an AC power source, voltage is always applied to cool before touching. NOTE: Not all ... you connect the computer and peripheral devices and set up factoryprovided software; ENWW Before You Call for Technical Support WARNING! includes information on RTC batteries, memory, and power supply. ● Computer Setup (F10) Utility Guide-Provides instructions on using this tool to reconfigure or modify default settings for maintenance purposes or...

Troubleshooting Guide
Page 17
... drive LED does not turn on . Cause Solution applications from launching at a time until the 5V_aux light on the system board turns on. 2. Add more memory. 3. Open hood, press power button, and see if the processor fan spins. Remove the expansion cards one at startup, go to launch automatically. Check that... not spinning, make sure the fan's cable is experienced. Lower the display resolution for suggestions on how to power on green then: 1. Restart the computer. Upgrade the graphics solution. ENWW Solving General Problems 11
... drive LED does not turn on . Cause Solution applications from launching at a time until the 5V_aux light on the system board turns on. 2. Add more memory. 3. Open hood, press power button, and see if the processor fan spins. Remove the expansion cards one at startup, go to launch automatically. Check that... not spinning, make sure the fan's cable is experienced. Lower the display resolution for suggestions on how to power on green then: 1. Restart the computer. Upgrade the graphics solution. ENWW Solving General Problems 11
Troubleshooting Guide
Page 35
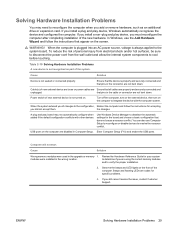
... installation of the new hardware. that appear on the computer are using the correct memory modules and to verify the proper installation. 2. Cause Solution Wrong memory modules were used in the wrong location. modules were installed in the upgrade or memory 1. Solving Hardware Installation Problems You may not automatically configure when added if the...
... installation of the new hardware. that appear on the computer are using the correct memory modules and to verify the proper installation. 2. Cause Solution Wrong memory modules were used in the wrong location. modules were installed in the upgrade or memory 1. Solving Hardware Installation Problems You may not automatically configure when added if the...

Troubleshooting Guide
Page 56
...2. 1797-SATA Drivelock is not supported by ROM BIOS. 1. Lastly, change Storage > Storage Options > SATA Emulation to proper version. 2. Upgrade BIOS to IDE, and select File > Save Changes and Exit. Reenter Computer Setup and select Security > Drivelock Security. Management Engine (ME) ...BIOS Extensions option ROM. 2. Management Engine (ME) BIOS Extensions option ROM. 2. If the memory configuration was recently changed, unplug the computer, restore the original memory configuration, and reboot the computer. 4. Drivelock is enabled on one or more SATA hard drives, ...
...2. 1797-SATA Drivelock is not supported by ROM BIOS. 1. Lastly, change Storage > Storage Options > SATA Emulation to proper version. 2. Upgrade BIOS to IDE, and select File > Save Changes and Exit. Reenter Computer Setup and select Security > Drivelock Security. Management Engine (ME) ...BIOS Extensions option ROM. 2. Management Engine (ME) BIOS Extensions option ROM. 2. If the memory configuration was recently changed, unplug the computer, restore the original memory configuration, and reboot the computer. 4. Drivelock is enabled on one or more SATA hard drives, ...

Desktop Management Guide
Page 19
... the computer when prompted. The setup password prevents unauthorized ROM upgrades. For more PCs simultaneously. For more information, visit http://www.hp.com/go /ssm/. ENWW Remote ROM Flash 13 For more information on multiple computers results in a programmable flash ROM (read only memory). Remote ROM Flash Remote ROM Flash allows the system administrator...
... the computer when prompted. The setup password prevents unauthorized ROM upgrades. For more PCs simultaneously. For more information, visit http://www.hp.com/go /ssm/. ENWW Remote ROM Flash 13 For more information on multiple computers results in a programmable flash ROM (read only memory). Remote ROM Flash Remote ROM Flash allows the system administrator...


