HP 5550dtn Close Front Covers - Color LaserJet Laser Printer
HP 5550dtn Close Front Covers
Related Manual Pages


Similar Questions

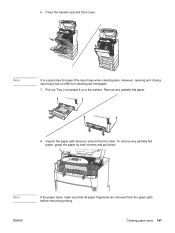
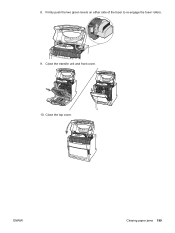
How Do I Close The Cover?
I have the HP P4015x that a school uses. I was wondering how do I close the cover lid? I push down o...
I have the HP P4015x that a school uses. I was wondering how do I close the cover lid? I push down o...
(Posted by chelleiasay 9 years ago)

Hp Laserjet 4015n Printer Top Cover Won't Close
(Posted by raseler 10 years ago)

Hp 3005 Error Is Close Top Cover
(Posted by incshahid 12 years ago)