HP 530 Recovery - Notebook PC
Related Manual Pages


Similar Questions

Where To Download Recovery Partition For Hp Mini Hp Mini 110-3110nr
I accidentally deleted the system partition recovery
I accidentally deleted the system partition recovery
(Posted by laurencelabador 8 years ago)
Recovery Discs
Hi,I need a Recovery Discs For my Hp Envy laptop.Its Model is: "HP ENVY TouchSmart m7-j010dx Noteboo...
Hi,I need a Recovery Discs For my Hp Envy laptop.Its Model is: "HP ENVY TouchSmart m7-j010dx Noteboo...
(Posted by mahmoudnl2 9 years ago)

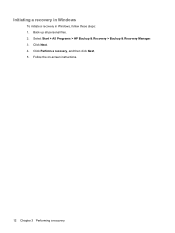
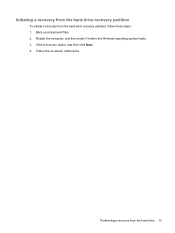
System Recovery
I would like to know how to do system recovery for my laptop
I would like to know how to do system recovery for my laptop
(Posted by kdmh03 13 years ago)