HP DesignJet 430, 450C, and 455CA Printer - User's Guide
Page 27
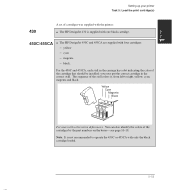
... the colors of cartridges was supplied with the printer: The HP DesignJet 430 is supplied with one black cartridge. 450C/455CA The HP DesignJet 450C and 455CA are supplied with four cartridges: - It is , from left to operate the 450C or 455CA with color-vision deficiencies. SETUP 1 Setting up your printer Task ... cartridge that should be installed: you must put the correct cartridge in the carriage has a dot indicating the color of the stall colors is not recommended to right, yellow, cyan, magenta and black. For the 450C and 455CA, each stall in the correct stall. Note.
... the colors of cartridges was supplied with the printer: The HP DesignJet 430 is supplied with one black cartridge. 450C/455CA The HP DesignJet 450C and 455CA are supplied with four cartridges: - It is , from left to operate the 450C or 455CA with color-vision deficiencies. SETUP 1 Setting up your printer Task ... cartridge that should be installed: you must put the correct cartridge in the carriage has a dot indicating the color of the stall colors is not recommended to right, yellow, cyan, magenta and black. For the 450C and 455CA, each stall in the correct stall. Note.

HP DesignJet 430, 450C, and 455CA Printer - User's Guide
Page 115
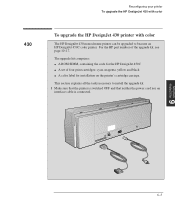
This section explains all the tasks necessary to become an HP DesignJet 450C color printer. For the HP part number of four print cartridges: cyan, magenta, yellow and black A color label for installation on the printer's cartridge carriage. The upgrade kit comprises: A ROM SIMM, containing the code for the HP DesignJet 450C A set of the upgrade kit, see page 10-16. RECONFIG- 6 URATION...
This section explains all the tasks necessary to become an HP DesignJet 450C color printer. For the HP part number of four print cartridges: cyan, magenta, yellow and black A color label for installation on the printer's cartridge carriage. The upgrade kit comprises: A ROM SIMM, containing the code for the HP DesignJet 450C A set of the upgrade kit, see page 10-16. RECONFIG- 6 URATION...
HP DesignJet 430, 450C, and 455CA Printer - User's Guide
Page 118
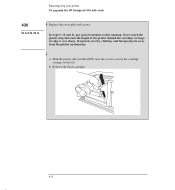
In steps 9, 10 and 11, pay special attention to access the cartridge carriage on the left. its edge is very sharp. b Remove the black cartridge. 6-8 Reconfiguring your printer To upgrade the HP DesignJet 430 with color 430 WARNING 8 Replace the cover plate and screws. Keep hair, jewelry, clothing, and foreign objects away from the printer mechanisms. 9 a With the printer still switched OFF, raise the cover to this warning. Don't touch the plastic strip that runs the length of the printer behind the cartridge carriage;
In steps 9, 10 and 11, pay special attention to access the cartridge carriage on the left. its edge is very sharp. b Remove the black cartridge. 6-8 Reconfiguring your printer To upgrade the HP DesignJet 430 with color 430 WARNING 8 Replace the cover plate and screws. Keep hair, jewelry, clothing, and foreign objects away from the printer mechanisms. 9 a With the printer still switched OFF, raise the cover to this warning. Don't touch the plastic strip that runs the length of the printer behind the cartridge carriage;
HP DesignJet 430, 450C, and 455CA Printer - User's Guide
Page 119
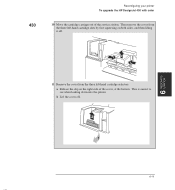
Then remove the cover from the three left -hand cartridge slots by first squeezing on the right side of the service station. a Release the clip on both sides, and then lifting it off . 2 1 RECONFIG- 6 URATION 6-9 b Lift the cover off . 1 2 1 11 Remove the cover from the three left -hand cartridge selectors. This is easiest to see when looking down into the printer. 430 Reconfiguring your printer To upgrade the HP DesignJet 430 with color 10 Move the cartridge carriage out of the cover, at the bottom.
Then remove the cover from the three left -hand cartridge slots by first squeezing on the right side of the service station. a Release the clip on both sides, and then lifting it off . 2 1 RECONFIG- 6 URATION 6-9 b Lift the cover off . 1 2 1 11 Remove the cover from the three left -hand cartridge selectors. This is easiest to see when looking down into the printer. 430 Reconfiguring your printer To upgrade the HP DesignJet 430 with color 10 Move the cartridge carriage out of the cover, at the bottom.
HP DesignJet 430, 450C, and 455CA Printer - User's Guide
Page 126
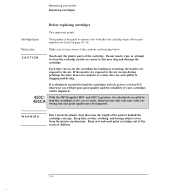
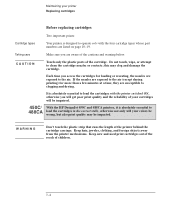
...on page 10-18. Each time you will get poor print quality and the reliability of your cartridges will be impaired. 450C/ With the HP DesignJet 450C and 455CA printers, it is absolutely essential to 455CA load the cartridges in the correct stalls, otherwise not only will your...nozzles or contacts; It is designed to operate only with the printer switched ON, otherwise you access the cartridges for more than a few minutes at a time, they are aware of the printer behind the cartridge carriage. Maintaining your colors be impacted. WARNING Don't touch the plastic strip that runs ...
...on page 10-18. Each time you will get poor print quality and the reliability of your cartridges will be impaired. 450C/ With the HP DesignJet 450C and 455CA printers, it is absolutely essential to 455CA load the cartridges in the correct stalls, otherwise not only will your...nozzles or contacts; It is designed to operate only with the printer switched ON, otherwise you access the cartridges for more than a few minutes at a time, they are aware of the printer behind the cartridge carriage. Maintaining your colors be impacted. WARNING Don't touch the plastic strip that runs ...

HP DesignJet 430/450C/488CA Printer - UserÂ’s Guide
Page 27
... the carriage has a dot indicating the color of the cartridge that should be installed: you must put the correct cartridge in the correct stall. SETUP 1 Setting up your printer Task 5: Load the print cartridge(s) 430 A set of cartridges was supplied with the printer: The HP DesignJet 430 is supplied with one black cartridge. 450C/488CA The HP DesignJet 450C and...
... the carriage has a dot indicating the color of the cartridge that should be installed: you must put the correct cartridge in the correct stall. SETUP 1 Setting up your printer Task 5: Load the print cartridge(s) 430 A set of cartridges was supplied with the printer: The HP DesignJet 430 is supplied with one black cartridge. 450C/488CA The HP DesignJet 450C and...
HP DesignJet 430/450C/488CA Printer - UserÂ’s Guide
Page 113
... the tasks necessary to become an HP DesignJet 450C color printer. The upgrade kit comprises: A ROM SIMM, containing the code for the HP DesignJet 450C A set of the upgrade kit, see page 10-17. RECONFIG- 6 URATION 6-5 Reconfiguring your printer To upgrade the HP DesignJet 430 with color 430 To upgrade the HP DesignJet 430 printer with color The HP DesignJet 430 monochrome printer can be upgraded to install the...
... the tasks necessary to become an HP DesignJet 450C color printer. The upgrade kit comprises: A ROM SIMM, containing the code for the HP DesignJet 450C A set of the upgrade kit, see page 10-17. RECONFIG- 6 URATION 6-5 Reconfiguring your printer To upgrade the HP DesignJet 430 with color 430 To upgrade the HP DesignJet 430 printer with color The HP DesignJet 430 monochrome printer can be upgraded to install the...

HP DesignJet 430/450C/488CA Printer - UserÂ’s Guide
Page 116
Don't touch the plastic strip that runs the length of the printer behind the cartridge carriage; b Remove the black cartridge. 6-8 its edge is very sharp. In steps 9, 10 and 11, pay special attention to access the cartridge carriage on the left. Reconfiguring your printer To upgrade the HP DesignJet 430 with color 430 WARNING 8 Replace the cover plate and screws. Keep hair, jewelry, clothing, and foreign objects away from the printer mechanisms. 9 a With the printer still switched OFF, raise the cover to this warning.
Don't touch the plastic strip that runs the length of the printer behind the cartridge carriage; b Remove the black cartridge. 6-8 its edge is very sharp. In steps 9, 10 and 11, pay special attention to access the cartridge carriage on the left. Reconfiguring your printer To upgrade the HP DesignJet 430 with color 430 WARNING 8 Replace the cover plate and screws. Keep hair, jewelry, clothing, and foreign objects away from the printer mechanisms. 9 a With the printer still switched OFF, raise the cover to this warning.

HP DesignJet 430/450C/488CA Printer - UserÂ’s Guide
Page 117
b Lift the cover off . 1 2 1 11 Remove the cover from the three left-hand cartridge slots by first squeezing on the right side of the service station. a Release the clip on both sides, and then lifting it off . 2 1 RECONFIG- 6 URATION 6-9 Then remove the cover from the three left-hand cartridge selectors. This is easiest to see when looking down into the printer. 430 Reconfiguring your printer To upgrade the HP DesignJet 430 with color 10 Move the cartridge carriage out of the cover, at the bottom.
b Lift the cover off . 1 2 1 11 Remove the cover from the three left-hand cartridge slots by first squeezing on the right side of the service station. a Release the clip on both sides, and then lifting it off . 2 1 RECONFIG- 6 URATION 6-9 Then remove the cover from the three left-hand cartridge selectors. This is easiest to see when looking down into the printer. 430 Reconfiguring your printer To upgrade the HP DesignJet 430 with color 10 Move the cartridge carriage out of the cover, at the bottom.
HP DesignJet 430/450C/488CA Printer - UserÂ’s Guide
Page 122
... absolutely essential to 488CA load the cartridges in the correct stalls, otherwise not only will be impaired. 450C/ With the HP DesignJet 450C and 488CA printers, it is designed to clogging and drying. WARNING Don't touch the plastic strip that runs the length of children. 7-4 Do not ... print cartridges out of the reach of the printer behind the cartridge carriage. CAUTION Touch only the plastic parts of the cautions and warning below. Each time you are exposed to clean the cartridge nozzles or contacts; Maintaining your colors be wrong, but also print quality may clog...
... absolutely essential to 488CA load the cartridges in the correct stalls, otherwise not only will be impaired. 450C/ With the HP DesignJet 450C and 488CA printers, it is designed to clogging and drying. WARNING Don't touch the plastic strip that runs the length of children. 7-4 Do not ... print cartridges out of the reach of the printer behind the cartridge carriage. CAUTION Touch only the plastic parts of the cautions and warning below. Each time you are exposed to clean the cartridge nozzles or contacts; Maintaining your colors be wrong, but also print quality may clog...
Service Manual
Page 5
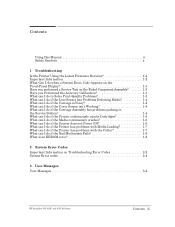
...What can I do if the Carriage is Noisy 1Ć4 What can I do if the Cover Sensor isn't Working 1Ć4 What can I do if the Carriage Assembly has problems parking in the Service Station 1Ć4 What can I do if the Printer continuously rejects Cartridges 1Ć5 ...Printer has problems with the Cutter 1Ć7 What can I do if the Bail Mechanism Fails 1Ć8 What is an EEROM error 1Ć8 2 System Error Codes Important Information on Troubleshooting Error Codes 2Ć2 System Error codes 2Ć4 3 User Messages User Messages 3Ć2 HP DesignJet 430, 450C and 455CA Printers...
...What can I do if the Carriage is Noisy 1Ć4 What can I do if the Cover Sensor isn't Working 1Ć4 What can I do if the Carriage Assembly has problems parking in the Service Station 1Ć4 What can I do if the Printer continuously rejects Cartridges 1Ć5 ...Printer has problems with the Cutter 1Ć7 What can I do if the Bail Mechanism Fails 1Ć8 What is an EEROM error 1Ć8 2 System Error Codes Important Information on Troubleshooting Error Codes 2Ć2 System Error codes 2Ć4 3 User Messages User Messages 3Ć2 HP DesignJet 430, 450C and 455CA Printers...
Service Manual
Page 6
...1 4Ć6 Viewing Test Output via the Serial Port 4Ć7 Bail Cycle Test 4Ć8 Front Panel Test 4Ć9 Carriage Axis (YĆaxis) Test 4Ć10 Carriage Test 4Ć12 Sensors Test 4Ć15 MediaĆAxis (XĆAxis) Test 4Ć16 Bench Run 4Ć18... the Accuracy Calibration 5Ć3 Performing the Accuracy Calibration 5Ć3 Adjusting the CarriageĆtoĆMedia Distance 5Ć5 To check the carriageĆtoĆmedia distance 5Ć5 To adjust the carriageĆtoĆmedia distance 5Ć7 iv Contents HP DesignJet 430, 450C and 455CA Printers
...1 4Ć6 Viewing Test Output via the Serial Port 4Ć7 Bail Cycle Test 4Ć8 Front Panel Test 4Ć9 Carriage Axis (YĆaxis) Test 4Ć10 Carriage Test 4Ć12 Sensors Test 4Ć15 MediaĆAxis (XĆAxis) Test 4Ć16 Bench Run 4Ć18... the Accuracy Calibration 5Ć3 Performing the Accuracy Calibration 5Ć3 Adjusting the CarriageĆtoĆMedia Distance 5Ć5 To check the carriageĆtoĆmedia distance 5Ć5 To adjust the carriageĆtoĆmedia distance 5Ć7 iv Contents HP DesignJet 430, 450C and 455CA Printers
Service Manual
Page 7
... Straightness Test 6Ć7 Test Pattern 4: Color Alignment Quality Test 6Ć9 Test Pattern 5: Color Variation Test 6Ć11 Test Pattern 6:...;2 Replacement Parts 7Ć2 Figure 1 Ć General View 7Ć3 Figure 2 Ć Printer Support 7Ć4 Figure 3 Ć Rollfeed Assembly 7Ć6 Figure 4 Ć Covers 7Ć... Primer Assembly and Service Station Assembly 7Ć14 Figure 8 Ć Carriage Assembly and Trailing Cable 7Ć16 Figure 9 Ć Bail and ...Bail and Overdrive Assembly . . . . . 7Ć22 Printer Labels 7Ć24 Users Guide and Quick Reference Guide Bundle ...
... Straightness Test 6Ć7 Test Pattern 4: Color Alignment Quality Test 6Ć9 Test Pattern 5: Color Variation Test 6Ć11 Test Pattern 6:...;2 Replacement Parts 7Ć2 Figure 1 Ć General View 7Ć3 Figure 2 Ć Printer Support 7Ć4 Figure 3 Ć Rollfeed Assembly 7Ć6 Figure 4 Ć Covers 7Ć... Primer Assembly and Service Station Assembly 7Ć14 Figure 8 Ć Carriage Assembly and Trailing Cable 7Ć16 Figure 9 Ć Bail and ...Bail and Overdrive Assembly . . . . . 7Ć22 Printer Labels 7Ć24 Users Guide and Quick Reference Guide Bundle ...
Service Manual
Page 8
... the Electronics Module 8Ć13 Removing the Encoder Strip 8Ć15 Removing the Right Bracket 8Ć17 Removing the Carriage Motor 8Ć18 Removing the Spittoon 8Ć20 Removing the Cutter Assembly 8Ć21 Removing the DriveĆRoller ... 9 Preventive Maintenance Moisture on Printer 9Ć2 Level of Printer Usage 9Ć2 Friction on Slider Rod 9Ć2 Noisy Carriage Wheel 9Ć2 Ink Spilling 9Ć3 Belt Swelling 9Ć3 Cleaning the Printer 9Ć4 General Cleaning 9Ć4 Cleaning the Drive Roller 9Ć4 vi Contents HP DesignJet 430, 450C and 455CA...
... the Electronics Module 8Ć13 Removing the Encoder Strip 8Ć15 Removing the Right Bracket 8Ć17 Removing the Carriage Motor 8Ć18 Removing the Spittoon 8Ć20 Removing the Cutter Assembly 8Ć21 Removing the DriveĆRoller ... 9 Preventive Maintenance Moisture on Printer 9Ć2 Level of Printer Usage 9Ć2 Friction on Slider Rod 9Ć2 Noisy Carriage Wheel 9Ć2 Ink Spilling 9Ć3 Belt Swelling 9Ć3 Cleaning the Printer 9Ć4 General Cleaning 9Ć4 Cleaning the Drive Roller 9Ć4 vi Contents HP DesignJet 430, 450C and 455CA...
Service Manual
Page 9
... Mechanism 10Ć3 Detecting the Lines and Media Edges 10Ć3 Line Sensor 10Ć3 Moving the Carriage 10Ć4 CarriageĆDrive Mechanics 10Ć4 Motor, Belt and Pulley 10Ć4 Carriage Guidance 10Ć4 Positional Feedback 10Ć4 Carriage PCA 10Ć4 Providing Ink 10Ć5 Print Cartridges 10Ć5 Distance between...;232ĆC 10Ć8 Power Supply 10Ć8 Water Condensation 10Ć8 Memory Usage 10Ć9 Plot Orientation 10Ć9 Raster Image Processor 10Ć9 HP DesignJet 430, 450C and 455CA Printers Contents vii
... Mechanism 10Ć3 Detecting the Lines and Media Edges 10Ć3 Line Sensor 10Ć3 Moving the Carriage 10Ć4 CarriageĆDrive Mechanics 10Ć4 Motor, Belt and Pulley 10Ć4 Carriage Guidance 10Ć4 Positional Feedback 10Ć4 Carriage PCA 10Ć4 Providing Ink 10Ć5 Print Cartridges 10Ć5 Distance between...;232ĆC 10Ć8 Power Supply 10Ć8 Water Condensation 10Ć8 Memory Usage 10Ć9 Plot Orientation 10Ć9 Raster Image Processor 10Ć9 HP DesignJet 430, 450C and 455CA Printers Contents vii
Service Manual
Page 14
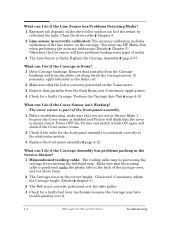
... module. 3 Replace the frontĆpanel assembly ' page 8Ć12. Power OFF the Printer and switch it . 1-4 HP DesignJet 430, 450C and 455CA Printers Troubleshooting What can I do if the Line Sensor has Problems Detecting Media? 1 Excessive ink deposits on the carriage. The cover sensor is part of the line sensor on the driveĆroller...
... module. 3 Replace the frontĆpanel assembly ' page 8Ć12. Power OFF the Printer and switch it . 1-4 HP DesignJet 430, 450C and 455CA Printers Troubleshooting What can I do if the Line Sensor has Problems Detecting Media? 1 Excessive ink deposits on the carriage. The cover sensor is part of the line sensor on the driveĆroller...
Service Manual
Page 15
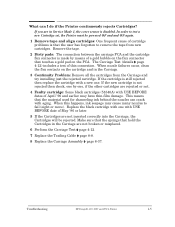
...the flex connector that the material used for channeling ink behind the nozzles can I do if the Printer continuously rejects Cartridges? Troubleshooting HP DesignJet 430, 450C and 455CA Printers 1-5 When nozzle failures occur, clean the flex contacts on the PCA. Replace the black cartridge ...with one with a new one , if the other cartridges are not inserted correctly into the Carriage, the Cartridges ...
...the flex connector that the material used for channeling ink behind the nozzles can I do if the Printer continuously rejects Cartridges? Troubleshooting HP DesignJet 430, 450C and 455CA Printers 1-5 When nozzle failures occur, clean the flex contacts on the PCA. Replace the black cartridge ...with one with a new one , if the other cartridges are not inserted correctly into the Carriage, the Cartridges ...

Service Manual
Page 16
... the bail assembly are installed on the Printer, otherwise there could be replaced. 1-6 HP DesignJet 430, 450C and 455CA Printers Troubleshooting If the media is damaged or removed, static charge can cause the media to stick to itself and jam the Printer. 3 The Carriage is at the back of the Printer. 3 Try to disconnect all the cables, apart...
... the bail assembly are installed on the Printer, otherwise there could be replaced. 1-6 HP DesignJet 430, 450C and 455CA Printers Troubleshooting If the media is damaged or removed, static charge can cause the media to stick to itself and jam the Printer. 3 The Carriage is at the back of the Printer. 3 Try to disconnect all the cables, apart...

Service Manual
Page 17
... D Make sure that is coming out will have problems parking in the cover clips. D If the Printer is placed on a table, it must reseat them. If necessary, perform the Carriage Test ' page 4Ć12. 5 Make sure the line sensor is calibrated. What can I do ... to determine exactly which component failed. Troubleshooting HP DesignJet 430, 450C and 455CA Printers 1-7 D Remove the Cutter and make sure that the Line Sensor is installed correctly. If the Printer is in the middle of the overdrive assembly) ' page 8Ć50. 7 Replace the Carriage Assembly ' page 8Ć37. Perform the...
... D Make sure that is coming out will have problems parking in the cover clips. D If the Printer is placed on a table, it must reseat them. If necessary, perform the Carriage Test ' page 4Ć12. 5 Make sure the line sensor is calibrated. What can I do ... to determine exactly which component failed. Troubleshooting HP DesignJet 430, 450C and 455CA Printers 1-7 D Remove the Cutter and make sure that the Line Sensor is installed correctly. If the Printer is in the middle of the overdrive assembly) ' page 8Ć50. 7 Replace the Carriage Assembly ' page 8Ć37. Perform the...

Service Manual
Page 18
... Errors What is generally not easy to discover the cause, due to the intermittent character of the failure modes. 1-8 HP DesignJet 430, 450C and 455CA Printers Troubleshooting It is an EEROM error? Any problems with the carriageĆmotor control system (for the bail up position. The notch on the slider rod. (Details ' page 5Ć...
... Errors What is generally not easy to discover the cause, due to the intermittent character of the failure modes. 1-8 HP DesignJet 430, 450C and 455CA Printers Troubleshooting It is an EEROM error? Any problems with the carriageĆmotor control system (for the bail up position. The notch on the slider rod. (Details ' page 5Ć...


