HP LaserJet Printer Family - Print Media Specification Guide
Page 29
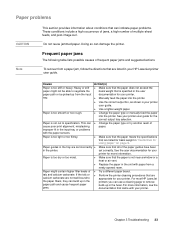
... can use a cleaning page to the paper fibers, they can build up in the fuser. q Replace the paper in the input tray, or problems with the paper sensors. q Perform the printer cleaning procedures that came with paper from a paper jam, follow the directions that are listed... is too smooth or too rough. See the user documentation for more information, see the documentation that are set correctly. For most HP LaserJet printers you can indicate paper problems. These conditions include a high occurrence of jams, a high number of frequent paper jams and suggested actions...
... can use a cleaning page to the paper fibers, they can build up in the fuser. q Replace the paper in the input tray, or problems with the paper sensors. q Perform the printer cleaning procedures that came with paper from a paper jam, follow the directions that are listed... is too smooth or too rough. See the user documentation for more information, see the documentation that are set correctly. For most HP LaserJet printers you can indicate paper problems. These conditions include a high occurrence of jams, a high number of frequent paper jams and suggested actions...
HP PCL/PJL reference - Printer Job Language Technical Reference Addendum
Page 122
... TRANSFER KIT ORDER FUSER KIT PERFORM PRINTER MAINTENANCE ORDER SUPPLIES PAGES LEFT REPLACE BLACK TONER REPLACE CYAN TONER REPLACE MAGENTA TONER REPLACE YELLOW TONER REPLACE IMAGE DRUM REPLACE BLACK DRUM REPLACE CYAN DRUM REPLACE MAGENTA DRUM REPLACE YELLOW DRUM REPLACE BLACK CARTRIDGE REPLACE CYAN CARTRIDGE REPLACE MAGENTA CARTRIDGE REPLACE YELLOW CARTRIDGE REPLACE TRANSPORT KIT REPLACE CLEANING KIT REPLACE TRANSFER KIT REPLACE FUSER KIT PERFORM PRINTER MAINTENANCE REPLACE SUPPLIES NON-HP SUPPLIES IN USE...
... TRANSFER KIT ORDER FUSER KIT PERFORM PRINTER MAINTENANCE ORDER SUPPLIES PAGES LEFT REPLACE BLACK TONER REPLACE CYAN TONER REPLACE MAGENTA TONER REPLACE YELLOW TONER REPLACE IMAGE DRUM REPLACE BLACK DRUM REPLACE CYAN DRUM REPLACE MAGENTA DRUM REPLACE YELLOW DRUM REPLACE BLACK CARTRIDGE REPLACE CYAN CARTRIDGE REPLACE MAGENTA CARTRIDGE REPLACE YELLOW CARTRIDGE REPLACE TRANSPORT KIT REPLACE CLEANING KIT REPLACE TRANSFER KIT REPLACE FUSER KIT PERFORM PRINTER MAINTENANCE REPLACE SUPPLIES NON-HP SUPPLIES IN USE...

HP PCL/PJL reference - Printer Job Language Technical Reference Addendum
Page 140
... ORDER TRANFER KIT ORDER FUSER KIT PERFORM PRINTER MAINTENANCE ORDER SUPPLIES PAGES LEFT REPLACE BLACK TONER REPLACE CYAN TONER REPLACE MAGENTA TONER REPLACE YELLOW TONER REPLACE IMAGE DRUM REPLACE BLACK DRUM REPLACE CYAN DRUM REPLACE MAGENTA DRUM REPLACE YELLOW DRUM REPLACE BLACK CARTRIDGE REPLACE CYAN CARTRIDGE REPLACE MAGENTA CARTRIDGE REPLACE YELLOW CARTRIDGE REPLACE TRANSPORT KIT REPLACE CLEANING KIT REPLACE TRANFER KIT REPLACE FUSER KIT PERFORM PRINTER MAINTENANCE REPLACE SUPPLIES INSTALL BLACK TONER...
... ORDER TRANFER KIT ORDER FUSER KIT PERFORM PRINTER MAINTENANCE ORDER SUPPLIES PAGES LEFT REPLACE BLACK TONER REPLACE CYAN TONER REPLACE MAGENTA TONER REPLACE YELLOW TONER REPLACE IMAGE DRUM REPLACE BLACK DRUM REPLACE CYAN DRUM REPLACE MAGENTA DRUM REPLACE YELLOW DRUM REPLACE BLACK CARTRIDGE REPLACE CYAN CARTRIDGE REPLACE MAGENTA CARTRIDGE REPLACE YELLOW CARTRIDGE REPLACE TRANSPORT KIT REPLACE CLEANING KIT REPLACE TRANFER KIT REPLACE FUSER KIT PERFORM PRINTER MAINTENANCE REPLACE SUPPLIES INSTALL BLACK TONER...

HP PCL/PJL reference - Printer Job Language Technical Reference Addendum
Page 142
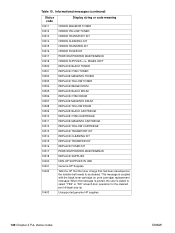
...40905 40906 40907 40908 Display string or code meaning INSTALL CLEANING KIT INSTALL TRANFER KIT INSTALL FUSER KIT PERFORM PRINTER MAINTENANCE INSTALL SUPPLIES NON-HP Cartridge Installed T2 Roller missing Croller out Croller missing REMOVE SEALING TAPE E-label cartridge error ORDER... CARTRIDGE DAYS LEFT ORDER YELLOW CARTRIDGE DAYS LEFT ORDER SUPPLIES DAYS LEFT REPLACE BLACK TONER REPLACE CYAN TONER REPLACE MAGENTA TONER REPLACE YELLOW TONER REPLACE BLACK CARTRIDGE REPLACE CYAN CARTRIDGE REPLACE MAGENTA CARTRIDGE REPLACE YELLOW CARTRIDGE REPLACE SUPPLIES 140 Chapter 4 PJL status codes ENWW
...40905 40906 40907 40908 Display string or code meaning INSTALL CLEANING KIT INSTALL TRANFER KIT INSTALL FUSER KIT PERFORM PRINTER MAINTENANCE INSTALL SUPPLIES NON-HP Cartridge Installed T2 Roller missing Croller out Croller missing REMOVE SEALING TAPE E-label cartridge error ORDER... CARTRIDGE DAYS LEFT ORDER YELLOW CARTRIDGE DAYS LEFT ORDER SUPPLIES DAYS LEFT REPLACE BLACK TONER REPLACE CYAN TONER REPLACE MAGENTA TONER REPLACE YELLOW TONER REPLACE BLACK CARTRIDGE REPLACE CYAN CARTRIDGE REPLACE MAGENTA CARTRIDGE REPLACE YELLOW CARTRIDGE REPLACE SUPPLIES 140 Chapter 4 PJL status codes ENWW
Service Manual
Page 8
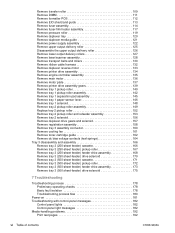
... PCB 112 Remove EIO shield and guide 113 Remove fuser assembly 114 Remove fuser-film heater assembly 117 Remove pressure roller 119 Remove...rollers 127 Remove laser/scanner assembly 128 Remove transport belts and rollers 130 Remove ribbon cable harness 132 Remove duplexer reverse motor 133 Remove printer drive assembly 134...printer drive assembly gears 139 Remove tray 1 pickup roller 140 Remove tray 1 pickup roller assembly 142 Remove tray 1 separation pad assembly 145 Remove tray 1 paper-sensor lever 146 Remove tray 1 solenoid 148 Remove tray 2 pickup roller assembly 149 Replace...
... PCB 112 Remove EIO shield and guide 113 Remove fuser assembly 114 Remove fuser-film heater assembly 117 Remove pressure roller 119 Remove...rollers 127 Remove laser/scanner assembly 128 Remove transport belts and rollers 130 Remove ribbon cable harness 132 Remove duplexer reverse motor 133 Remove printer drive assembly 134...printer drive assembly gears 139 Remove tray 1 pickup roller 140 Remove tray 1 pickup roller assembly 142 Remove tray 1 separation pad assembly 145 Remove tray 1 paper-sensor lever 146 Remove tray 1 solenoid 148 Remove tray 2 pickup roller assembly 149 Replace...

Service Manual
Page 11
...Power cord 56 Figure 23. Interface cable door 57 Figure 27. Printer functionality divided into systems 73 Figure 36. Pickup/feed system 87.... Replace toner cartridge 63 Figure 32. Power supply PCB 79 Figure 39. Photosensitive drum 81 Figure 42. Fuser film...Figure 7. Sample identification label 4 Figure 2. Top view 27 Figure 10. HP JetDirect EIO card 56 Figure 25. Cleaning stage 82 Figure 43. Latent electrostatic...page (back 46 Figure 19. Self test/configuration page 47 Figure 20. Laser/scanner system 83 Figure 45. Internal assembly locations (1 of 5 8 Figure...
...Power cord 56 Figure 23. Interface cable door 57 Figure 27. Printer functionality divided into systems 73 Figure 36. Pickup/feed system 87.... Replace toner cartridge 63 Figure 32. Power supply PCB 79 Figure 39. Photosensitive drum 81 Figure 42. Fuser film...Figure 7. Sample identification label 4 Figure 2. Top view 27 Figure 10. HP JetDirect EIO card 56 Figure 25. Cleaning stage 82 Figure 43. Latent electrostatic...page (back 46 Figure 19. Self test/configuration page 47 Figure 20. Laser/scanner system 83 Figure 45. Internal assembly locations (1 of 5 8 Figure...

Service Manual
Page 76
... visit near the end of use: l fuser assembly l transfer roller l separation pads (tray 1, tray 2, and tray 3) l pickup rollers (tray 1, tray 2, and tray 3) l output feed rollers (upper and lower) l transport belts and rollers See "Removal and replacement" in chapter 6 for procedures to be ..., environment, and usage conditions. 60 Chapter 4 Printer maintenance C7058-90936 These parts should be inspected and, if required, replaced after approximately 150,000 pages of the part's expected life and replaced if found to remove and replace these parts. Variables such as media, environment,...
... visit near the end of use: l fuser assembly l transfer roller l separation pads (tray 1, tray 2, and tray 3) l pickup rollers (tray 1, tray 2, and tray 3) l output feed rollers (upper and lower) l transport belts and rollers See "Removal and replacement" in chapter 6 for procedures to be ..., environment, and usage conditions. 60 Chapter 4 Printer maintenance C7058-90936 These parts should be inspected and, if required, replaced after approximately 150,000 pages of the part's expected life and replaced if found to remove and replace these parts. Variables such as media, environment,...

Service Manual
Page 96
...transferred onto media by the primary charging roller in the fuser unit. To form a latent image on the photosensitive drum, the laser beam modulated by heat and pressure in preparation for a service call when replacement is required. 80 Chapter 5 Theory of operation C7058-90936... The toner on the developing cylinder develops the latent image formed on the photosensitive drum surface. Electrostatic latent image formation block 2.Laser exposure Paper path Rotation of the printer. The potential...
...transferred onto media by the primary charging roller in the fuser unit. To form a latent image on the photosensitive drum, the laser beam modulated by heat and pressure in preparation for a service call when replacement is required. 80 Chapter 5 Theory of operation C7058-90936... The toner on the developing cylinder develops the latent image formed on the photosensitive drum surface. Electrostatic latent image formation block 2.Laser exposure Paper path Rotation of the printer. The potential...

Service Manual
Page 109
... Remove the toner cartridge 96 Cover and tray removal and replacement 97 Remove tray 3 97 Remove the cassette from tray 2 ... 109 Remove DIMM 111 Remove formatter PCB 112 Remove EIO shield and guide 113 Remove fuser assembly 114 Remove fuser-film heater assembly 117 Remove pressure roller 119 Remove duplexer tray 120 Remove duplexer media...Remove lower output delivery rollers 127 Remove laser/scanner assembly 128 Remove transport belts and rollers 130 Remove ribbon cable harness 132 Remove duplexer reverse motor 133 Remove printer drive assembly 134 Remove engine controller ...
... Remove the toner cartridge 96 Cover and tray removal and replacement 97 Remove tray 3 97 Remove the cassette from tray 2 ... 109 Remove DIMM 111 Remove formatter PCB 112 Remove EIO shield and guide 113 Remove fuser assembly 114 Remove fuser-film heater assembly 117 Remove pressure roller 119 Remove duplexer tray 120 Remove duplexer media...Remove lower output delivery rollers 127 Remove laser/scanner assembly 128 Remove transport belts and rollers 130 Remove ribbon cable harness 132 Remove duplexer reverse motor 133 Remove printer drive assembly 134 Remove engine controller ...

Service Manual
Page 130
... the reverse guide) CAUTION When replacing the reverse guide, use the two screws (callout 1) removed in step 2. Step 2 Remove the two screws (callout 1) that the fuser assembly has sufficiently cooled before handling. Step 1 Remove the following assemblies: • Remove the toner cartridge. CAUTION Remove fuser assembly If the printer was recently operating, verify that...
... the reverse guide) CAUTION When replacing the reverse guide, use the two screws (callout 1) removed in step 2. Step 2 Remove the two screws (callout 1) that the fuser assembly has sufficiently cooled before handling. Step 1 Remove the following assemblies: • Remove the toner cartridge. CAUTION Remove fuser assembly If the printer was recently operating, verify that...

Service Manual
Page 132
Figure 84. Remove fuser assembly Note When replacing the fuser assembly, use the guide pins (located near the mounting screw-holes) to correctly align it. 116 Chapter 6 Removal and replacement C7058-90936 Step 5 Pull the fuser assembly from the printer.
Figure 84. Remove fuser assembly Note When replacing the fuser assembly, use the guide pins (located near the mounting screw-holes) to correctly align it. 116 Chapter 6 Removal and replacement C7058-90936 Step 5 Pull the fuser assembly from the printer.

Service Manual
Page 134
Remove pressure plate Step 6 Lift the fuser-film heater assembly out of the pressure roller. 118 Chapter 6 Removal and replacement C7058-90936 Position the end with the two-wire harness (black and white wire) is spring-loaded. CAUTION The pressure plate is over ...the shaft end of the assembly carriage. 12 Figure 88. Remove the fuser-film heater assembly Note When replacing the fuser-film heater assembly, verify that it is correctly oriented (callout 1). Step 4 Use a small flatblade screwdriver to gently to detach the ...
Remove pressure plate Step 6 Lift the fuser-film heater assembly out of the pressure roller. 118 Chapter 6 Removal and replacement C7058-90936 Position the end with the two-wire harness (black and white wire) is spring-loaded. CAUTION The pressure plate is over ...the shaft end of the assembly carriage. 12 Figure 88. Remove the fuser-film heater assembly Note When replacing the fuser-film heater assembly, verify that it is correctly oriented (callout 1). Step 4 Use a small flatblade screwdriver to gently to detach the ...

Service Manual
Page 138
..."Remove tray 3" on page 114. See "Remove fuser assembly" on page 97. • Remove the cassette from tray 2. Step 3 Unplug two two-pin, a three-pin, and the five-pin harness connectors (callout 1). 12 Figure 92. The printer contains parts that are sensitive to electrostatic discharge (ESD...the following assemblies: • Remove the toner cartridge. See "Toner cartridge removal and replacement" on page 100. • Remove the rear pivot pin, duplexer tray, and duplex media guide. Always service the printer at an ESD-protected workstation or use an ESD mat. See "Remove rear cover...
..."Remove tray 3" on page 114. See "Remove fuser assembly" on page 97. • Remove the cassette from tray 2. Step 3 Unplug two two-pin, a three-pin, and the five-pin harness connectors (callout 1). 12 Figure 92. The printer contains parts that are sensitive to electrostatic discharge (ESD...the following assemblies: • Remove the toner cartridge. See "Toner cartridge removal and replacement" on page 100. • Remove the rear pivot pin, duplexer tray, and duplex media guide. Always service the printer at an ESD-protected workstation or use an ESD mat. See "Remove rear cover...
Service Manual
Page 197
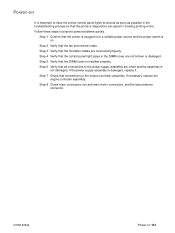
.... Step 4 Verify that connections to a reliable power source and the power switch is on. Step 8 Check fuser connectors, fan and main motor connectors, and the laser/scanner connector. Step 5 Verify that the fan and motors rotate. Step 7 Check that the control panel light ...locating printing errors. Step 3 Verify that the printer's diagnostics can assist in the troubleshooting process so that the formatter cables are connected properly. Power-on It is important to pinpoint power problems quickly. If necessary, replace the engine controller assembly. C7058-90936 Power-on...
.... Step 4 Verify that connections to a reliable power source and the power switch is on. Step 8 Check fuser connectors, fan and main motor connectors, and the laser/scanner connector. Step 5 Verify that the fan and motors rotate. Step 7 Check that the control panel light ...locating printing errors. Step 3 Verify that the printer's diagnostics can assist in the troubleshooting process so that the formatter cables are connected properly. Power-on It is important to pinpoint power problems quickly. If necessary, replace the engine controller assembly. C7058-90936 Power-on...

Service Manual
Page 205
.... l Replace the formatter. l Replace the fuser. l Replace the engine controller assembly. l Replace the formatter. Fatal error secondary codes (continued) Control-panel light pattern Fatal error secondary Status log message code Bad fuser error (50) 40050 Recommended action l Be sure that the fuser is installed correctly and is fully seated. Scan buffer error (64) 40064 l Turn the printer off...
.... l Replace the formatter. l Replace the fuser. l Replace the engine controller assembly. l Replace the formatter. Fatal error secondary codes (continued) Control-panel light pattern Fatal error secondary Status log message code Bad fuser error (50) 40050 Recommended action l Be sure that the fuser is installed correctly and is fully seated. Scan buffer error (64) 40064 l Turn the printer off...

Service Manual
Page 218
... a different kind or brand of the printer or use the recommended print media and store it . Vertical lines Defective toner cartridge. l Clean the guide. Table 40. Print media does not meet HP specifications, replace the media and advise the customer to see if the problem corrects itself . l Replace the fuser. 202 Chapter 7 Troubleshooting C7058-90936...
... a different kind or brand of the printer or use the recommended print media and store it . Vertical lines Defective toner cartridge. l Clean the guide. Table 40. Print media does not meet HP specifications, replace the media and advise the customer to see if the problem corrects itself . l Replace the fuser. 202 Chapter 7 Troubleshooting C7058-90936...

Service Manual
Page 219
... environment meets specifications. l Print a few more pages to see if the problem corrects itself . Defective fuser. Toner smear Printer's operating environment does not meet HP specifications, replace the paper. Defective fuser. l Clean the inside of media in the tray. C7058-90936 Image-formation troubleshooting 203 Paper might be too smooth. l Through the software, adjust the...
... environment meets specifications. l Print a few more pages to see if the problem corrects itself . Defective fuser. Toner smear Printer's operating environment does not meet HP specifications, replace the paper. Defective fuser. l Clean the inside of media in the tray. C7058-90936 Image-formation troubleshooting 203 Paper might be too smooth. l Through the software, adjust the...

Service Manual
Page 221
... occur when using l preprinted forms, a large quantity of narrow media, or a fuser mode that print media type and quality meet HP specifications, replace the paper. l Turn over the stack of narrow media, or a fuser mode that print media type and quality meet printer specifications or is stored improperly. Also try rotating the media 180 degrees...
... occur when using l preprinted forms, a large quantity of narrow media, or a fuser mode that print media type and quality meet HP specifications, replace the paper. l Turn over the stack of narrow media, or a fuser mode that print media type and quality meet printer specifications or is stored improperly. Also try rotating the media 180 degrees...

Service Manual
Page 312
...FIR port features 3 locating 8 using 58 fasteners 230 fatal errors 187 FCC regulations 12 features model comparisons 5 printer 2 feed belts cleaning 61 locating 10 operations 86 feed rollers, replacement intervals 60 feed system control 78 coordination with other systems 73 jam detection 91 paper feeding operations 86 sensors 87... 95 number 48 operations 74 page count 53 pick-up/feed system operations 86 removing 112 frequency, jams 194 FRUs (field replaceable units) ordering 228 removal and replacement strategies 95 furnish test, media 40 fuser assembly diagrams and part numbers 251 EN
...FIR port features 3 locating 8 using 58 fasteners 230 fatal errors 187 FCC regulations 12 features model comparisons 5 printer 2 feed belts cleaning 61 locating 10 operations 86 feed rollers, replacement intervals 60 feed system control 78 coordination with other systems 73 jam detection 91 paper feeding operations 86 sensors 87... 95 number 48 operations 74 page count 53 pick-up/feed system operations 86 removing 112 frequency, jams 194 FRUs (field replaceable units) ordering 228 removal and replacement strategies 95 furnish test, media 40 fuser assembly diagrams and part numbers 251 EN

Service Manual
Page 313
... precautions parts removal 95 toner cartridges 65 harnesses replacing 95 ribbon cable, removing 132 heater assembly, removing 117 heating operations, fuser assembly 78 heavy media, sizes supported 31 height, printer 5, 27 high-voltage power supply 79 host computer, communications operations 74 troubleshooting 217 HP authorized resellers 17 HP Customer Care centers Express Exchange 15 reseller...
... precautions parts removal 95 toner cartridges 65 harnesses replacing 95 ribbon cable, removing 132 heater assembly, removing 117 heating operations, fuser assembly 78 heavy media, sizes supported 31 height, printer 5, 27 high-voltage power supply 79 host computer, communications operations 74 troubleshooting 217 HP authorized resellers 17 HP Customer Care centers Express Exchange 15 reseller...


