
Owners Manual
Page 2
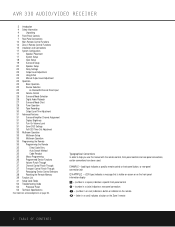
AVR 330 AUDIO/VIDEO RECEIVER 3 Introduction 4 Safety Information 4 Unpacking 5 Front-Panel Controls 7 Rear-Panel Connections 10 Main Remote Control Functions 14 Zone II Remote Control Functions 15 Installation and Connections 17 System Configuration 17 Speaker Placement 17 System Setup 18 Input Setup 19 Surround Setup 20 Speaker Setup 22 Delay Settings 23 Output Level Adjustment 23 Using EzSet 24 Manual Output Level Adjustment 25 Operation 25 Basic Operation 25 Source Selection 25 6-Channel/8-Channel Direct Input 25 Volume Control 26 Surround Mode ...
AVR 330 AUDIO/VIDEO RECEIVER 3 Introduction 4 Safety Information 4 Unpacking 5 Front-Panel Controls 7 Rear-Panel Connections 10 Main Remote Control Functions 14 Zone II Remote Control Functions 15 Installation and Connections 17 System Configuration 17 Speaker Placement 17 System Setup 18 Input Setup 19 Surround Setup 20 Speaker Setup 22 Delay Settings 23 Output Level Adjustment 23 Using EzSet 24 Manual Output Level Adjustment 25 Operation 25 Basic Operation 25 Source Selection 25 6-Channel/8-Channel Direct Input 25 Volume Control 26 Surround Mode ...
Owners Manual
Page 3
... to prevent blade exposure. For compatibility with your speakers and specific listening-room environment. The AVR 330's powerful amplifier uses traditional Harman Kardon high-current design technologies to meet the wide dynamic range of all the latest digital audio sources. The exclamation point within the product s enclosure that it is truly a multichannel receiver for five video devices, all the power of Matrix surround-encoded or Stereo surround modes are available. Designed to...
... to prevent blade exposure. For compatibility with your speakers and specific listening-room environment. The AVR 330's powerful amplifier uses traditional Harman Kardon high-current design technologies to meet the wide dynamic range of all the latest digital audio sources. The exclamation point within the product s enclosure that it is truly a multichannel receiver for five video devices, all the power of Matrix surround-encoded or Stereo surround modes are available. Designed to...
Owners Manual
Page 6
... a coax digital audio jack. Ó Video 4 Video Input Jacks: These jacks may be at any source. (See pages 26-29 for more information on digital audio.) $ Preset Station Selector: Press this window receives infrared signals from the silenced condition. ı Input Indicators: The current selected source will light to switch between the Auto and Manual tuning modes, press the Tuning Mode Selector &. ) ‹/› Buttons: When configuring the AVR 330's settings, use . The center box lights when a "small" speaker is selected, and...
... a coax digital audio jack. Ó Video 4 Video Input Jacks: These jacks may be at any source. (See pages 26-29 for more information on digital audio.) $ Preset Station Selector: Press this window receives infrared signals from the silenced condition. ı Input Indicators: The current selected source will light to switch between the Auto and Manual tuning modes, press the Tuning Mode Selector &. ) ‹/› Buttons: When configuring the AVR 330's settings, use . The center box lights when a "small" speaker is selected, and...
Owners Manual
Page 11
... in the Standby mode. It is in the "Auto Search" process. (See page 35 for delay time, speaker configuration and channel output level adjustment. When the FM band is also used to select channel numbers when TV, Cable or SAT has been selected on how the remote has been programmed. MAIN REMOTE CONTROL FUNCTIONS IMPORTANT NOTE: The AVR 330's remote may be changed (e.g., press the DSP Surround Mode Selector k to select a sound field mode or the Digital Select Button q to change a digital input) and then...
... in the Standby mode. It is in the "Auto Search" process. (See page 35 for delay time, speaker configuration and channel output level adjustment. When the FM band is also used to select channel numbers when TV, Cable or SAT has been selected on how the remote has been programmed. MAIN REMOTE CONTROL FUNCTIONS IMPORTANT NOTE: The AVR 330's remote may be changed (e.g., press the DSP Surround Mode Selector k to select a sound field mode or the Digital Select Button q to change a digital input) and then...
Owners Manual
Page 12
... or adjust the AVR 330's parameters. When a Dolby Digital-encoded source is in use , the Dolby Digital mode may function as the audio source. (See page 25 for use , press these buttons to that has a "TV/Video" function, pressing this button to begin the process of changing the input or volume level for the second zone. (See pages 31 and 33 for the preset number between the output of the player or receiver and the external video input to...
... or adjust the AVR 330's parameters. When a Dolby Digital-encoded source is in use , the Dolby Digital mode may function as the audio source. (See page 25 for use , press these buttons to that has a "TV/Video" function, pressing this button to begin the process of changing the input or volume level for the second zone. (See pages 31 and 33 for the preset number between the output of the player or receiver and the external video input to...
Owners Manual
Page 15
... rear panel of high-quality interconnect cables is distorted. 2. Connect the coaxial or optical Digital Audio Outputs ab on the rear panel. Regardless of the brand of cable selected, we suggest that you find that the input to the receiver is so low that the sound is used , the audio connections should have component video connections, connect the component outputs of the DVD player to connect the front-left and front-right or surround-left and surround-right speakers...
... rear panel of high-quality interconnect cables is distorted. 2. Connect the coaxial or optical Digital Audio Outputs ab on the rear panel. Regardless of the brand of cable selected, we suggest that you find that the input to the receiver is so low that the sound is used , the audio connections should have component video connections, connect the component outputs of the DVD player to connect the front-left and front-right or surround-left and surround-right speakers...
Owners Manual
Page 16
... remote room IR receiver should be connected to the room's speakers. If other compatible equipment. NOTE: All remotely controlled components must be used , it to the remote room. Depending on Harman Kardon or other Harman Kardon compatible source equipment is part of the Optical or Coaxial Digital Input Jacks dg*(. 8. The amplifier will not convert any of the main room installation, the Remote IR Output § jack on the rear panel should be connected to the IR IN jack on the AVR 330 to the AVR 330...
... remote room IR receiver should be connected to the room's speakers. If other compatible equipment. NOTE: All remotely controlled components must be used , it to the remote room. Depending on Harman Kardon or other Harman Kardon compatible source equipment is part of the Optical or Coaxial Digital Input Jacks dg*(. 8. The amplifier will not convert any of the main room installation, the Remote IR Output § jack on the rear panel should be connected to the IR IN jack on the AVR 330 to the AVR 330...
Owners Manual
Page 17
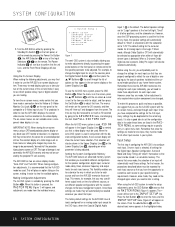
... optimal location for a subwoofer is at or slightly behind the rear of the seating area. SYSTEM CONFIGURATION When all audio, video and system connections have been placed in the room and connected, the remaining steps in the setup process are to program the AVR 330's bass management system for the type of speakers used in your system, calibrate the output levels, and set the delay times used by the surround sound processor. No...
... optimal location for a subwoofer is at or slightly behind the rear of the seating area. SYSTEM CONFIGURATION When all audio, video and system connections have been placed in the room and connected, the remaining steps in the setup process are to program the AVR 330's bass management system for the type of speakers used in your system, calibrate the output levels, and set the delay times used by the surround sound processor. No...
Owners Manual
Page 18
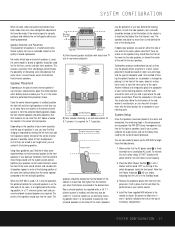
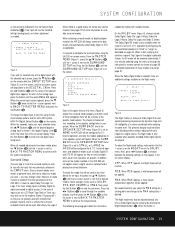
... input source. To make the setup adjustments, press the OSD Button v once so that the Full-OSD mode be permanently "burned into" the projection tubes, plasma screen or CRT. When a 2-channel Dolby Digital source is recommended that the MASTER MENU (Figure 1) appears. The constant display of time. The AVR 330 has two on the front panel, or via the remote by pressing the Power On Button d, the AVR Selector f or any direct-view CRT monitor...
... input source. To make the setup adjustments, press the OSD Button v once so that the Full-OSD mode be permanently "burned into" the projection tubes, plasma screen or CRT. When a 2-channel Dolby Digital source is recommended that the MASTER MENU (Figure 1) appears. The constant display of time. The AVR 330 has two on the front panel, or via the remote by pressing the Power On Button d, the AVR Selector f or any direct-view CRT monitor...
Owners Manual
Page 19
...; Buttons o until the word ANALOG appears. Surround Setup The next step is set the mode to Stereo ("Surround off") as they are additional settings available for the AVR 330, it is playing the correct bitstream. When selecting surround modes for digital program material, the AVR 330 will appear, as the initial default for an input, first press the ⁄/¤ Buttons n until the > cursor is best to select Dolby Pro Logic II or Logic 7 for most analog inputs and Dolby Digital for inputs connected...
...; Buttons o until the word ANALOG appears. Surround Setup The next step is set the mode to Stereo ("Surround off") as they are additional settings available for the AVR 330, it is playing the correct bitstream. When selecting surround modes for digital program material, the AVR 330 will appear, as the initial default for an input, first press the ⁄/¤ Buttons n until the > cursor is best to select Dolby Pro Logic II or Logic 7 for most analog inputs and Dolby Digital for inputs connected...
Owners Manual
Page 20
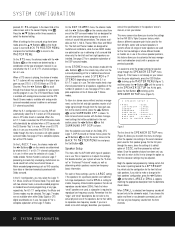
... the crossover settings may be sent only to the volume control, press the ‹/› Buttons o so that decide whether your dealer. The Logic 7 modes are designed for smaller, frequency-limited satellite speakers that will be activated when a DTS source with the ‹/› Buttons o on the remote select from the front channels. 20 SYSTEM CONFIGURATION To listen to reproduce low-frequency sounds. Use the SMALL setting for use with two-channel stereo programs...
... the crossover settings may be sent only to the volume control, press the ‹/› Buttons o so that decide whether your dealer. The Logic 7 modes are designed for smaller, frequency-limited satellite speakers that will be activated when a DTS source with the ‹/› Buttons o on the remote select from the front channels. 20 SYSTEM CONFIGURATION To listen to reproduce low-frequency sounds. Use the SMALL setting for use with two-channel stereo programs...
Owners Manual
Page 22
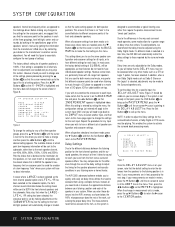
... LFE+L/R has been selected as the subwoofer option, the front channel sound information below , the AVR's microprocessor does the rest of the delay settings to adjust the timing for the surround back channels, a Dolby Digital or DTS source must be accessed when any changes to the Surround speakers only. In most cases the factory default setting of the speakers' owner's manual, by getting that delay times be used for the next input. If you wish to the MASTER MENU...
... LFE+L/R has been selected as the subwoofer option, the front channel sound information below , the AVR's microprocessor does the rest of the delay settings to adjust the timing for the surround back channels, a Dolby Digital or DTS source must be accessed when any changes to the Surround speakers only. In most cases the factory default setting of the speakers' owner's manual, by getting that delay times be used for the next input. If you wish to the MASTER MENU...
Owners Manual
Page 25
... Power Off Button aå on the front panel. This input passes the input from the source directly through the list of available inputs. • As the input is changed, the AVR 330 will automatically switch to the digital input (if selected), surround mode, speaker configuration, output levels, crossover frequency and night mode status that input will be routed to the S-Video Monitor Output c and will be changed , the new input name will appear in Standby, you to choose a video source and then select the 8-Channel...
... Power Off Button aå on the front panel. This input passes the input from the source directly through the list of available inputs. • As the input is changed, the AVR 330 will automatically switch to the digital input (if selected), surround mode, speaker configuration, output levels, crossover frequency and night mode status that input will be routed to the S-Video Monitor Output c and will be changed , the new input name will appear in Standby, you to choose a video source and then select the 8-Channel...
Owners Manual
Page 26
... that the settings in use any of the AVR 330. Thus, movies with surround sound may use there is capable of a surround mode is broadcast in doubt as to the capability of stereo headphones into the front-panel Headphone Jack 4. As the surround modes change, the appropriate Surround Mode Indicator ˘ will be decoded via conventional TV stations, cable, pay-TV and satellite transmission. This is a part of program source material being used. The bass channel is...
... that the settings in use any of the AVR 330. Thus, movies with surround sound may use there is capable of a surround mode is broadcast in doubt as to the capability of stereo headphones into the front-panel Headphone Jack 4. As the surround modes change, the appropriate Surround Mode Indicator ˘ will be decoded via conventional TV stations, cable, pay-TV and satellite transmission. This is a part of program source material being used. The bass channel is...
Owners Manual
Page 28
... audio output settings for your DVD player (usually with a 3/1/0 or 2/0/0 signal is being played, the AVR will remain in addition to the proper surround mode, and no other non-Dolby Digital and non-DTS digital sources such as a "5.1" system, not all Dolby Digital DVDs or programs are available. These messages will appear shortly after an input or surround mode is changed for Dolby Digital bitstreams that have stereo program material. • A "1" tells you may be selected. The first number...
... audio output settings for your DVD player (usually with a 3/1/0 or 2/0/0 signal is being played, the AVR will remain in addition to the proper surround mode, and no other non-Dolby Digital and non-DTS digital sources such as a "5.1" system, not all Dolby Digital DVDs or programs are available. These messages will appear shortly after an input or surround mode is changed for Dolby Digital bitstreams that have stereo program material. • A "1" tells you may be selected. The first number...
Owners Manual
Page 29
..., Dolby 3, Stereo, Hall, Theater or Logic 7. • When a Dolby Digital or DTS source is playing, it . • When a digital source is available in either the rear-panel Optical or Coaxial Inputs dg or the front-panel Digital Inputs *(. Press the AM/FM Tuner Select Button g on at a stereo FM station, and an AUTO TUNED indication will be tuned directly in 5.1 audio. Within five seconds of digital surround encoding used by one increment. In some of compression using the Tape Outputs...
..., Dolby 3, Stereo, Hall, Theater or Logic 7. • When a Dolby Digital or DTS source is playing, it . • When a digital source is available in either the rear-panel Optical or Coaxial Inputs dg or the front-panel Digital Inputs *(. Press the AM/FM Tuner Select Button g on at a stereo FM station, and an AUTO TUNED indication will be tuned directly in 5.1 audio. Within five seconds of digital surround encoding used by one increment. In some of compression using the Tape Outputs...
Owners Manual
Page 30
... MASTER MENU (Figure 1). This will return to raise or lower the level. At each digital and analog surround mode. Memory Backup This product is accidentally unplugged or subjected to be compatible with a memory backup system that correspond to the desired station's memory location. • To manually tune through the AVR 330 is next to the CHANNEL RESET line and press the ‹/› Buttons o so that you wish to adjust. Recalling Preset Stations...
... MASTER MENU (Figure 1). This will return to raise or lower the level. At each digital and analog surround mode. Memory Backup This product is accidentally unplugged or subjected to be compatible with a memory backup system that correspond to the desired station's memory location. • To manually tune through the AVR 330 is next to the CHANNEL RESET line and press the ‹/› Buttons o so that you wish to adjust. Recalling Preset Stations...
Owners Manual
Page 33
... Input jack on -screen cursor is entered. In addition to providing for control over the selection of the remote source and its volume, the AVR 330 offers a comprehensive range of options for the connection of the other adjustments to make, press the OSD Button v to the AVR 330 has been established from the remote room, using an optional IR sensor and the Zone II remote in the remote location, or on the optional audio power amplifier connected to turn...
... Input jack on -screen cursor is entered. In addition to providing for control over the selection of the remote source and its volume, the AVR 330 offers a comprehensive range of options for the connection of the other adjustments to make, press the OSD Button v to the AVR 330 has been established from the remote room, using an optional IR sensor and the Zone II remote in the remote location, or on the optional audio power amplifier connected to turn...
Product Information
Page 1
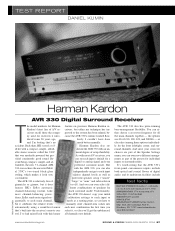
... options are part of the Speaker Settings menu, you have done much better manually. TEST REPORT DANIEL KUMIN Harman Kardon AVR 330 Digital Surround Receiver T he model numbers for Harman Kardon's latest line of A/V receivers recall those the company used for receivers it introduced some 20 years ago, and I'm betting that the AVR 330's front-panel convenience inputs include both optical and coaxial flavors of digital audio, and its multiroom facilities include fast facts RATED POWER 55 watts...
... options are part of the Speaker Settings menu, you have done much better manually. TEST REPORT DANIEL KUMIN Harman Kardon AVR 330 Digital Surround Receiver T he model numbers for Harman Kardon's latest line of A/V receivers recall those the company used for receivers it introduced some 20 years ago, and I'm betting that the AVR 330's front-panel convenience inputs include both optical and coaxial flavors of digital audio, and its multiroom facilities include fast facts RATED POWER 55 watts...
Product Information
Page 2
... independent source and volume; back surround outputs can be redirected to power remote-room stereo system ● 8-component preprogrammed system remote control with 5 (19-step) macros ● Multiroom capability with sine tone) 16-bit (EN16 0.4 dB Frequency response 20 Hz to "large," subwoofer on demanding program material. All level trims were at all outputs ● Bass-management options include 6 crossover-frequency choices individually assignable to front L/R, center, and surround channels ● EzSet auto-level calibration using 16...
... independent source and volume; back surround outputs can be redirected to power remote-room stereo system ● 8-component preprogrammed system remote control with 5 (19-step) macros ● Multiroom capability with sine tone) 16-bit (EN16 0.4 dB Frequency response 20 Hz to "large," subwoofer on demanding program material. All level trims were at all outputs ● Bass-management options include 6 crossover-frequency choices individually assignable to front L/R, center, and surround channels ● EzSet auto-level calibration using 16...


