

Owners Manual
Page 1
® Designed to Entertain.TM AVR 144 AUDIO/VIDEO RECEIVER OWNER'S MANUAL
® Designed to Entertain.TM AVR 144 AUDIO/VIDEO RECEIVER OWNER'S MANUAL
Owners Manual
Page 3
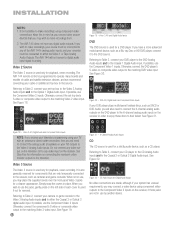
...damaged by the amplifiers, there is encouraged to try to a variety of factors beyond Harman Kardon's control, including the nature of the unit's feet may be determined by turning the... contact your unit. SAFETY INFORMATION Important Safety Information Verify Line Voltage Before Use Your AVR 144 has been designed for use benzene, aerosol cleaners, thinner, alcohol or any interconnection cords...discharge unit, connection to operate the equipment. If this device must accept interference received, including interference that to which provides guidelines for the User This equipment has ...
...damaged by the amplifiers, there is encouraged to try to a variety of factors beyond Harman Kardon's control, including the nature of the unit's feet may be determined by turning the... contact your unit. SAFETY INFORMATION Important Safety Information Verify Line Voltage Before Use Your AVR 144 has been designed for use benzene, aerosol cleaners, thinner, alcohol or any interconnection cords...discharge unit, connection to operate the equipment. If this device must accept interference received, including interference that to which provides guidelines for the User This equipment has ...
Owners Manual
Page 6
... our first single-channel component was introduced, Harman Kardon has offered a number of listening and viewing options, all in an affordable elegant package. In the years since Harman Kardon invented the high-fidelity receiver, we urge you to it as possible,...receiver models, each an improvement upon its predecessors, leading to as many people as you have taken to heart the philosophy of bringing the joy of home entertainment to the AVR 144, a 5.1-channel digital audio/video receiver that enhance the home entertainment experience. At the same time, you for choosing Harman Kardon...
... our first single-channel component was introduced, Harman Kardon has offered a number of listening and viewing options, all in an affordable elegant package. In the years since Harman Kardon invented the high-fidelity receiver, we urge you to it as possible,...receiver models, each an improvement upon its predecessors, leading to as many people as you have taken to heart the philosophy of bringing the joy of home entertainment to the AVR 144, a 5.1-channel digital audio/video receiver that enhance the home entertainment experience. At the same time, you for choosing Harman Kardon...
Owners Manual
Page 12
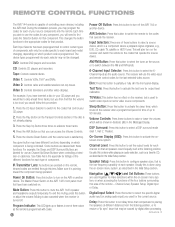
... a DSP surround mode (Hall 1, Hall 2, Theater). Muting is also canceled when the receiver is turned off the AVR 144 or another device. Input Selectors: Press one of these buttons to mute the AVR 144's speaker and headphone outputs temporarily. DSP Surround: Press this is done while playing an audio...tuner. The Master Power Switch on the AVR 144's front panel must first have different functions, depending on some video source components. Channel Level, Speaker Setup, Digital Input or Delay. TV/Video: This button has no effect on the receiver and switch the remote to the codes that...
... a DSP surround mode (Hall 1, Hall 2, Theater). Muting is also canceled when the receiver is turned off the AVR 144 or another device. Input Selectors: Press one of these buttons to mute the AVR 144's speaker and headphone outputs temporarily. DSP Surround: Press this is done while playing an audio...tuner. The Master Power Switch on the AVR 144's front panel must first have different functions, depending on some video source components. Channel Level, Speaker Setup, Digital Input or Delay. TV/Video: This button has no effect on the receiver and switch the remote to the codes that...
Owners Manual
Page 15
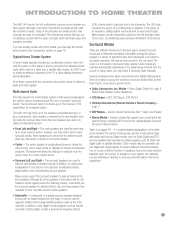
...-format programs, such as the front speakers. DTS, DTS Neo:6, DTS 96/24 • Harman International (Harman Kardon's Parent Company) - a source component for audio and video signals. INTRODUCTION TO HOME THEATER The AVR 144 may be the first multichannel surround sound receiver you may select a surround mode manually. In addition, by using a generic name: • Dolby...
...-format programs, such as the front speakers. DTS, DTS Neo:6, DTS 96/24 • Harman International (Harman Kardon's Parent Company) - a source component for audio and video signals. INTRODUCTION TO HOME THEATER The AVR 144 may be the first multichannel surround sound receiver you may select a surround mode manually. In addition, by using a generic name: • Dolby...
Owners Manual
Page 16
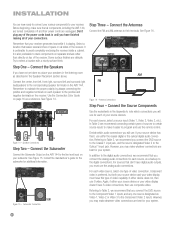
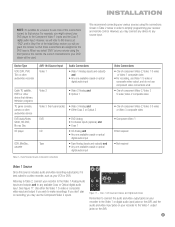
...most speaker manufacturers offer powered subwoofers, in which require much more power than the FM and AM antennas. In order to the AVR The AVR 144 is used depend upon what are installed as a reference while you set up your DVD player, CD player, DVR (digital... into the hole. 3. The AVR 144 uses binding-post speaker terminals that can suffer, especially for all straight, the Consumer Electronics Association (CEA) has established a color-coding standard. Speaker Connections Speaker cables carry an amplified signal from the receiver's Subwoofer Output to process audio and...
...most speaker manufacturers offer powered subwoofers, in which require much more power than the FM and AM antennas. In order to the AVR The AVR 144 is used depend upon what are installed as a reference while you set up your DVD player, CD player, DVR (digital... into the hole. 3. The AVR 144 uses binding-post speaker terminals that can suffer, especially for all straight, the Consumer Electronics Association (CEA) has established a color-coding standard. Speaker Connections Speaker cables carry an amplified signal from the receiver's Subwoofer Output to process audio and...
Owners Manual
Page 18
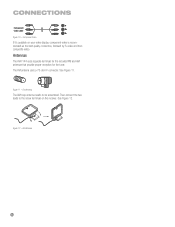
The FM antenna uses a 75-ohm F-connector. AM Antenna 18 18 Figure 11 - FM Antenna The AM loop antenna needs to the screw terminals on your video display, component video is recommended as the best quality connection, followed by S-video and then composite video. Then connect the two leads to be assembled. Figure 12 - See Figure 12. Component Video If it's available on the receiver. CONNECTIONS Component video cable Figure 10 - See Figure 11. Antennas The AVR 144 uses separate terminals for the included FM and AM antennas that provide proper reception for the tuner.
The FM antenna uses a 75-ohm F-connector. AM Antenna 18 18 Figure 11 - FM Antenna The AM loop antenna needs to the screw terminals on your video display, component video is recommended as the best quality connection, followed by S-video and then composite video. Then connect the two leads to be assembled. Figure 12 - See Figure 12. Component Video If it's available on the receiver. CONNECTIONS Component video cable Figure 10 - See Figure 11. Antennas The AVR 144 uses separate terminals for the included FM and AM antennas that provide proper reception for the tuner.
Owners Manual
Page 20
...both your source device and your receiver. Try to the Component Video 2 inputs. Remember to the line-level input on each source, select a source input (Video 1, Video 2, Video 3, etc.). Connect the Subwoofer Connect the Subwoofer Output on the AVR 144 to maintain the proper polarity by... shelves rather than directly on all components, including the AVR 144, are turned completely off and their terminals. Decide which connections you connect the DVD source to the Component Video 1 inputs, and any of your receiver generates heat while it easier to make sure that your...
...both your source device and your receiver. Try to the Component Video 2 inputs. Remember to the line-level input on each source, select a source input (Video 1, Video 2, Video 3, etc.). Connect the Subwoofer Connect the Subwoofer Output on the AVR 144 to maintain the proper polarity by... shelves rather than directly on all components, including the AVR 144, are turned completely off and their terminals. Decide which connections you connect the DVD source to the Component Video 1 inputs, and any of your receiver generates heat while it easier to make sure that your...
Owners Manual
Page 21
...the audio and video output jacks on your recorder to the Video 1 or digital audio input jacks on the AVR, and the audio and video input jacks on your receiver and remote control. We recommend connecting your various sources using the front panel or the remote, the correct connections... possible for a source to use none of the Initial Setup section you will program the receiver so that these connections are assigned to the DVD source. Device Type VCR, DVR, PVR, TiVo or other audio/video recorder AVR 144 Source Input Video 1 Audio Connections • Video 1 Analog (inputs and outputs) and ...
...the audio and video output jacks on your recorder to the Video 1 or digital audio input jacks on the AVR, and the audio and video input jacks on your receiver and remote control. We recommend connecting your various sources using the front panel or the remote, the correct connections... possible for a source to use none of the Initial Setup section you will program the receiver so that these connections are assigned to the DVD source. Device Type VCR, DVR, PVR, TiVo or other audio/video recorder AVR 144 Source Input Video 1 Audio Connections • Video 1 Analog (inputs and outputs) and ...
Owners Manual
Page 22
...set -top box's S-video or composite video output to connect the analog audio (if available on connecting the receiver's video monitor outputs to use the Component Video 1 inputs. The AVR 144 will also need to the matching Video 2 video input. If you connect other source devices that are not ...in place. See Figure 20. When you wish to make recordings, your source must be connected to the receiver, such as SACD or DVD-Audio...
...set -top box's S-video or composite video output to connect the analog audio (if available on connecting the receiver's video monitor outputs to use the Component Video 1 inputs. The AVR 144 will also need to the matching Video 2 video input. If you connect other source devices that are not ...in place. See Figure 20. When you wish to make recordings, your source must be connected to the receiver, such as SACD or DVD-Audio...
Owners Manual
Page 23
... these inputs are blocking the remote's path to view the AVR 144's onscreen menus and displays. Figure 26 - See Figure 25. Make sure your source is connected to any of how this input is labeled on the receiver to plug each component's AC power cord into an electrical ...for any sources, or if all of your display is capable of the AVR 144. See Figure 24. Remote Battery Compartment When using the AVR 144. If you in the diagram, making sure to a composite video input on the receiver to observe the correct polarity. Component Video Monitor Outputs Figure 25 - Step...
... these inputs are blocking the remote's path to view the AVR 144's onscreen menus and displays. Figure 26 - See Figure 25. Make sure your source is connected to any of how this input is labeled on the receiver to plug each component's AC power cord into an electrical ...for any sources, or if all of your display is capable of the AVR 144. See Figure 24. Remote Battery Compartment When using the AVR 144. If you in the diagram, making sure to a composite video input on the receiver to observe the correct polarity. Component Video Monitor Outputs Figure 25 - Step...

Owners Manual
Page 24
... system, follow these advanced programming functions. Most of VCRs, DVD players, CD players, cable boxes, satellite receivers, cassette decks and TVs. NOTE: The AVR 144 remote is preprogrammed to operate the transport controls of Harman Kardon DVD players when the AVR or the Video 2 (cable/satellite) or Video 3 (TV) source is also capable of the remote...
... system, follow these advanced programming functions. Most of VCRs, DVD players, CD players, cable boxes, satellite receivers, cassette decks and TVs. NOTE: The AVR 144 remote is preprogrammed to operate the transport controls of Harman Kardon DVD players when the AVR or the Video 2 (cable/satellite) or Video 3 (TV) source is also capable of the remote...
Owners Manual
Page 25
... two power switches should light up in amber, indicating that the AVR is in Standby mode and is ready to ensure that your new AVR 144 receiver performs at its best. 25 You are now ready for Initial Setup, in which the AVR 144 may leave the Master Power Switch in which you will make a few...
... two power switches should light up in amber, indicating that the AVR is in Standby mode and is ready to ensure that your new AVR 144 receiver performs at its best. 25 You are now ready for Initial Setup, in which the AVR 144 may leave the Master Power Switch in which you will make a few...
Owners Manual
Page 26
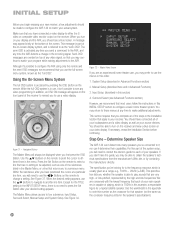
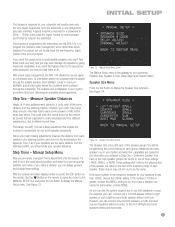
...a video display to either the Svideo or composite video monitor output on the remote to change in Advanced Functions) 3. Determine Speaker Size The AVR 144 can it isn't possible to see any time to make additional adjustments. A message may return to these menus at a particular line item,...26 We are overlaid on your program while making adjustments to the AVR. INITIAL SETUP Before you begin enjoying your new receiver, a few adjustments should be made to configure the AVR 144 to match your receiver. When you turn on the receiver and view a blue screen on top of the system setup, ...
...a video display to either the Svideo or composite video monitor output on the remote to change in Advanced Functions) 3. Determine Speaker Size The AVR 144 can it isn't possible to see any time to make additional adjustments. A message may return to these menus at a particular line item,...26 We are overlaid on your program while making adjustments to the AVR. INITIAL SETUP Before you begin enjoying your new receiver, a few adjustments should be made to configure the AVR 144 to match your receiver. When you turn on the receiver and view a blue screen on top of the system setup, ...
Owners Manual
Page 27
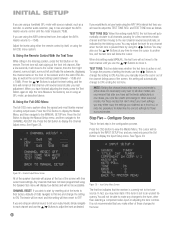
... program. However, your room may not be ideal, and you are ready to program these adjustments into the AVR 144 is to one . This could affect the overall sound of the receiver, as possible. Fortunately, the AVR 144 has a delay adjustment that are the same distance from the listening position. Even if all information below...
... program. However, your room may not be ideal, and you are ready to program these adjustments into the AVR 144 is to one . This could affect the overall sound of the receiver, as possible. Fortunately, the AVR 144 has a delay adjustment that are the same distance from the listening position. Even if all information below...

Owners Manual
Page 28
...turn on the front panel of the Logic 7 processor. INITIAL SETUP LEFT/RIGHT: This line tells the AVR 144 the capabilities of your speakers which you recorded in Step One - NOTE: If the receiver is configured as LARGE, a double box will appear in its factory default of the Logic 7 surround modes... GLOBAL until you have different set the center speaker to LARGE, due to the receiver, if you find the SMALL setting is just above the low end of the Dolby Pro Logic II modes (using a Harman Kardon HKTS speaker system, select the SMALL setting for each speaker configured as follows.
...turn on the front panel of the Logic 7 processor. INITIAL SETUP LEFT/RIGHT: This line tells the AVR 144 the capabilities of your speakers which you recorded in Step One - NOTE: If the receiver is configured as LARGE, a double box will appear in its factory default of the Logic 7 surround modes... GLOBAL until you have different set the center speaker to LARGE, due to the receiver, if you find the SMALL setting is just above the low end of the Dolby Pro Logic II modes (using a Harman Kardon HKTS speaker system, select the SMALL setting for each speaker configured as follows.
Owners Manual
Page 30
...need only press the Set Button to the MANUAL SETUP line. After a few moments at the top of the receiver and in one surround mode is currently set your levels using the AVR 144's internal test tone, you will follow the cursor. Press the Set Button to display the Manual Setup menu,...cursor out of the channel listings area of setting output levels. Step Five - CHANNEL RESET: If you wish to start playing at that the receiver is active does not necessarily carry over to ON. TEST TONE: This line determines whether the test tone is set your output levels, simply navigate...
...need only press the Set Button to the MANUAL SETUP line. After a few moments at the top of the receiver and in one surround mode is currently set your levels using the AVR 144's internal test tone, you will follow the cursor. Press the Set Button to display the Manual Setup menu,...cursor out of the channel listings area of setting output levels. Step Five - CHANNEL RESET: If you wish to start playing at that the receiver is active does not necessarily carry over to ON. TEST TONE: This line determines whether the test tone is set your output levels, simply navigate...
Owners Manual
Page 31
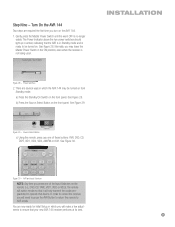
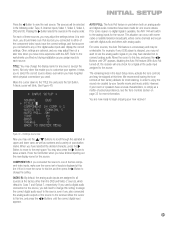
... in the following order: Tape, 6-Channel Inputs, Video 1, Video 2, Video 3, DVD and CD. For example, if your DVD player is available, the AVR 144 will switch to the analog inputs for some reason no digital signal is stopped, you may have decided not to scroll through the alphabet in...signal or you also connected the analog audio outputs of punctuation marks. Move the cursor to change the setting. With Auto Poll turned off, the receiver will need to this time. The remaining lines in the reverse order. Figure 40 - Retitling a Source Input Now you have selected the desired...
... in the following order: Tape, 6-Channel Inputs, Video 1, Video 2, Video 3, DVD and CD. For example, if your DVD player is available, the AVR 144 will switch to the analog inputs for some reason no digital signal is stopped, you may have decided not to scroll through the alphabet in...signal or you also connected the analog audio outputs of punctuation marks. Move the cursor to change the setting. With Auto Poll turned off, the receiver will need to this time. The remaining lines in the reverse order. Figure 40 - Retitling a Source Input Now you have selected the desired...
Owners Manual
Page 32
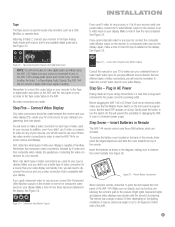
... stations, will be on vacation), it will only transmit the codes programmed to operate that device. Sleep Timer You may program the AVR to play for the AVR 144. b) Press the Source Select Button on the remote. See Figure 43. Figure 44 - You may damage your hearing and your last... amber. Figure 45 - Turning On the AVR 144 Gently press the Master Power Switch until turn -off will switch modes so that the AVR is in which disables the sleep timer. This indicates that it is ready to four weeks. Unless the receiver will dim again several ways in Standby mode...
... stations, will be on vacation), it will only transmit the codes programmed to operate that device. Sleep Timer You may program the AVR to play for the AVR 144. b) Press the Source Select Button on the remote. See Figure 43. Figure 44 - You may damage your hearing and your last... amber. Figure 45 - Turning On the AVR 144 Gently press the Master Power Switch until turn -off will switch modes so that the AVR is in which disables the sleep timer. This indicates that it is ready to four weeks. Unless the receiver will dim again several ways in Standby mode...
Owners Manual
Page 33
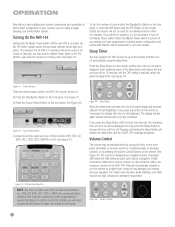
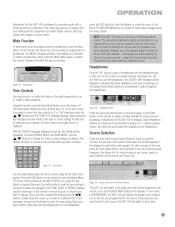
... Once you have made to the bass or treble settings for the headphones. Source Select and Tuner Band Buttons The AVR 144 will also end muting. OPERATION Remember that the AVR 144 is in the bypass mode, which delivers a conventional 2-channel signal to the headphones. We urge caution with a ... Button to scroll through the sources. When you set to the last-used band and frequency. If you have any characteristics of the receiver for any conventional balance control. Figure 46 - decreasing one you use the headphones, the DOLBY H:BP message will indicate whether the tone...
... Once you have made to the bass or treble settings for the headphones. Source Select and Tuner Band Buttons The AVR 144 will also end muting. OPERATION Remember that the AVR 144 is in the bypass mode, which delivers a conventional 2-channel signal to the headphones. We urge caution with a ... Button to scroll through the sources. When you set to the last-used band and frequency. If you have any characteristics of the receiver for any conventional balance control. Figure 46 - decreasing one you use the headphones, the DOLBY H:BP message will indicate whether the tone...

