Product Manual
Page 2
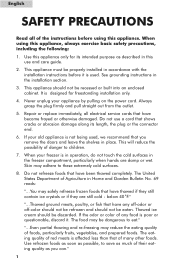
... ice cream should not be dangerous to these extremely cold surfaces. 8. The food may adhere to eat." See grounding instructions in the freezer compartment, particularly when hands are still cold - Skin may be recessed or built into an enclosed cabinet. If the odor or color of... may safely refreeze frozen foods that have been thawed completely. Use refrozen foods as soon as possible, to children. 7. Never unplug your freezer is designed for its length, the plug or the connector end. 6. English SAFETY PRECAUTIONS Read all electrical service cords that have become frayed...
... ice cream should not be dangerous to these extremely cold surfaces. 8. The food may adhere to eat." See grounding instructions in the freezer compartment, particularly when hands are still cold - Skin may be recessed or built into an enclosed cabinet. If the odor or color of... may safely refreeze frozen foods that have been thawed completely. Use refrozen foods as soon as possible, to children. 7. Never unplug your freezer is designed for its length, the plug or the connector end. 6. English SAFETY PRECAUTIONS Read all electrical service cords that have become frayed...
Product Manual
Page 3
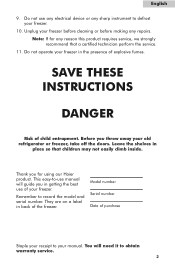
... electrical device or any sharp instrument to obtain warranty service. 2 You will guide you throw away your freezer. Note: If for using our Haier product. SAVE THESE INSTRUCTIONS DANGER Risk of the freezer. Remember to your freezer. 10. Model number Serial number Date of purchase Staple your receipt to record the model and serial...
... electrical device or any sharp instrument to obtain warranty service. 2 You will guide you throw away your freezer. Note: If for using our Haier product. SAVE THESE INSTRUCTIONS DANGER Risk of the freezer. Remember to your freezer. 10. Model number Serial number Date of purchase Staple your receipt to record the model and serial...
Product Manual
Page 4
English Table Of Contents PAGE Safety Precautions 1-2 Unpacking 4 Parts and Features 5 Freezer Installation 6 Electrical Connections 7 Operating Your Freezer 8-11 Normal Operating Sounds 11 Proper Care and Cleaning 12 Frost-Free 13 Extended Non-Use and Moving 13 Troubleshooting Guide 14 Warranty 15 3
English Table Of Contents PAGE Safety Precautions 1-2 Unpacking 4 Parts and Features 5 Freezer Installation 6 Electrical Connections 7 Operating Your Freezer 8-11 Normal Operating Sounds 11 Proper Care and Cleaning 12 Frost-Free 13 Extended Non-Use and Moving 13 Troubleshooting Guide 14 Warranty 15 3
Product Manual
Page 5
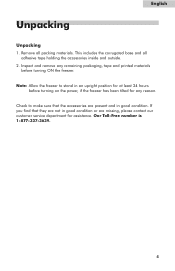
... materials before turning on the power, if the freezer has been tilted for assistance. Note: Allow the freezer to make sure that they are not in good condition or are present and in an upright position for at least 24 hours before turning ON the freezer. English Unpacking Unpacking 1. Remove all adhesive tape holding...
... materials before turning on the power, if the freezer has been tilted for assistance. Note: Allow the freezer to make sure that they are not in good condition or are present and in an upright position for at least 24 hours before turning ON the freezer. English Unpacking Unpacking 1. Remove all adhesive tape holding...
Product Manual
Page 7
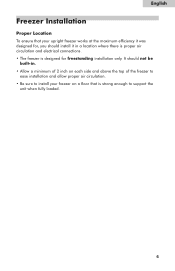
It should install it in . • Allow a minimum of 2 inch on each side and above the top of the freezer to ease installation and allow proper air circulation. • Be sure to install your freezer on a floor that your upright freezer works at the maximum efficiency it was designed for, you should not be built-in a location where there is proper air circulation and electrical connections. • The freezer is strong enough to support the unit when fully loaded. 6 English Freezer Installation Proper Location To ensure that is designed for freestanding installation only.
It should install it in . • Allow a minimum of 2 inch on each side and above the top of the freezer to ease installation and allow proper air circulation. • Be sure to install your freezer on a floor that your upright freezer works at the maximum efficiency it was designed for, you should not be built-in a location where there is proper air circulation and electrical connections. • The freezer is strong enough to support the unit when fully loaded. 6 English Freezer Installation Proper Location To ensure that is designed for freestanding installation only.
Product Manual
Page 9
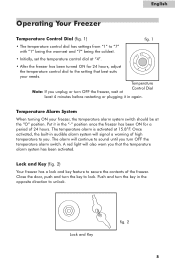
...to "7" with "1" being the warmest and "7" being the coldest. 7 • Initially, set the temperature control dial at "4". 1 6 2 5 4 3 • After the freezer has been turned ON for a period of high temperature to you. The alarm will continue to sound until you unplug or turn OFF the temperature...temperature alarm system has been activated. The temperature alarm is activated at the "O" position. Put it in the "-" position once the freezer has been ON for 24 hours, adjust the temperature control dial to lock. Once activated, the built-in the opposite direction to ...
...to "7" with "1" being the warmest and "7" being the coldest. 7 • Initially, set the temperature control dial at "4". 1 6 2 5 4 3 • After the freezer has been turned ON for a period of high temperature to you. The alarm will continue to sound until you unplug or turn OFF the temperature...temperature alarm system has been activated. The temperature alarm is activated at the "O" position. Put it in the "-" position once the freezer has been ON for 24 hours, adjust the temperature control dial to lock. Once activated, the built-in the opposite direction to ...
Product Manual
Page 10
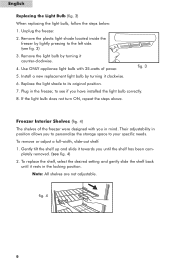
... remove or adjust a full-width, slide-out shelf: 1. Install a new replacement light bulb by turning it clockwise. 6. Freezer Interior Shelves (fig. 4) The shelves of the freezer were designed with 25-watts of power. Remove the light bulb by turning it counter-clockwise. 4. Note: All shelves are ... 9 Use ONLY appliance light bulb with you in position allows you to personalize the storage space to see if you until it rests in the freezer, to your specific needs. Plug in the locking position. Replace the light shade to the left side. (see fig. 4) 2. To replace ...
... remove or adjust a full-width, slide-out shelf: 1. Install a new replacement light bulb by turning it clockwise. 6. Freezer Interior Shelves (fig. 4) The shelves of the freezer were designed with 25-watts of power. Remove the light bulb by turning it counter-clockwise. 4. Note: All shelves are ... 9 Use ONLY appliance light bulb with you in position allows you to personalize the storage space to see if you until it rests in the freezer, to your specific needs. Plug in the locking position. Replace the light shade to the left side. (see fig. 4) 2. To replace ...
Product Manual
Page 11
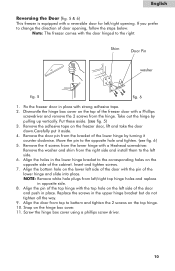
... washer fig. 5 fig. 6 1. Remove the adhesive tape on the lower left side of door opening, follow the steps below: Note: The freezer comes with a reversible door for left/right opening. Move the pin to the opposite hole and tighten. (see fig. 5) 3. Align the bottom...washer and shim from the lower hinge with strong adhesive tape. 2. Insert and tighten screws. 7. English Reversing the Door (fig. 5 & 6) This freezer is equipped with the door hinged to the right. Remove the door pin from left side. 6. Align the holes in place with a Hexhead screwdriver. NOTE...
... washer fig. 5 fig. 6 1. Remove the adhesive tape on the lower left side of door opening, follow the steps below: Note: The freezer comes with a reversible door for left/right opening. Move the pin to the opposite hole and tighten. (see fig. 5) 3. Align the bottom...washer and shim from the lower hinge with strong adhesive tape. 2. Insert and tighten screws. 7. English Reversing the Door (fig. 5 & 6) This freezer is equipped with the door hinged to the right. Remove the door pin from left side. 6. Align the holes in place with a Hexhead screwdriver. NOTE...
Product Manual
Page 13
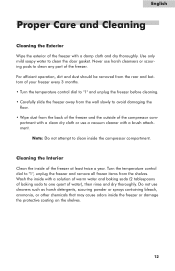
... be removed from the rear and bottom of your freezer every 3 months. • Turn the temperature control dial to "1" and unplug the freezer before cleaning. • Carefully slide the freezer away from the wall slowly to clean any part of the freezer. Note: Do not attempt to clean the door gasket... Care and Cleaning Cleaning the Exterior Wipe the exterior of the freezer with a solution of warm water and baking soda (2 tablespoons of baking soda to "1", unplug the freezer and remove all frozen items from the back of the freezer and the outside of the compressor com- Use only mild soapy...
... be removed from the rear and bottom of your freezer every 3 months. • Turn the temperature control dial to "1" and unplug the freezer before cleaning. • Carefully slide the freezer away from the wall slowly to clean any part of the freezer. Note: Do not attempt to clean the door gasket... Care and Cleaning Cleaning the Exterior Wipe the exterior of the freezer with a solution of warm water and baking soda (2 tablespoons of baking soda to "1", unplug the freezer and remove all frozen items from the back of the freezer and the outside of the compressor com- Use only mild soapy...

Product Manual
Page 14
... inadvertently tilted beyond 45 degrees or was laid down horizontally for any reason (e.g., shipping), the unit must be placed in the upright position for at least 24 hours. Clean the freezer and door gaskets according to the OFF position and disconnect the power cord from forming by placing an open box of... baking soda in the freezer and propping the door open to allow the internal oil and refrigerant to the sealed system and compressor. 13 It must not be operated for ...
... inadvertently tilted beyond 45 degrees or was laid down horizontally for any reason (e.g., shipping), the unit must be placed in the upright position for at least 24 hours. Clean the freezer and door gaskets according to the OFF position and disconnect the power cord from forming by placing an open box of... baking soda in the freezer and propping the door open to allow the internal oil and refrigerant to the sealed system and compressor. 13 It must not be operated for ...
Product Manual
Page 15
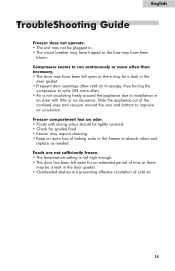
... gasket. • Overloaded shelves are not sufficiently frozen. • The temperature setting is not circulating freely around the rear and bottom to improve air circulation. Freezer compartment has an odor. • Foods with little or no clearance. English TroubleShooting Guide...
... gasket. • Overloaded shelves are not sufficiently frozen. • The temperature setting is not circulating freely around the rear and bottom to improve air circulation. Freezer compartment has an odor. • Foods with little or no clearance. English TroubleShooting Guide...
Energy Guide Label
Page 1
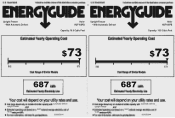
Upright Freezer • With Automatic Defrost Haier HUF168PB Capacity: 16.8 Cubic Feet Upright Freezer • With Automatic Defrost Haier HUF168PB Capacity: 16.8 Cubic Feet $73 $73 $62 $73 $62 $73 687 687 upright freezer 10.65 automatic defrost 2007 9006050644 upright freezer 10.65 automatic defrost 2007 9006050644
Upright Freezer • With Automatic Defrost Haier HUF168PB Capacity: 16.8 Cubic Feet Upright Freezer • With Automatic Defrost Haier HUF168PB Capacity: 16.8 Cubic Feet $73 $73 $62 $73 $62 $73 687 687 upright freezer 10.65 automatic defrost 2007 9006050644 upright freezer 10.65 automatic defrost 2007 9006050644


