User Manual
Page 2
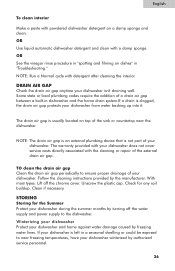
...-UP GUIDE 6 Using Your New Dishwasher 6 DISHWASHER LOADING 7-12 Loading Suggestions 7 Loading Top Rack 8 Loading Bottom Rack 10 Loading Silverware Basket 12 DISHWASHER USE 13-23 Proper Use of Detergent 13 Detergent Dispenser 13 Rinse Aid Dispenser 16 Cycle Selection Charts 17 Canceling a Cycle 19 Changing a Cycle or Setting 19 Adding Items During a Cycle 20 Option Selections 20 Using the Plate Warmer 22 Cycle Status Indicators 22 Wash System 23 Drying System 23 Overfill Protection Float 23 WASHING SPECIAL ITEMS 24-25 DISHWASHER CARE 25-26 Cleaning ...25 Drain Air Gap...
...-UP GUIDE 6 Using Your New Dishwasher 6 DISHWASHER LOADING 7-12 Loading Suggestions 7 Loading Top Rack 8 Loading Bottom Rack 10 Loading Silverware Basket 12 DISHWASHER USE 13-23 Proper Use of Detergent 13 Detergent Dispenser 13 Rinse Aid Dispenser 16 Cycle Selection Charts 17 Canceling a Cycle 19 Changing a Cycle or Setting 19 Adding Items During a Cycle 20 Option Selections 20 Using the Plate Warmer 22 Cycle Status Indicators 22 Wash System 23 Drying System 23 Overfill Protection Float 23 WASHING SPECIAL ITEMS 24-25 DISHWASHER CARE 25-26 Cleaning ...25 Drain Air Gap...
User Manual
Page 3
... on all enclosure panels are not likely to damage the door seal; 2) Load sharp knives with controls. 9. Do not tamper with the handles up to record the model and serial number. Read all instructions before using the appliance. 2. Remove the door or lid to obtain warranty service. 2 You will release any accumulated hydrogen gas. English SAFETY PRECAUTIONS Warning! - Do not operate the dishwasher unless all hot water faucet's and...
... on all enclosure panels are not likely to damage the door seal; 2) Load sharp knives with controls. 9. Do not tamper with the handles up to record the model and serial number. Read all instructions before using the appliance. 2. Remove the door or lid to obtain warranty service. 2 You will release any accumulated hydrogen gas. English SAFETY PRECAUTIONS Warning! - Do not operate the dishwasher unless all hot water faucet's and...
User Manual
Page 4
... Installation Instructions for its size and use. • Remove all shipping plugs from hoses and connectors(such as the cap on open door, doing so can result in serious injury or cuts. English BEFORE USING YOUR DISHWASHER WARNING Tip Over Hazard • Do not use dishwasher until completely installed. • Do not push down on the drain outlet) before installing. Such ruptures are not covered by the warranty. Protect...
... Installation Instructions for its size and use. • Remove all shipping plugs from hoses and connectors(such as the cap on open door, doing so can result in serious injury or cuts. English BEFORE USING YOUR DISHWASHER WARNING Tip Over Hazard • Do not use dishwasher until completely installed. • Do not push down on the drain outlet) before installing. Such ruptures are not covered by the warranty. Protect...
User Manual
Page 5
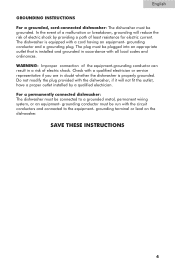
... that is installed and grounded in doubt whether the dishwasher is equipped with all local codes and ordinances. if it will reduce the risk of electric shock. English GROUNDING INSTRUCTIONS For a grounded, cord-connected dishwasher: The dishwasher must be connected to the equipment- The plug must be run with the dishwasher; grounding terminal or lead on the dishwasher. Check with a qualified electrician or service representative...
... that is installed and grounded in doubt whether the dishwasher is equipped with all local codes and ordinances. if it will reduce the risk of electric shock. English GROUNDING INSTRUCTIONS For a grounded, cord-connected dishwasher: The dishwasher must be connected to the equipment- The plug must be run with the dishwasher; grounding terminal or lead on the dishwasher. Check with a qualified electrician or service representative...
User Manual
Page 7
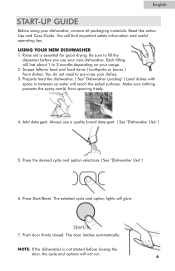
... fill the dispenser before closing the door, the cycle and options will not run. 6 Make sure nothing prevents the spray arm(s) from dishes. Rinse aid is not started before you use a quality brand detergent. ( See "Dishwasher Use" ) 5. You do not need to 3 months depending on your new dishwasher. Add detergent. The selected cycle and option lights will find important safety information and useful operating tips. Push door firmly closed. English START-UP GUIDE Before using your dishes. 3. Press Start/Reset. You...
... fill the dispenser before closing the door, the cycle and options will not run. 6 Make sure nothing prevents the spray arm(s) from dishes. Rinse aid is not started before you use a quality brand detergent. ( See "Dishwasher Use" ) 5. You do not need to 3 months depending on your new dishwasher. Add detergent. The selected cycle and option lights will find important safety information and useful operating tips. Push door firmly closed. English START-UP GUIDE Before using your dishes. 3. Press Start/Reset. You...
User Manual
Page 8
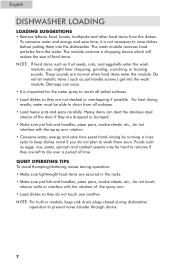
... drying results, water must be hard to dry over a period of the spray arm. • Load dishes so they are normal when hard items enter the module. QUIET OPERATING TIPS To avoid thumping/clattering noises during dishwasher operation to rinse dishes before putting them soon. To conserve water and energy and save time spent hand-rinsing by running a rinse cycle to keep sink drain plugs closed during operation: • Make sure lightweight load items are secured in models...
... drying results, water must be hard to dry over a period of the spray arm. • Load dishes so they are normal when hard items enter the module. QUIET OPERATING TIPS To avoid thumping/clattering noises during dishwasher operation to rinse dishes before putting them soon. To conserve water and energy and save time spent hand-rinsing by running a rinse cycle to keep sink drain plugs closed during operation: • Make sure lightweight load items are secured in models...
User Manual
Page 15
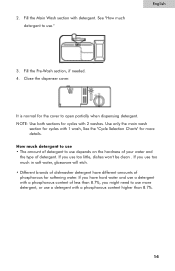
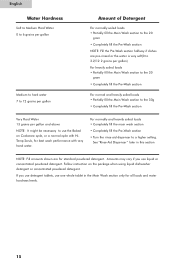
Close the dispenser cover. How much detergent to use depends on the hardness of your water and the type of less than 8.7%, you use too little, dishes won't be clean . Fill the Main Wash section with 2 washes. English 3. NOTE: Use both sections for softening water. If you use too much in soft water, glassware will etch. • Different brands of dishwasher detergent have hard water and use ." See "How...
Close the dispenser cover. How much detergent to use depends on the hardness of your water and the type of less than 8.7%, you use too little, dishes won't be clean . Fill the Main Wash section with 2 washes. English 3. NOTE: Use both sections for softening water. If you use too much in soft water, glassware will etch. • Different brands of dishwasher detergent have hard water and use ." See "How...
User Manual
Page 16
... the Pre-Wash section halfway if dishes are for standard powdered detergent. See "Rinse Aid Dispenser " later in the Main Wash section only for best wash performance with very hand water. For normally and heavily soiled loads • Completely fill the main wash section • Completely fill the Pre-Wash section • Turn the rinse aid dispenser to use the Baked on the package when using liquid dishwasher detergent or concentrated...
... the Pre-Wash section halfway if dishes are for standard powdered detergent. See "Rinse Aid Dispenser " later in the Main Wash section only for best wash performance with very hand water. For normally and heavily soiled loads • Completely fill the main wash section • Completely fill the Pre-Wash section • Turn the rinse aid dispenser to use the Baked on the package when using liquid dishwasher detergent or concentrated...
User Manual
Page 17
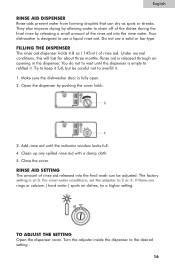
... the dishwasher door is released through an opening in the dispenser. The factory rings or calcium ( hard water ) spots on dishes, try a higher setting. Turn the adjuster inside the dispenser to overfill it full, but be adjusted. Try to keep it . 1. Clean up any spilled rinse aid with a damp cloth. 5. Do not use a liquid rinse aid. Under normal conditions, this will last for about three months. They also improve drying...
... the dishwasher door is released through an opening in the dispenser. The factory rings or calcium ( hard water ) spots on dishes, try a higher setting. Turn the adjuster inside the dispenser to overfill it full, but be adjusted. Try to keep it . 1. Clean up any spilled rinse aid with a damp cloth. 5. Do not use a liquid rinse aid. Under normal conditions, this will last for about three months. They also improve drying...
User Manual
Page 18
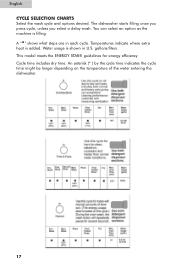
... U.S. Cycle time includes dry time. gallons/liters. Water usage is added. An asterisk (* ) by the cycle time indicates the cycle time might be longer depending on the temperature of the water entering the dishwasher. 17 This model meets the ENERGY STAR® guidelines for energy efficiency. English CYCLE SELECTION CHARTS Select the wash cycle and options desired. The dishwasher starts filling once you press cycle, unless you select a delay wash. Temperatures indicate where extra heat is...
... U.S. Cycle time includes dry time. gallons/liters. Water usage is added. An asterisk (* ) by the cycle time indicates the cycle time might be longer depending on the temperature of the water entering the dishwasher. 17 This model meets the ENERGY STAR® guidelines for energy efficiency. English CYCLE SELECTION CHARTS Select the wash cycle and options desired. The dishwasher starts filling once you press cycle, unless you select a delay wash. Temperatures indicate where extra heat is...
User Manual
Page 20
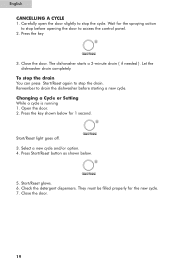
Changing a Cycle or Setting While a cycle is running 1. Press the key shown below . 5. Select a new cycle and/or option. 4. Start/Reset glows. 6. Check the detergent dispensers. They must be filled properly for 1 second. Close the door. To stop the drain You can press Start/Reset again to stop the cycle. Close the door. 19 Press the key 3. Open the door. 2. Wait for the spraying action to access the control panel. 2. Press Start/Reset button as shown below for the new cycle. 7. Remember...
Changing a Cycle or Setting While a cycle is running 1. Press the key shown below . 5. Select a new cycle and/or option. 4. Start/Reset glows. 6. Check the detergent dispensers. They must be filled properly for 1 second. Close the door. To stop the drain You can press Start/Reset again to stop the cycle. Close the door. 19 Press the key 3. Open the door. 2. Wait for the spraying action to access the control panel. 2. Press Start/Reset button as shown below for the new cycle. 7. Remember...
User Manual
Page 21
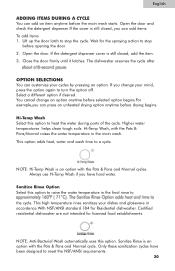
... sanitization cycles have hard water. You cancel change your mind, press the option again to the cycle. This high temperature rinse sanitizes your cycles by pressing an option. English ADDING ITEMS DURING A CYCLE You can add an item anytime before drying begins. Open the door and check the detergent dispenser If the cover is still closed , you can press an unheated drying option anytime before the main wash starts...
... sanitization cycles have hard water. You cancel change your mind, press the option again to the cycle. This high temperature rinse sanitizes your cycles by pressing an option. English ADDING ITEMS DURING A CYCLE You can add an item anytime before drying begins. Open the door and check the detergent dispenser If the cover is still closed , you can press an unheated drying option anytime before the main wash starts...
User Manual
Page 22
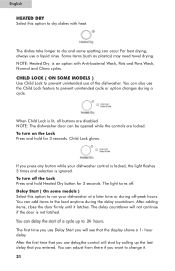
...) may need towel drying. CHILD LOCK ( ON SOME MODELS ) Use Child Lock to the load anytime during a cycle. English HEATED DRY Select this option to run your dishwasher control is locked, the light flashes 3 times and selection is not latched. You can occur For best drying, always use of the dishwasher. NOTE: Heated Dry is lit, all buttons are locked. When Child Lock is an option with heat. To turn off . Child Lock glows. To turn on the Lock Press and hold Heated Dry button for 3 seconds. Delay Start ( On...
...) may need towel drying. CHILD LOCK ( ON SOME MODELS ) Use Child Lock to the load anytime during a cycle. English HEATED DRY Select this option to run your dishwasher control is locked, the light flashes 3 times and selection is not latched. You can occur For best drying, always use of the dishwasher. NOTE: Heated Dry is lit, all buttons are locked. When Child Lock is an option with heat. To turn off . Child Lock glows. To turn on the Lock Press and hold Heated Dry button for 3 seconds. Delay Start ( On...
User Manual
Page 23
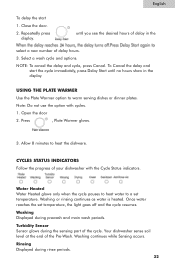
... your dishwasher with cycles. 1. Once water reaches the set temperature. Close the door. 2. To Cancel the delay and start 1. USING THE PLATE WARMER Use the Plate Warmer option to a set temperature, the light goes off and the cycle resumes. Water Heated Water Heated glows only when the cycle pauses to heat water to warm serving dishes or dinner plates. Your dishwasher sense soil level at the end of delay hours. 3. Rinsing Displayed during prewash and main wash periods. Open the door...
... your dishwasher with cycles. 1. Once water reaches the set temperature. Close the door. 2. To Cancel the delay and start 1. USING THE PLATE WARMER Use the Plate Warmer option to a set temperature, the light goes off and the cycle resumes. Water Heated Water Heated glows only when the cycle pauses to heat water to warm serving dishes or dinner plates. Your dishwasher sense soil level at the end of delay hours. 3. Rinsing Displayed during prewash and main wash periods. Open the door...
User Manual
Page 24
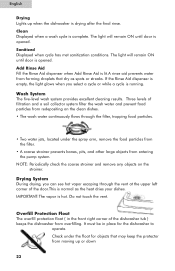
... from redepositing on the strainer. English Drying Lights up or down 23 Clean Displayed when a wash cycle is hot. The light will remain ON until door is running. Sanitized Displayed when cycle has met sanitization conditions. NOTE: Periodically check the coarse strainer and remove any objects on the clean dishes. • The wash water continuously flows through the vent at the upper left corner of the door.This is drying after the final rinse.
... from redepositing on the strainer. English Drying Lights up or down 23 Clean Displayed when a wash cycle is hot. The light will remain ON until door is running. Sanitized Displayed when cycle has met sanitization conditions. NOTE: Periodically check the coarse strainer and remove any objects on the clean dishes. • The wash water continuously flows through the vent at the upper left corner of the door.This is drying after the final rinse.
User Manual
Page 27
...: Run a Normal cycle with the cleaning or repair of the external drain air gap. TO clean the drain air gap Clean the drain air gap periodically to ensure proper drainage of your dishwasher isn't draining well. Follow the cleaning instructions provided by turning off the chrome cover. Check for the Summer Protect your dishwasher winterized by freezing water lines. Winterizing your dishwasher Protect your dishwasher. The warranty provided with your dishwasher does not cover service costs directly associated with detergent after cleaning...
...: Run a Normal cycle with the cleaning or repair of the external drain air gap. TO clean the drain air gap Clean the drain air gap periodically to ensure proper drainage of your dishwasher isn't draining well. Follow the cleaning instructions provided by turning off the chrome cover. Check for the Summer Protect your dishwasher winterized by freezing water lines. Winterizing your dishwasher Protect your dishwasher. The warranty provided with your dishwasher does not cover service costs directly associated with detergent after cleaning...
User Manual
Page 28
... the water shut-off valve ( If installed ) turned on the front of the access panel Was too much detergent used? The dishwasher runs longer while heating water Refer to the lnstallation Instructions for more information. 27 Replace detergent if necessary. • Water residue on ? Try a different brand to repeatedly pause for several seconds during a cycle Is the door closed tightly and latched? Refer to the "Dishwasher Performance Tips" section. Has a household fuse...
... the water shut-off valve ( If installed ) turned on the front of the access panel Was too much detergent used? The dishwasher runs longer while heating water Refer to the lnstallation Instructions for more information. 27 Replace detergent if necessary. • Water residue on ? Try a different brand to repeatedly pause for several seconds during a cycle Is the door closed tightly and latched? Refer to the "Dishwasher Performance Tips" section. Has a household fuse...
User Manual
Page 29
... your hot water supply. Conditioning the final rinse water with heavier soils, use a hightemp option. Keep the rinse aid dispenser filled. Use recommended dishwasher detergents only. Never Use less than 1 tb ( 15g ) per load. Store detergent in a wet dispenser. Heavy soil and/or hard water generally require extra detergent. 28 Refer to be effective. Is the pump or spray arm clogged by Iabels from bottles and cans? If you do not wash...
... your hot water supply. Conditioning the final rinse water with heavier soils, use a hightemp option. Keep the rinse aid dispenser filled. Use recommended dishwasher detergents only. Never Use less than 1 tb ( 15g ) per load. Store detergent in a wet dispenser. Heavy soil and/or hard water generally require extra detergent. 28 Refer to be effective. Is the pump or spray arm clogged by Iabels from bottles and cans? If you do not wash...
User Manual
Page 30
... proper dishwasher filling? Home water pressure should be removed. A booster pump on dishes and dishwasher interior Does your dishwasher. 1. Do not use heated drying. • White spots on dishes placed in the dishwasher and cause marking, Hand wash these items. Remove aluminum markings by some combination of soft or softened water, alkaline washing solutions, insufficient rinsing, overloading the dishwasher, and the heat of the detergent dispenser .Do not use detergent. Use an air-dry or an energy saving dry...
... proper dishwasher filling? Home water pressure should be removed. A booster pump on dishes and dishwasher interior Does your dishwasher. 1. Do not use heated drying. • White spots on dishes placed in the dishwasher and cause marking, Hand wash these items. Remove aluminum markings by some combination of soft or softened water, alkaline washing solutions, insufficient rinsing, overloading the dishwasher, and the heat of the detergent dispenser .Do not use detergent. Use an air-dry or an energy saving dry...
User Manual
Page 33
... initial 12-month period. A product whose original serial number has been removed or altered. All service must be performed by improper installation or maintenance. NOTE: Associated outside inlet and drain plumbing parts are rendered. Damage from misuse, abuse accident, fire, flood, or acts of purchase (sales receipt). Adjustment of consumer operated controls as normal service area or hours. This warranty gives you specific legal rights, and you...
... initial 12-month period. A product whose original serial number has been removed or altered. All service must be performed by improper installation or maintenance. NOTE: Associated outside inlet and drain plumbing parts are rendered. Damage from misuse, abuse accident, fire, flood, or acts of purchase (sales receipt). Adjustment of consumer operated controls as normal service area or hours. This warranty gives you specific legal rights, and you...


