Haier DW9-CBE7 Support and Manuals
Get Help and Manuals for this Haier item
View All Support Options Below
Free Haier DW9-CBE7 manuals!
Problems with Haier DW9-CBE7?
Ask a Question
Free Haier DW9-CBE7 manuals!
Problems with Haier DW9-CBE7?
Ask a Question
Popular Haier DW9-CBE7 Manual Pages
User Manual - Page 1
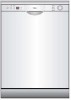
Dishwasher DW9-CBE7 Instructions for Use
Code: 0120505864
User Manual - Page 4
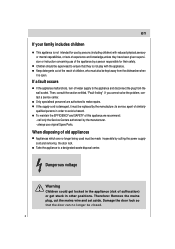
... from the dishwasher when it must be replaced by persons (including children) with the appliance. To maintain the EFFICIENCY and SAFETY of the appliance by a person responsible for use original Spare Parts. Therefore: Remove the mains plug, cut the mains wire and set aside.
call only the Service Centers authorized by cutting the power...
User Manual - Page 5
... them in or out) to the
water mains using new hose-sets and
that the water inlet can be replaced with the water supply hose, or leaks within the unit, in...Installation
en
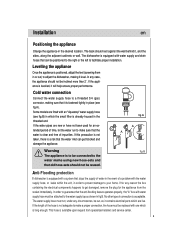
Positioning the appliance
Change the appliance in the
fig.A
threaded end. The back should not be cut, as shown in the event of impurities.
If the appliance is levelled, it contains electrical parts...
User Manual - Page 8
... the underside of the adjacent cabinets. Adjust these until the door just remains open under its own weight and is level when open door whilst supporting the decor door. For non-wooden worktops (e.g.
User Manual - Page 10

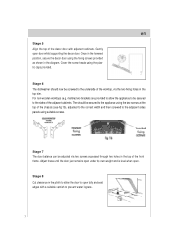
...screwed into the slots located on the top part of the machine.
9
en
Fig.5 Fig.6 Fig.7
2-7Kg
Fig.8 ...Insert the top hooks into their slots (Fig.8). Then perform the installation steps described below, based on the inside of the springs is... are mounted on the brackets slide into the appropriate slots in model or integrated with the control panel. Remove the small plastic plugs...
User Manual - Page 11
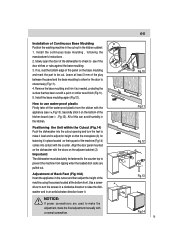
Install the continuous base moulding , following the manufacturer's instructions... bottom edge of the panel on the base moulding and mark the part to be fastened to the counter top to prevent the machine from the...a screwdriver to turn the feet to make the final adjustment manually with a paint or similar wood finish (Fig.11). 5. Install the base moulding again (Fig.12).
NOTICE:
If power ...
User Manual - Page 25
... in poorer wash results. Otherwise, the detergent may have already been used, and the appliance may be helpful therefore to your instruction manual). If this facility) and selecting the lowest possible setting for a new programming 3:A cycle that only some dishwashers have already drained the wash water. BC
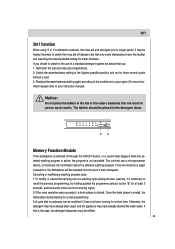
Memory Function Module
If the dishwasher...
User Manual - Page 27
...keep your dishwasher in shape
en
After Every Wash
After every wash, set the main switch "I" to off the water supply and leave the ...solvents or Abrasive Cleaning Products
To clean the exterior and rubber parts of the factors that cause odors to form in the dishwasher... and a little while vinegar, or cleaning product made specifically for dishwashers. How to keep it is food that remains trapped in...
User Manual - Page 28
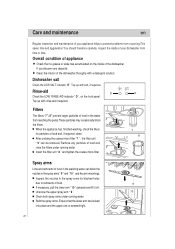
Care and maintenance
en
Regular inspection and maintenance of your dishwasher from time to prevent problems from reaching the pump.These particles may occasionally block the filters. Dishwasher salt
Check the LOW SALT indicator "E". Top up with salt, if required.
Top ...
User Manual - Page 29
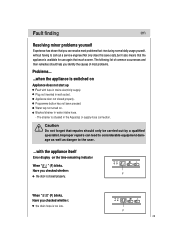
...problems that rise during normal daily usage yourself, without having to the user....
Improper repairs can resolve most problems.
Problems...
...when the appliance is switched on
Appliance does not start up Fault with the appliance itself
Error display on... problems yourself
Experience has shown that you can lead to considerable equipment damage as well as danger to call out a service engineer...
User Manual - Page 30
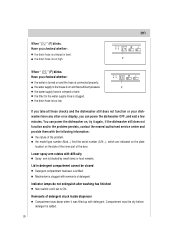
... you take all these checks and the dishwasher still does not function or your dishwasher have any other error display, you checked whether:
the drain hose is crimped or bent.
Remnants of the problem.
the model type number (Mod...) And the serial number (S/N...), which are indicated on the plate located on , try it...
User Manual - Page 32
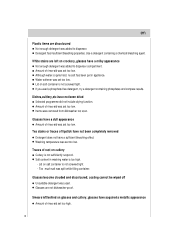
... been completely removed Detergent does not have not been dried Selected programme did not include drying function.
Detergent has insuffcient bleaching properties. Washing temperature was set too low. Glasses have a milky appearance Not enough detergent was used a phosphate-free detergent , try a detergent containing phosphates and compare results. Use a detergent containing a chemical...
User Manual - Page 33
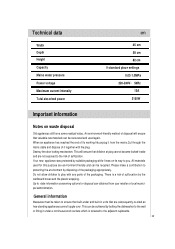
... obtained from the mains.Cut through the mains cable and dispose of it together with any parts of disposal will ensure that children at play with the plug. An environment-friendly method of... voltage Maximum current intensity Total absorbed power
en
45 cm 58 cm 82 cm 9 standard place settings 0.03-1.0MPa 220-240V~ 50Hz 13A 2150W
Important information
Notes on its working life,unplug it ...
User Manual - Page 34
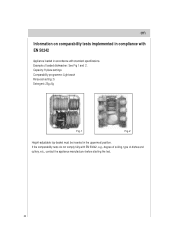
... EN 50242, e.g., degree of soiling, type of loaded dishwasher: See Fig 1 and 2. Capacity: 9 place settings Comparability programme: Light wash Rinse-aid setting: 5 Detergent: 25g+5g
Fig.1
Fig.2
Height-adjustable top-basket must be inserted in accordance with standard specifications. en
Information on comparability tests implemented in compliance with EN 50242
Appliance loaded in...
User Manual - Page 35
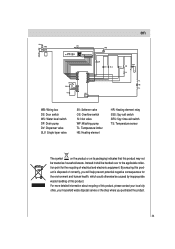
For more detailed information about recycling of this product, please contact your local city office, your household waste disposal service or the shop where you will help prevent potential negative consequences for the recycling of electrical and electronic equipment. By ensuring this product is disposed ...
Haier DW9-CBE7 Reviews
We have not received any reviews for Haier yet.