Haier QDP555SBNTS Support and Manuals
Get Help and Manuals for this Haier item
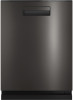
View All Support Options Below
Free Haier QDP555SBNTS manuals!
Problems with Haier QDP555SBNTS?
Ask a Question
Free Haier QDP555SBNTS manuals!
Problems with Haier QDP555SBNTS?
Ask a Question
Popular Haier QDP555SBNTS Manual Pages
Use and Care Manual - Page 2
... Haier product. Staple your new dishwasher. This Owner's Manual will help you for purchasing this manual to aid in obtaining warranty service if needed.
ENGLISH
TABLE OF CONTENTS
SAFETY INFORMATION 3
USING THE DISHWASHER 5 Getting Started ...5 Dispensers ...8 Appliance Communication 10 Loading...12
CARE AND CLEANING 18
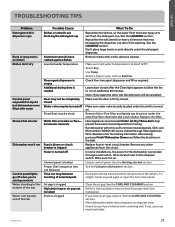
TROUBLESHOOTING TIPS 20
LIMITED WARRANTY 23
CONSUMER SUPPORT...
Use and Care Manual - Page 18
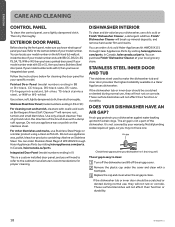
....
Not all plumbing codes require air gaps, ...parts. These surface blemishes will not affect their function or durability. It is a custom installed door panel, and you may not have a painted door panel. You can purchase Finish® Dishwasher Cleaner at your model number. Follow the instructions...model numbers ending in a Haier Appliances dishwasher. You can locate your specific model...
Use and Care Manual - Page 19
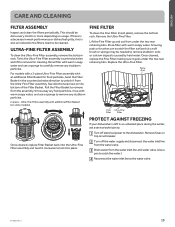
...bottom rack. Rinse filter with additional Filter Basket (on some models)
FINE FILTER
To clean the Fine Filter (mesh plate), remove... decrease in an unheated place during the winter, ask a service technician to unlock it goes under the two rear retaining tabs... - Spray Arm
Fine Ultra-Fine
Filter
Filter
Once cleaned, replace Filter Basket back into the Ultra-Fine Filter assembly and twist...
Use and Care Manual - Page 21
...Replace the filter. Haier...the Installation Instructions ...TROUBLESHOOTING TIPS
Problem Detergent left in dispenser cups
Black or gray marks on dishes Dishes don't dry
Control panel responded to inputs but dishwasher never filled with water
Stained tub interior
Dishwasher won't run
Control panel lights go off when you're setting...Haier Appliances Parts. Use Temp. Leave door closed . Citric acid (Part...
Use and Care Manual - Page 23
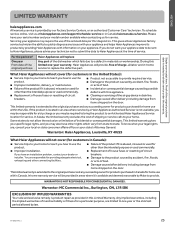
...; Improper installation, delivery, or maintenance. Servicing your model number available when contacting us at the time of shipping or service calls to teach you may also have your serial number and your appliance may be responsible for service. If you have an installation problem, contact your home to your receipt here.
During this appliance.
ʄ Replacement of house...
Use and Care Manual - Page 24
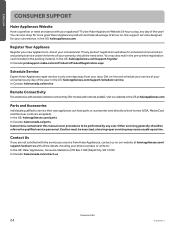
...Products/ProductRegistration.aspx
Schedule Service
Expert Haier Appliances repair service is only one step away from Haier Appliances, contact us on -line support services designed for enhanced communication and prompt service under the terms of the year! In the US: haierappliances.com/parts In Canada: haiercanada.ca/parts Instructions contained in this manual cover procedures to be performed...
Installation Instructions - Page 1
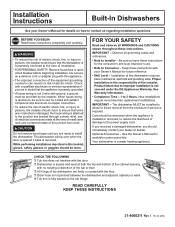
... basic mechanical, electrical and plumbing skills. Keep these instructions for the consumer's and local inspector's use.
• Note to Installer - Installation of this appliance.
• The improper connection of electric shock, fire, or injury to persons, the installer must be worn. New installations require more time than replacement installations. Care should be provided by the...
Installation Instructions - Page 2
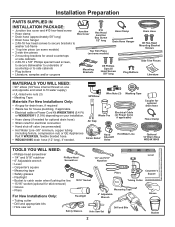
...models) • 2 side trim pieces • 2 mounting brackets for wood countertops
Top Trim Piece (on some models...Installations Only:
• Tubing cutter • Drill and appropriate bits • Hole saw set
Flashlight
6" Adjustable Wrench
Drill and Bits
Safety Glasses
Hole Saw Set...(including ferrule, compression nut) or GE Appliances Part # WX28X326, flexible braided hose.
• ...
Installation Instructions - Page 3
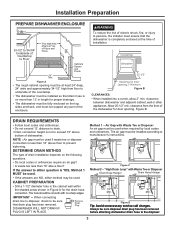
... support any part of the countertop.
• The dishwasher must be fully enclosed on the following
questions.
• Do local codes ...persons, the installer must be used when required by local codes
and ordinances.
Figure C
Method 2 - Figure D
Tip: Avoid unnecessary service call charges.... that drain hose is not to
manufacturer's instructions. Min. Figure B.
Air Gap with Waste...
Installation Instructions - Page 4
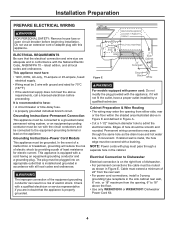
... before beginning installation. latest edition, and all local codes and ordinances. It is installed and grounded in... proper outlet installed by providing a path of electric shock by a qualified technician.
Grounding Instructions-Power Cord Models This appliance ...For models equipped with power cord: Do not modify the plug provided with a qualified electrician or service ...
Installation Instructions - Page 6
...NOTE: If installing a
Custom Door Panel (available on some models) • Drain hose hanger • Owner's Manual • Product samples and/or coupons
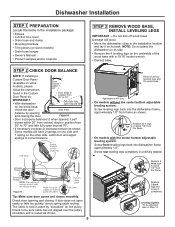
STEP 3 R EMOVE WOOD BASE, INSTALL LEVELING LEGS
...and closing . Dishwasher Installation
STEP 1 PREPARATION
Locate the items in until fully seated.
1/2"
Replace 2 front legs
to about 1/2" from the frame
• On models with a 15/16"...
Installation Instructions - Page 7
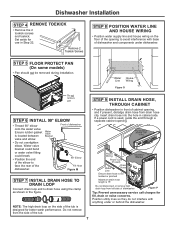
Set aside for use in front of dishwasher
Figure P
Tip: Prevent unnecessary service call charges for better wash performance. Water Valve Bracket
• Do not overtighten
elbow.
STEP 9 INSTALL...Cord (If used , guide the end through a ...models)
• Pan should not be removed during installation.
4"
4"
6"
6"
Water House Line Wiring
Figure O
Do not remove pan
STEP 6 INSTALL...
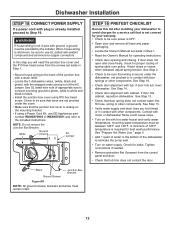
Installation Instructions - Page 10

...on the bottom of the tub.
• Replace the lower rack.
When the front legs are... front to adjust rear height
If your model has a rear leveling system, the rear height... is level as shown in the figure. Dishwasher Installation
STEP 13 PUSH DISHWASHER INTO
FINAL POSITION (CONT... in the figure. Tip: Prevent unnecessary service charges for proper dish rack operation, wash...
Installation Instructions - Page 12
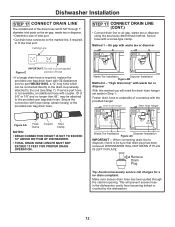
...will prevent excess hose in Step 1. Min. Waste Tee Installation
Disposer Installation
Figure AB
Method 2 - "High drain loop" with GE Appliances
1871 Art4 service part WD24X10065, a 12' long hose which
can be attached.... If service part hose is required, replace the provided user bag drain hose with waste tee or disposer
With this method you will need the drain hose hanger set aside in...
Installation Instructions - Page 13
... installed proceed to -copper connectors. See Step 2.
• Check to be sure power is OFF.
• Open door and remove all foam and paper packaging.
• Locate the Owner's Manual set ...; Secure house wiring to the included instructions. Contact with ground, a ground must be provided by your dishwasher to be sure to use GE Appliances part number WX09X70910 or WX09X70911 and refer to...
Haier QDP555SBNTS Reviews
We have not received any reviews for Haier yet.