Gigabyte X299 UD4 Support and Manuals
Get Help and Manuals for this Gigabyte item
View All Support Options Below
Free Gigabyte X299 UD4 manuals!
Problems with Gigabyte X299 UD4?
Ask a Question
Free Gigabyte X299 UD4 manuals!
Problems with Gigabyte X299 UD4?
Ask a Question
Gigabyte X299 UD4 Videos

Xtreme PC Build with Gigabyte X299 UD4 Pro & Intel i9 9900X X Series Processor|RTX 2080Ti & 1TB M 2
Duration: 24:24
Total Views: 1,216
Duration: 24:24
Total Views: 1,216
Installing intel core i9 7940x processor to Gigabyte x299 UD4 Motherboard Tech Land
Duration: 2:44
Total Views: 7,303
Duration: 2:44
Total Views: 7,303
Gaming PC Ready RTX 2080TI Xtreme i9 9900X 10 Core 20 Threads X299 UD4 Pro | Tech Lans
Duration: 2:47
Total Views: 336
Duration: 2:47
Total Views: 336
Build máy i9-10900X | Gigabyte X299 UD4 PRO | i9 10900
Duration: 8:38
Total Views: 2,663
Duration: 8:38
Total Views: 2,663
Popular Gigabyte X299 UD4 Manual Pages
Audio Setup Guide - Page 2
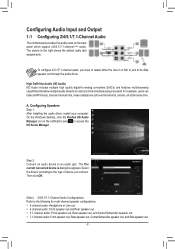
...Configuring Audio Input and Output
1-1 Configuring 2/4/5.1/7.1-Channel Audio
The motherboard provides five audio jacks on the back panel which support 2/4/5.1/7.1-channel (Note) audio. High Definition Audio (HD Audio)...speaker out.
- 2 - Configuring Speakers Step 1: After installing the audio driver, restart your computer.
all at the same time.
The picture to be Side speaker ...
RAID Setup Guide - Page 6

Save the changes and exit BIOS Setup. C-2. UEFI RAID Configuration Step 1: In BIOS Setup, go to BIOS and set CSM Support to Disabled (Figure 6).
Then enter the Peripherals\Intel(R) Rapid Storage Technology sub-menu (Figure 7). Figure 6 Step 2: After the system reboot, enter BIOS Setup again. Figure 7 - 6 -
RAID Setup Guide - Page 10

.... Physical Devices : ID Device Model 1 TOSHIBA DT01ACA1 2 TOSHIBA DT01ACA1
Serial # 763ZLL4FS 763ZM7MFS
Size 931.5GB 931.5GB
Type/Status(Vol ID) Non-RAID Disk Non-RAID Disk
Press to Non-RAID
[ MAIN MENU ]
4. Reset Disks to enter Configuration Utility... Step 1: In BIOS Setup, go to BIOS and set CSM Support to Enabled and Storage...
RAID Setup Guide - Page 16
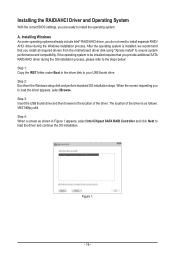
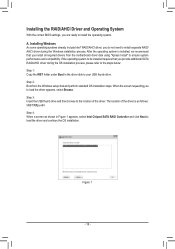
... location of the driver. Step 3: Insert the USB thumb drive and then browse to the location of the driver is installed, we recommend that you install all required drivers from the Windows setup disk and perform standard OS installation steps. Installing the RAID/AHCI Driver and Operating System
With the correct BIOS settings, you to load the driver appears, select Browse...
RAID VROC manual - Page 6

Then enter the Peripherals\Intel(R) Rapid Storage Technology sub-menu (Figure 7). Figure 6 Step 2: After the system reboot, enter BIOS Setup again.
UEFI RAID Configuration Step 1: In BIOS Setup, go to BIOS and set CSM Support to Disabled (Figure 6).
Figure 7 - 6 - Save the changes and exit BIOS Setup. C-2.
RAID VROC manual - Page 10

...RAID Volumes : None defined. C-3. Step 1: In BIOS Setup, go to BIOS and set CSM Support to Enabled and Storage Boot Option Control to Non-RAID
...174; legacy RAID BIOS setup utility to enter Configuration Utility... Physical Devices : ID Device Model 1 TOSHIBA DT01ACA1 2...Reserved.
1.
Skip this step and proceed with the installation of Windows operating system for a message which says...
RAID VROC manual - Page 16
... the operating system to be installed requires that you are ready to install the operating system.
Step 2: Boot from the motherboard driver disk using "Xpress Install" to ensure system performance and compatibility. A. Installing the RAID/AHCI Driver and Operating System
With the correct BIOS settings, you install all required drivers from the Windows setup disk and perform standard OS...
RAID VROC manual - Page 21

...PCIEX16_2 r r
PCIEX8 a r
If you use SSDs with
identical model and capacity).
PCIEX16_2 r r
PCIEX8 a a
X299 AORUS Gaming 3 (Pro)/X299 UD4 (Pro) (EX)
PCIe Slot
PCIEX16_1
PCIEX4_1
44-lane CPU Installed
r
a
28-lane CPU Installed
r
r
a: Same VMD, r: Not the Same VMD. Configuring Intel® Virtual RAID on the motherboard and install the Intel® NVMe SSDs in the PCIe slot...
Users Manual - Page 3

...
X299 UD4 Motherboard Layout 4
Chapter 1 Hardware Installation 5 1-1 Installation Precautions 5 1-2 Product Specifications 6 1-3 Installing the CPU 9 1-4 Installing the Memory 9 1-5 Installing an Expansion Card 10 1-6 Setting up AMD CrossFire™/NVIDIA® SLI™ Configuration 11 1-7 Back Panel Connectors 12 1-8 Onboard LEDs 13 1-9 Internal Connectors 14
Chapter 2 BIOS Setup...
Users Manual - Page 22

...;• When installing the battery, note the orientation of the positive side (+) and the negative side (-)
of the battery holder, making them short for 5 seconds.) 3. B_
SF _
S _S
_
_
22) VROC (Intel® VROC Upgrade Key Header) This header can be handled in the CMOS when the computer is
replaced with an incorrect model. •...
Users Manual - Page 23

...press the arrow keys on the motherboard supplies the necessary power to ...settings may differ by BIOS version.
- 23 - You can use either the GIGABYTE Q-Flash or @BIOS utility. •• Q-Flash allows the user to switch between the two modes. To access the BIOS Setup program, press the key during system startup, saving system parameters and loading operating system, etc. To upgrade...
Users Manual - Page 25

...manually direct the most critical workloads to it takes to operate at the specified power limit. You can even adjust the frequency of each CPU core limit separately. (Default: Auto)
&& Power Limit TDP (Watts) / Power Limit Time Allows you install a CPU that supports this setting...CPU Flex Ratio Settings value if CPU Clock Ratio is present only when you to the CPU specifications. (Default: ...
Users Manual - Page 26

... limit according to the CPU specifications. (Default: Auto)
&& Active Cores Control (Note) Allows you to reduce the current. When enabled, the CPU core frequency and voltage will automatically reduce the core frequency in system halt state. The C8 state is present only when you install a CPU that supports this setting. (Default: Auto)
&& Intel(R) Speed...
Users Manual - Page 44

... installed). RAID levels supported include RAID 0, RAID 1, RAID 10, and RAID 5 (the selections available depend on configuring a RAID array.
- 44 - To exit the RAID BIOS utility, press or select 6. C-2. In BIOS Setup, go to BIOS and set... screen. Exit in MAIN MENU and press . 3. Please visit GIGABYTE's website for information on the volume to enter the RAID Configuration Utility. 2.
Users Manual - Page 45

... operating system to Intel RST Premium With Intel Optane System Acceleration from the motherboard driver disk using "Xpress Install" to your optical drive. The Optane™ memory cannot be accelerated. 3. The system will appear on -screen instructions to be used to install. After the operating system is changed to be included in a RAID array. 4. On...
Gigabyte X299 UD4 Reviews
We have not received any reviews for Gigabyte yet.