Gigabyte X299 AORUS Gaming 9 Support and Manuals
Get Help and Manuals for this Gigabyte item
View All Support Options Below
Free Gigabyte X299 AORUS Gaming 9 manuals!
Problems with Gigabyte X299 AORUS Gaming 9?
Ask a Question
Free Gigabyte X299 AORUS Gaming 9 manuals!
Problems with Gigabyte X299 AORUS Gaming 9?
Ask a Question
Gigabyte X299 AORUS Gaming 9 Videos

Review AORUS EXTREME PC BUILD ! i7 7820X + X299 AORUS Gaming 9 + 1080ti AORUS Extreme !!
Duration: 9:03
Total Views: 1,055
Duration: 9:03
Total Views: 1,055
?GIGABYTE?X299 AORUS Gaming 9 ?????????!!?AORUS?
Duration: 1:02:42
Total Views: 7,657
Duration: 1:02:42
Total Views: 7,657
Gigabyte X299 Aorus Gaming 9: ?áng l?a ch?n v?i m?c giá 13 tri?u ??ng |ThinkView
Duration: 5:47
Total Views: 18,802
Duration: 5:47
Total Views: 18,802
GIGABYTE X299 AORUS Gaming 9 ???? RGB Fusion
Duration: :19
Total Views: 108
Duration: :19
Total Views: 108
Popular Gigabyte X299 AORUS Gaming 9 Manual Pages
User Manual - Page 4

Table of Contents
Box Contents...6 Optional Items...6 X299 AORUS Gaming 9 Motherboard Layout 7 Chapter 1 Hardware Installation 9
1-1 Installation Precautions 9 1-2 Product Specifications 10 1-3 Installing the CPU and CPU Cooler 14
1-3-1 Installing the CPU...14 1-3-2 Installing the CPU Cooler 16 1-4 Installing the Memory 17 1-4-1 4 Channel/Dual Channel Memory Configuration 17 1-4-2 ...
User Manual - Page 20

...BIOS Setup to make any required BIOS changes for your computer.
PCI Express x16 Slot
Follow the steps below to install an expansion card: •• Make sure the motherboard supports...with your operating system. After installing all expansion cards, replace the chassis cover(s). 6. Hardware Installation
- 20 - Carefully read the manual that supports your expansion card in your ...
User Manual - Page 25

...Operating system status LED
BOOT
VGA
Quick Buttons This motherboard has 3 quick buttons: power button, reset button...want to factory defaults when needed. Hardware Installation
PW_SW: Power Button RST_SW: Reset Button...BIOS Setup to load factory defaults (select Load Optimized Defaults) or manually configure the BIOS settings (refer to Chapter 2, "BIOS Setup," for BIOS configurations).
- 25 -
User Manual - Page 45

.... BIOS includes a BIOS Setup program that allows the user to modify basic system configuration settings or to clear the CMOS values.)
- 45 - Inadequately altering the settings may result in system malfunction.
•• It is recommended that you not alter the default settings (unless you not flash the BIOS. To upgrade the BIOS, use either the GIGABYTE Q-Flash or @BIOS utility...
User Manual - Page 51

...install a CPU that supports this setting. (Default: Auto)
&& Turbo Per Core Limit Control (Note) Allows you to control each core individually for CPU Turbo mode and how long it . Auto sets the power limit according to the CPU specifications...). BIOS Setup && AVX Offset (Note) AVX offset is the negative offset of AVX ratio.
&& AVX 512 (Note) Allows you to configure AVX 512 instructions. ...
User Manual - Page 79

Figure 6
Step 2: After the system reboot, enter BIOS Setup again. Then enter the Peripherals\Intel(R) Rapid Storage Technology sub-menu (Figure 7).
UEFI RAID Configuration
Step 1: In BIOS Setup, go to BIOS and set CSM Support to Disabled (Figure 6).
C-2. Save the changes and exit BIOS Setup. Configuring a RAID Set Figure 7 - 79 -
User Manual - Page 83

Step 1: In BIOS Setup, go to BIOS and set CSM Support to Enabled and Storage Boot Option Control to create a RAID ... Save the changes and exit BIOS Setup.
Option ROM - 15.7.0.2925 Copyright (C) Intel Corporation.
Intel(R) Rapid Storage Technology - Acceleration Options 6.
Recovery Volume Options 5. C-3. Skip this step and proceed with the installation of Windows operating system for ...
User Manual - Page 89

... in Figure 1 appears, select Intel Chipset SATA RAID Controller and click Next to load the driver and continue the OS installation.
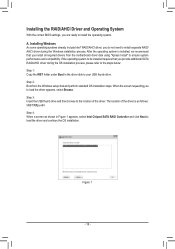
The location of the driver. 3-2 Installing the RAID/AHCI Driver and Operating System
With the correct BIOS settings, you to load the driver appears, select Browse. Step 3: Insert the USB thumb drive and then browse to the...
RAID Setup Guide - Page 6

Save the changes and exit BIOS Setup.
Figure 6 Step 2: After the system reboot, enter BIOS Setup again.
C-2. Then enter the Peripherals\Intel(R) Rapid Storage Technology sub-menu (Figure 7). UEFI RAID Configuration Step 1: In BIOS Setup, go to BIOS and set CSM Support to Disabled (Figure 6). Figure 7 - 6 -
RAID Setup Guide - Page 10

... Volume 2. Physical Deivces : ID Device Model 1 TOSHIBA DT01ACA1 2 TOSHIBA DT01ACA1
[ DISK/VOLUME INFORMATION ]
Serial # 763ZLL4FS 763ZM7MFS
Size 931.5GB 931.5GB
Type/Status(Vol ID) Non-RAID Disk Non-RAID Disk
[hi]-Select
[ESC]-Exit
Figure 14
[ENTER]-Select Menu
- 10 - Step 1: In BIOS Setup, go to BIOS and set CSM Support to Enabled and Storage Boot...
RAID Setup Guide - Page 16
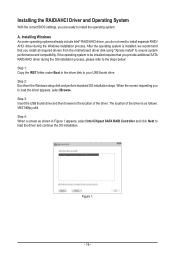
... are ready to install the operating system. Step 3: Insert the USB thumb drive and then browse to the location of the driver is installed, we recommend that you provide additional SATA RAID/AHCI driver during the Windows installation process. Installing the RAID/AHCI Driver and Operating System
With the correct BIOS settings, you to load the driver appears, select Browse...
RAID VROC manual - Page 6

Figure 7 - 6 - Figure 6 Step 2: After the system reboot, enter BIOS Setup again. C-2.
Save the changes and exit BIOS Setup. Then enter the Peripherals\Intel(R) Rapid Storage Technology sub-menu (Figure 7). UEFI RAID Configuration Step 1: In BIOS Setup, go to BIOS and set CSM Support to Disabled (Figure 6).
RAID VROC manual - Page 10

...Acceleration Options 6. Intel(R) Rapid Storage Technology -
Create RAID Volume 2. Step 1: In BIOS Setup, go to BIOS and set CSM Support to Enabled and Storage Boot Option Control to enter Configuration Utility... RAID Volumes : None defined.
Physical Devices : ID Device Model 1 TOSHIBA DT01ACA1 2 TOSHIBA DT01ACA1
Serial # 763ZLL4FS 763ZM7MFS
Size 931.5GB 931.5GB...
RAID VROC manual - Page 16
...
With the correct BIOS settings, you do not need to install separate RAID/ AHCI driver during the OS installation process, please refer to the steps below: Step 1: Copy the IRST folder under Boot in Figure 1 appears, select Intel Chipset SATA RAID Controller and click Next to load the driver and continue the OS installation. After the operating...
RAID VROC manual - Page 21

... RAID on the motherboard and install the Intel® NVMe SSDs in the PCIe slot(s) or M.2(s) connector controlled by the same VMD controller.
X299 AORUS Gaming 9
PCIe Slot
PCIEX16_1
44-lane CPU Installed
a
28-lane CPU Installed
a
a: Same VMD, r: Not the Same VMD. Intel® VROC Upgrade Key Supported RAID Levels
No Key Installed
RAID 0
Standard Key
RAID 0, 1, 10
Premium Key...
Gigabyte X299 AORUS Gaming 9 Reviews
We have not received any reviews for Gigabyte yet.