Quick Guide - GSmart G1315 English Version
Page 16
Network supporting: (a). SIM 2: 2G (GSM) If this document is modified, please download the latest version on GSmart's official website also. NOTE: 1. SIM 1: 3G (WCDMA) (b). B2, No.207, Sec.3, Pai-Hsin Road, Hsin-Tien Dist., New Taipei City 231, Taiwan +886-2-89132220 www.gigabytecm.com G1315│ 16 GIGA-BYTE COMMUNICATIONS INC. Only ONE SIM card exist at one time when making phone call or internet browsing. 2. You can download the user manual on GSmart's official website.
Network supporting: (a). SIM 2: 2G (GSM) If this document is modified, please download the latest version on GSmart's official website also. NOTE: 1. SIM 1: 3G (WCDMA) (b). B2, No.207, Sec.3, Pai-Hsin Road, Hsin-Tien Dist., New Taipei City 231, Taiwan +886-2-89132220 www.gigabytecm.com G1315│ 16 GIGA-BYTE COMMUNICATIONS INC. Only ONE SIM card exist at one time when making phone call or internet browsing. 2. You can download the user manual on GSmart's official website.
User Manual- GSmart G1315 English Version
Page 28
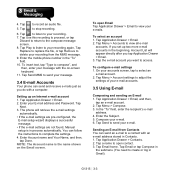
..."To" field, enter the recipient's e-mail address. 4. Tap Send to send your accounts screen, tap to access. Tap Application Drawer > Contacts. 2. G1315│3-3 Tap to view all e-mail accounts. Tap Application Drawer > Email. 2. Tap Application Drawer > Email. 2. On your e-mail. Sending an ...If the e-mail settings are pre-configured, the E-mail setup wizard displays a successful message. • If the e-mail settings are not found, Manual setup is the name shown on -screen keyboard. 11. Tap Application Drawer > Email, and then, tap an e-mail account. 2. Enter the ...
..."To" field, enter the recipient's e-mail address. 4. Tap Send to send your accounts screen, tap to access. Tap Application Drawer > Contacts. 2. G1315│3-3 Tap to view all e-mail accounts. Tap Application Drawer > Email. 2. Tap Application Drawer > Email. 2. On your e-mail. Sending an ...If the e-mail settings are pre-configured, the E-mail setup wizard displays a successful message. • If the e-mail settings are not found, Manual setup is the name shown on -screen keyboard. 11. Tap Application Drawer > Email, and then, tap an e-mail account. 2. Enter the ...
User Manual- GSmart G1315 English Version
Page 31
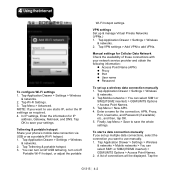
...want to add VPNs. Tap Application Drawer > Settings > Wireless & networks. 2. VPN settings Set up a wireless data connection manually 1. To start a data connection manually If you set up & manage Virtual Private Networks (VPNs.) 1. To configure Wi-Fi settings 1. NOTE: If you want to... networks > You can select SIM1 or SIM2(If SIM2 inserted) > GSM/UMTS Options > Access Point Names. 2. Tap the G1315│ 4-2 Manual settings for Cellular Data Network Check the availability of connections will be displayed. Tap Application Drawer > Settings > Wireless & networks. ...
...want to add VPNs. Tap Application Drawer > Settings > Wireless & networks. 2. VPN settings Set up a wireless data connection manually 1. To start a data connection manually If you set up & manage Virtual Private Networks (VPNs.) 1. To configure Wi-Fi settings 1. NOTE: If you want to... networks > You can select SIM1 or SIM2(If SIM2 inserted) > GSM/UMTS Options > Access Point Names. 2. Tap the G1315│ 4-2 Manual settings for Cellular Data Network Check the availability of connections will be displayed. Tap Application Drawer > Settings > Wireless & networks. ...
User Manual- GSmart G1315 English Version
Page 55
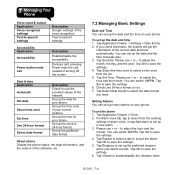
... set up many alarms on your phone. Tap Ringtone to save the settings. 6. Tap Vibrate to -speech settings. Text-to enable/disable the vibration when G1315│7-4 To set up the date and time 1. Tap Set to set up the preferred ringtone when your phone. to adjust the hour and the... screen. Tap Select the time zone to select from the list. 5. Set up the time for your phone. Set up the date and the time manually also. 3.
... set up many alarms on your phone. Tap Ringtone to save the settings. 6. Tap Vibrate to -speech settings. Text-to enable/disable the vibration when G1315│7-4 To set up the date and time 1. Tap Set to set up the preferred ringtone when your phone. to adjust the hour and the... screen. Tap Select the time zone to select from the list. 5. Set up the time for your phone. Set up the date and the time manually also. 3.