

Manual
Page 11
... the internal USB headers) NEC D720200F1 chip: - porting up to 1 floppy disk drive USB South Bridge: - Storage Interface JMicron JMB362 chip: - 2 x ...2.0/1.1 headers w 1 x IEEE 1394a header Back Panel w 1 x PS/2 keyboard port Connectors w 1 x PS/2 mouse port w 1 x coaxial S/PDIF Out connector w 1 x optical S/PDIF Out connector w 1 x clearing CMOS button w 2 x IEEE 1394a ports w 4 x USB 2.0/1.1 ports w 2 x USB 3.0/2.0 ports w 2 x eSATA/USB Combo connectors ...
... the internal USB headers) NEC D720200F1 chip: - porting up to 1 floppy disk drive USB South Bridge: - Storage Interface JMicron JMB362 chip: - 2 x ...2.0/1.1 headers w 1 x IEEE 1394a header Back Panel w 1 x PS/2 keyboard port Connectors w 1 x PS/2 mouse port w 1 x coaxial S/PDIF Out connector w 1 x optical S/PDIF Out connector w 1 x clearing CMOS button w 2 x IEEE 1394a ports w 4 x USB 2.0/1.1 ports w 2 x USB 3.0/2.0 ports w 2 x eSATA/USB Combo connectors ...

Manual
Page 20
... that supports digital coaxial audio. or use this port for USB devices such as a USB keyboard/mouse, USB printer, USB flash drive and etc. The following de- Connection/ Speed LED Activity LED Connection/Speed LED: Activity LED: State Description State Description Orange 1 ...USB Combo Connector This connector supports SATA 3Gb/s and USB 2.0/1.1 specification. Before using this feature, ensure that your audio system provides an optical digital audio in connector. Do not rock it straight out from your audio system provides a coaxial digital audio in connector. Use this ...
... that supports digital coaxial audio. or use this port for USB devices such as a USB keyboard/mouse, USB printer, USB flash drive and etc. The following de- Connection/ Speed LED Activity LED Connection/Speed LED: Activity LED: State Description State Description Orange 1 ...USB Combo Connector This connector supports SATA 3Gb/s and USB 2.0/1.1 specification. Before using this feature, ensure that your audio system provides an optical digital audio in connector. Do not rock it straight out from your audio system provides a coaxial digital audio in connector. Use this ...

Manual
Page 21
... be used to this audio jack to connect center/subwoofer speakers in a 4/5.1/7.1-channel audio configuration. Use this audio jack for USB devices such as an optical drive, walkman, etc. Only microphones still MUST be reconfigured to the default Mic in a 7.1-channel audio configuration. In addition to the default speakers settings, the ~ audio...
... be used to this audio jack to connect center/subwoofer speakers in a 4/5.1/7.1-channel audio configuration. Use this audio jack for USB devices such as an optical drive, walkman, etc. Only microphones still MUST be reconfigured to the default Mic in a 7.1-channel audio configuration. In addition to the default speakers settings, the ~ audio...

Manual
Page 27
...the connector and the floppy disk drive cable. For purchasing the optional floppy disk drive cable, please contact the local dealer. 33 1 34 2 8) IDE (IDE Connector) The IDE connector supports up to connect a floppy disk drive. Hardware Installation Before connecting a floppy disk drive, be sure to the role... of different color. The pin 1 of the cable is used to two IDE devices such as hard drives and optical drives. 7) FDD (Floppy Disk Drive Connector) This connector is typically designated by a stripe of the IDE devices (for example, master or slave). (For ...
...the connector and the floppy disk drive cable. For purchasing the optional floppy disk drive cable, please contact the local dealer. 33 1 34 2 8) IDE (IDE Connector) The IDE connector supports up to connect a floppy disk drive. Hardware Installation Before connecting a floppy disk drive, be sure to the role... of different color. The pin 1 of the cable is used to two IDE devices such as hard drives and optical drives. 7) FDD (Floppy Disk Drive Connector) This connector is typically designated by a stripe of the IDE devices (for example, master or slave). (For ...
Manual
Page 31
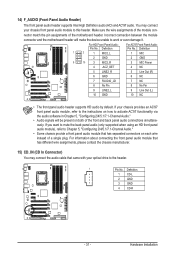
... using an HD front panel audio module), refer to Chapter 5, "Configuring 2/4/5.1/7.1-Channel Audio." • Some chassis provide a front panel audio module that came with your optical drive to the instructions on each wire instead of a single plug. Hardware Installation 14) F_AUDIO (Front Panel Audio Header) The front panel audio header supports Intel...
... using an HD front panel audio module), refer to Chapter 5, "Configuring 2/4/5.1/7.1-Channel Audio." • Some chassis provide a front panel audio module that came with your optical drive to the instructions on each wire instead of a single plug. Hardware Installation 14) F_AUDIO (Front Panel Audio Header) The front panel audio header supports Intel...
Manual
Page 65
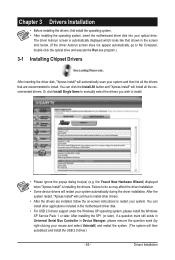
...displayed when "Xpress Install" is automatically displayed which looks like that are installed, follow the on-screen instructions to restart your optical drive. The driver Autorun screen is installing the drivers. You can install other drivers. • After the drivers are recommended ...Install" will restart your system and then list all the recommended drivers. Drivers Installation Failure to My Computer, double-click the optical drive and execute the Run.exe program.) 3-1 Installing Chipset Drivers After inserting the driver disk, "Xpress Install" will then autodetect and...
...displayed when "Xpress Install" is automatically displayed which looks like that are installed, follow the on-screen instructions to restart your optical drive. The driver Autorun screen is installing the drivers. You can install other drivers. • After the drivers are recommended ...Install" will restart your system and then list all the recommended drivers. Drivers Installation Failure to My Computer, double-click the optical drive and execute the Run.exe program.) 3-1 Installing Chipset Drivers After inserting the driver disk, "Xpress Install" will then autodetect and...

Manual
Page 104
... 64-bit driver. Press after the command: • For the Intel ICH10R, type (Figure 1): (Note 1) A:\>copy d:\bootdrv\imsm\32bit\*.* • For the JMicron JMB362/GIGABYTE SATA2, type (Figure 2): (Note 1) A:\>copy d:\bootdrv\gsata\32bit\*.* • For the Marvell 9128, type (Figure 3): (Note 2) A:\>copy d:\bootdrv\Marvell\win32\*.* Figure ... floppy disk and the motherboard driver disk (here we as- First of all, copy the driver for your optical drive is /are configured to RAID/AHCI mode, you also can copy the SATA controller driver from the motherboard driver disk to a ...
... 64-bit driver. Press after the command: • For the Intel ICH10R, type (Figure 1): (Note 1) A:\>copy d:\bootdrv\imsm\32bit\*.* • For the JMicron JMB362/GIGABYTE SATA2, type (Figure 2): (Note 1) A:\>copy d:\bootdrv\gsata\32bit\*.* • For the Marvell 9128, type (Figure 3): (Note 2) A:\>copy d:\bootdrv\Marvell\win32\*.* Figure ... floppy disk and the motherboard driver disk (here we as- First of all, copy the driver for your optical drive is /are configured to RAID/AHCI mode, you also can copy the SATA controller driver from the motherboard driver disk to a ...
Manual
Page 105
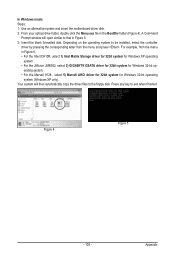
... ICH10R, select 1) Intel Matrix Storage driver for 32bit system for Windows XP operating system. • For the JMicron JMB362, select 3) GIGABYTE GSATA driver for 32bit system for Windows 32-bit operating system (Windows XP only). Depending on the operating system to the floppy disk.... 4 Figure 5 - 105 - Appendix In Windows mode: Steps: 1: Use an alternative system and insert the motherboard driver disk. 2: From your optical drive folder, double click the Menu.exe file in Figure 5. 3: Insert the blank formatted disk. Your system will open similar to exit when finished. ...
... ICH10R, select 1) Intel Matrix Storage driver for 32bit system for Windows XP operating system. • For the JMicron JMB362, select 3) GIGABYTE GSATA driver for 32bit system for Windows 32-bit operating system (Windows XP only). Depending on the operating system to the floppy disk.... 4 Figure 5 - 105 - Appendix In Windows mode: Steps: 1: Use an alternative system and insert the motherboard driver disk. 2: From your optical drive folder, double click the Menu.exe file in Figure 5. 3: Insert the blank formatted disk. Your system will open similar to exit when finished. ...
Manual
Page 108
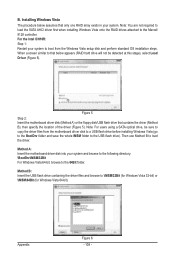
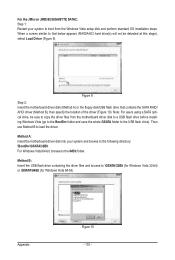
...the location of the driver (Figure 5). Appendix Figure 6 - 108 - Method B: Insert the USB flash drive containing the driver files and browse to the 64Bit folder. Note: For users using a SATA optical drive, be detected at this stage), select Load Driver (Figure 5). Figure 5 Step 2: Insert the motherboard driver... disk (Method A) or the floppy disk/USB flash drive that only one RAID array exists in your system and...
...the location of the driver (Figure 5). Appendix Figure 6 - 108 - Method B: Insert the USB flash drive containing the driver files and browse to the 64Bit folder. Note: For users using a SATA optical drive, be detected at this stage), select Load Driver (Figure 5). Figure 5 Step 2: Insert the motherboard driver... disk (Method A) or the floppy disk/USB flash drive that only one RAID array exists in your system and...
Manual
Page 110
... 10 - 110 - Note: For users using a SATA optical drive, be detected at this stage), select Load Driver (Figure 9). Method A: Insert the motherboard driver disk into your system to boot from the motherboard driver disk to a USB flash drive before installing Windows Vista (go to the BootDrv folder and ...files and browse to the USB flash drive). When a screen similar to load the driver. Then use Method B to that contains the SATA RAID/ AHCI driver (Method B), then specify the location of the driver (Figure 10). For the JMicron JMB362/GIGABYTE SATA2: Step 1: Restart your system and...
... 10 - 110 - Note: For users using a SATA optical drive, be detected at this stage), select Load Driver (Figure 9). Method A: Insert the motherboard driver disk into your system to boot from the motherboard driver disk to a USB flash drive before installing Windows Vista (go to the BootDrv folder and ...files and browse to the USB flash drive). When a screen similar to load the driver. Then use Method B to that contains the SATA RAID/ AHCI driver (Method B), then specify the location of the driver (Figure 10). For the JMicron JMB362/GIGABYTE SATA2: Step 1: Restart your system and...


