Manual
Page 5
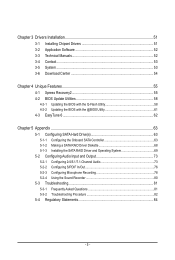
... 51 3-1 Installing Chipset Drivers 51 3-2 Application Software 52 3-3 Technical Manuals 52 3-4 Contact...53 3-5 System...53 3-6 Download Center 54 Chapter 4 Unique Features 55 4-1 Xpress Recovery2 55 ... EasyTune 6...62 Chapter 5 Appendix...63 5-1 Configuring SATA Hard Drive(s 63 5-1-1 Configuring the Onboard SATA Controller 63 5-1-2 Making a SATA RAID Driver Diskette 68 5-1-3 Installing the SATA RAID Driver and Operating System 69 5-2 Configuring Audio Input and Output 73 5-2-1 Configuring 2/4/5.1/7.1-Channel Audio 73 5-2-2 Configuring S/PDIF In/Out 76 5-2-3 Configuring Microphone...
... 51 3-1 Installing Chipset Drivers 51 3-2 Application Software 52 3-3 Technical Manuals 52 3-4 Contact...53 3-5 System...53 3-6 Download Center 54 Chapter 4 Unique Features 55 4-1 Xpress Recovery2 55 ... EasyTune 6...62 Chapter 5 Appendix...63 5-1 Configuring SATA Hard Drive(s 63 5-1-1 Configuring the Onboard SATA Controller 63 5-1-2 Making a SATA RAID Driver Diskette 68 5-1-3 Installing the SATA RAID Driver and Operating System 69 5-2 Configuring Audio Input and Output 73 5-2-1 Configuring 2/4/5.1/7.1-Channel Audio 73 5-2-2 Configuring S/PDIF In/Out 76 5-2-3 Configuring Microphone...

Manual
Page 78
...click on Microphone and select Set Default Device. If you set the volumes at the same time. Step 2: Connect your microphone to record the sound. Then configure the jack for microphone functionality. Do not mute the recording volume, or you'll not be used at a middle level. Appendix...on the back panel or the Mic in the notification area. To hear the sound being recorded during the recording process, do not mute the playback volume. 5-2-3 Configuring Microphone Recording Step 1: After installing the audio driver, the HD Audio Manager icon will appear in jack (pink) on the ...
...click on Microphone and select Set Default Device. If you set the volumes at the same time. Step 2: Connect your microphone to record the sound. Then configure the jack for microphone functionality. Do not mute the recording volume, or you'll not be used at a middle level. Appendix...on the back panel or the Mic in the notification area. To hear the sound being recorded during the recording process, do not mute the playback volume. 5-2-3 Configuring Microphone Recording Step 1: After installing the audio driver, the HD Audio Manager icon will appear in jack (pink) on the ...
Manual
Page 81
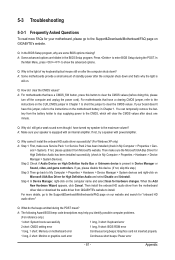
... Chapter 1 to short the jumper to the CMOS, which will clear the CMOS values after about one minute. Q: How do I still get a weak sound even though I have this step.) Step 3: Then go back to My Computer > Properties > Hardware > Device Manager > System devices and right-click on...device is still on the computer name and select Scan for hardware changes. Then install the onboard HD audio driver from the motherboard driver disk or download the audio driver from GIGABYTE's website to show the advanced options. A: The following Award BIOS beep code descriptions may help you identify ...
... Chapter 1 to short the jumper to the CMOS, which will clear the CMOS values after about one minute. Q: How do I still get a weak sound even though I have this step.) Step 3: Then go back to My Computer > Properties > Hardware > Device Manager > System devices and right-click on...device is still on the computer name and select Scan for hardware changes. Then install the onboard HD audio driver from the motherboard driver disk or download the audio driver from GIGABYTE's website to show the advanced options. A: The following Award BIOS beep code descriptions may help you identify ...


