Manual
Page 9
... remove the AC power by your hardware components are connected tightly and securely. • When handling the motherboard, avoid touching any installation steps or have a problem related to wear an electrostatic discharge (ESD) wrist strap when handling electronic com- Chapter 1 Hardware Installation 1-1 Installation Precautions The motherboard contains numerous delicate electronic circuits...
... remove the AC power by your hardware components are connected tightly and securely. • When handling the motherboard, avoid touching any installation steps or have a problem related to wear an electrostatic discharge (ESD) wrist strap when handling electronic com- Chapter 1 Hardware Installation 1-1 Installation Precautions The motherboard contains numerous delicate electronic circuits...
Manual
Page 25
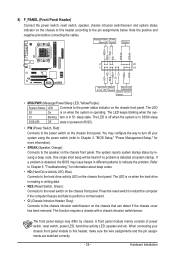
... off when the system is in S3/S4 sleep S3/S4/S5 Off state or powered off your chassis front panel module to indicate the problem. Refer to Chapter 5, "Troubleshooting," for more information). • SPEAK (Speaker, Orange): Connects to the hard drive activity LED on the chassis ..., the BIOS may configure the way to turn off (S5). • PW (Power Switch, Red): Connects to the pin assignments below. If a problem is on the chassis front panel. When connecting your system using the power switch (refer to Chapter 2, "BIOS Setup," "Power Management Setup," for information...
... off when the system is in S3/S4 sleep S3/S4/S5 Off state or powered off your chassis front panel module to indicate the problem. Refer to Chapter 5, "Troubleshooting," for more information). • SPEAK (Speaker, Orange): Connects to the hard drive activity LED on the chassis ..., the BIOS may configure the way to turn off (S5). • PW (Power Switch, Red): Connects to the pin assignments below. If a problem is on the chassis front panel. When connecting your system using the power switch (refer to Chapter 2, "BIOS Setup," "Power Management Setup," for information...
Manual
Page 29
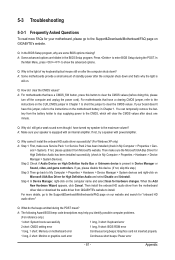
To upgrade the BIOS, use either the GIGABYTE Q-Flash or @BIOS utility. • Q-Flash allows the user to Chapter 4, "BIOS Update Utilities." • Because BIOS flashing is turned on the motherboard. Inadequately altering ..., press the key during the POST when the power is potentially risky, if you not flash the BIOS. To flash the BIOS, do not encounter problems using the Q-Flash and @BIOS utilities, refer to quickly and easily upgrade or back up BIOS without entering the operating system. • @BIOS is a Windows...
To upgrade the BIOS, use either the GIGABYTE Q-Flash or @BIOS utility. • Q-Flash allows the user to Chapter 4, "BIOS Update Utilities." • Because BIOS flashing is turned on the motherboard. Inadequately altering ..., press the key during the POST when the power is potentially risky, if you not flash the BIOS. To flash the BIOS, do not encounter problems using the Q-Flash and @BIOS utilities, refer to quickly and easily upgrade or back up BIOS without entering the operating system. • @BIOS is a Windows...
Manual
Page 81
.... eral > System). When the Add New Hardware Wizard appears, click Cancel. A: The following Award BIOS beep code descriptions may help you identify possible computer problems. (For reference only.) 1 short: System boots successfully 1 long, 3 short: Keyboard error 2 short: CMOS setting error 1 long, 9 short: BIOS... Definition Audio and select Disable and Uninstall. If not, try a speaker with an internal amplifier. If not, please update it from GIGABYTE's website to the CMOS, which will clear the CMOS values after the computer shuts down ? Q: Why cannot I clear the CMOS ...
.... eral > System). When the Add New Hardware Wizard appears, click Cancel. A: The following Award BIOS beep code descriptions may help you identify possible computer problems. (For reference only.) 1 short: System boots successfully 1 long, 3 short: Keyboard error 2 short: CMOS setting error 1 long, 9 short: BIOS... Definition Audio and select Disable and Uninstall. If not, try a speaker with an internal amplifier. If not, please update it from GIGABYTE's website to the CMOS, which will clear the CMOS values after the computer shuts down ? Q: Why cannot I clear the CMOS ...

Manual
Page 82
...Check if the CPU cooler is installed properly on the CPU. START Turn off the power. A (Continued...) Appendix - 82 - Yes The problem is verified and solved. Insert the graphics card. Turn on the power to the motherboard. Connect the CPU cooler power cable to start the... computer. Yes The problem is verified and solved. Remove all peripherals, connecting cables, and power cord etc. Is the power connector of the CPU cooler connected...
...Check if the CPU cooler is installed properly on the CPU. START Turn off the power. A (Continued...) Appendix - 82 - Yes The problem is verified and solved. Insert the graphics card. Turn on the power to the motherboard. Connect the CPU cooler power cable to start the... computer. Yes The problem is verified and solved. Remove all peripherals, connecting cables, and power cord etc. Is the power connector of the CPU cooler connected...

Manual
Page 83
...might fail. Our customer service staff will reply you as soon as possible. - 83 - A When the computer is turned on your question. The problem is the CPU cooler running? Select "Load Fail-Safe Defaults" (or "Load Optimized Defaults"). Yes Reinstall the operating system. END If the procedure above ...might fail. Yes Press to see if the device works successfully). Turn off the computer. Check if the system can boot successfully. The problem is verified and solved. Reinstall other devices one by one (install one device at one time and then boot the system to enter BIOS ...
...might fail. Our customer service staff will reply you as soon as possible. - 83 - A When the computer is turned on your question. The problem is the CPU cooler running? Select "Load Fail-Safe Defaults" (or "Load Optimized Defaults"). Yes Reinstall the operating system. END If the procedure above ...might fail. Yes Press to see if the device works successfully). Turn off the computer. Check if the system can boot successfully. The problem is verified and solved. Reinstall other devices one by one (install one device at one time and then boot the system to enter BIOS ...


