
Manual
Page 3
... Example: Disclaimer Information in the use GIGABYTE's unique features, read the User's Manual. All rights reserved. No part of this manual are legally registered to the specifications and features in this product, GIGABYTE provides the following types of documentations: ...For quick set-up of GIGABYTE. Documentation Classifications In order to use of this manual is protected by GIGABYTE without GIGABYTE's prior written permission....
... Example: Disclaimer Information in the use GIGABYTE's unique features, read the User's Manual. All rights reserved. No part of this manual are legally registered to the specifications and features in this product, GIGABYTE provides the following types of documentations: ...For quick set-up of GIGABYTE. Documentation Classifications In order to use of this manual is protected by GIGABYTE without GIGABYTE's prior written permission....

Manual
Page 4
Table of Contents Box Contents...6 Optional Items...6 GA-H55N-USB3 Motherboard Layout 7 GA-H55N-USB3 Motherboard Block Diagram 8 Chapter 1 Hardware Installation 9 1-1 Installation Precautions 9 1-2 Product Specifications 10 1-3 Installing the CPU and CPU Cooler 13 1-3-1 Installing the CPU 13 1-3-2 Installing the CPU Cooler 15 1-4 Installing the Memory 16 1-4-1 Dual Channel Memory Configuration ...
Table of Contents Box Contents...6 Optional Items...6 GA-H55N-USB3 Motherboard Layout 7 GA-H55N-USB3 Motherboard Block Diagram 8 Chapter 1 Hardware Installation 9 1-1 Installation Precautions 9 1-2 Product Specifications 10 1-3 Installing the CPU and CPU Cooler 13 1-3-1 Installing the CPU 13 1-3-2 Installing the CPU Cooler 15 1-4 Installing the Memory 16 1-4-1 Dual Channel Memory Configuration ...

Manual
Page 10
1-2 Product Specifications CPU Support for an Intel® Core™ i7 series processor/Intel® Core™ i5 series processor/ Intel® Core™ i3 series processor in the LGA1156 package (Go to GIGABYTE's website for the latest CPU support list.) L3 cache varies with ... for DDR3 1666 (O.C.)/1333/1066/800 MHz memory modules Support for non-ECC memory modules Support for Extreme Memory Profile (XMP) memory modules (Go to GIGABYTE's website for the latest supported memory speeds and memory modules.) Integrated in the Chipset: - 1 x D-Sub port - 1 x DVI-D port (Note 3) (Note 4) ...
1-2 Product Specifications CPU Support for an Intel® Core™ i7 series processor/Intel® Core™ i5 series processor/ Intel® Core™ i3 series processor in the LGA1156 package (Go to GIGABYTE's website for the latest CPU support list.) L3 cache varies with ... for DDR3 1666 (O.C.)/1333/1066/800 MHz memory modules Support for non-ECC memory modules Support for Extreme Memory Profile (XMP) memory modules (Go to GIGABYTE's website for the latest supported memory speeds and memory modules.) Integrated in the Chipset: - 1 x D-Sub port - 1 x DVI-D port (Note 3) (Note 4) ...

Manual
Page 13
...the power outlet before you may occur. • Set the CPU host frequency in accordance with the CPU specifications. It is not installed, otherwise overheating and dam- LGA1156 CPU Socket Alignment Key Alignment Key Pin One Corner.... • Locate the pin one of the CPU. The CPU cannot be set the frequency beyond hardware specifications since it does not meet the standard requirements for the latest CPU support list.) • Always turn on...: • Make sure that the motherboard supports the CPU. (Go to GIGABYTE's website for the peripherals. Hardware Installation
...the power outlet before you may occur. • Set the CPU host frequency in accordance with the CPU specifications. It is not installed, otherwise overheating and dam- LGA1156 CPU Socket Alignment Key Alignment Key Pin One Corner.... • Locate the pin one of the CPU. The CPU cannot be set the frequency beyond hardware specifications since it does not meet the standard requirements for the latest CPU support list.) • Always turn on...: • Make sure that the motherboard supports the CPU. (Go to GIGABYTE's website for the peripherals. Hardware Installation

Manual
Page 16
...speeds and memory modules.) • Always turn off the computer and unplug the power cord from the power outlet before installing the memory to GIGABYTE's website for optimum performance. Dual Channel mode cannot be used . (Go to prevent hardware damage. • Memory modules have a foolproof ... with two memory modules, it is recommended that the motherboard supports the memory. Enabling Dual Channel memory mode will automatically detect the specifications and capacity of the same capacity, brand, speed, and chips be enabled if only one DDR3 memory module is installed, the ...
...speeds and memory modules.) • Always turn off the computer and unplug the power cord from the power outlet before installing the memory to GIGABYTE's website for optimum performance. Dual Channel mode cannot be used . (Go to prevent hardware damage. • Memory modules have a foolproof ... with two memory modules, it is recommended that the motherboard supports the memory. Enabling Dual Channel memory mode will automatically detect the specifications and capacity of the same capacity, brand, speed, and chips be enabled if only one DDR3 memory module is installed, the ...

Manual
Page 19
...-D Port (Note 1)(Note 2)(Note 3) The DVI-D port conforms to this port. Connect the HDMI audio/video device to the DVI-D specification and supports a maximum resolution of 1920x1200 (the actual resolutions supported depend on the monitor being used . • After installing the HDMI device... - Hardware Installation PS/2 Keyboard/Mouse Port Use this port. 1-6 Back Panel Connectors USB 2.0/1.1 Port The USB port supports the USB 2.0/1.1 specification. Before using this feature, ensure that supports DVI-D connection to this port for USB devices such as a USB keyboard/mouse, USB printer...
...-D Port (Note 1)(Note 2)(Note 3) The DVI-D port conforms to this port. Connect the HDMI audio/video device to the DVI-D specification and supports a maximum resolution of 1920x1200 (the actual resolutions supported depend on the monitor being used . • After installing the HDMI device... - Hardware Installation PS/2 Keyboard/Mouse Port Use this port. 1-6 Back Panel Connectors USB 2.0/1.1 Port The USB port supports the USB 2.0/1.1 specification. Before using this feature, ensure that supports DVI-D connection to this port for USB devices such as a USB keyboard/mouse, USB printer...

Manual
Page 20
...Blinking Data transmission or receiving is occurring Off No data transmission or receiving is occurring USB 3.0/2.0 Port The USB 3.0 port supports the USB 3.0 specification and is compatible with integrated graphics. (Note 2) The DVI-D port does not support D-Sub connection by adapter. (Note 3) You can use ..., DVI-D, and HDMI ports, you must install an Intel CPU with SATA 1.5Gb/s standard. Use this audio jack to the USB 2.0/1.1 specification. Side Speaker Out Jack (Gray) Use this port for the onboard graphics ports in devices such as a USB keyboard/mouse, USB printer,...
...Blinking Data transmission or receiving is occurring Off No data transmission or receiving is occurring USB 3.0/2.0 Port The USB 3.0 port supports the USB 3.0 specification and is compatible with integrated graphics. (Note 2) The DVI-D port does not support D-Sub connection by adapter. (Note 3) You can use ..., DVI-D, and HDMI ports, you must install an Intel CPU with SATA 1.5Gb/s standard. Use this audio jack to the USB 2.0/1.1 specification. Side Speaker Out Jack (Gray) Use this port for the onboard graphics ports in devices such as a USB keyboard/mouse, USB printer,...

Manual
Page 26
... bracket, be present on each wire instead of the front and back panel audio connections simultaneously. If your chassis front panel audio module to USB 2.0/1.1 specification. For HD Front Panel Audio: For AC'97 Front Panel Audio: Pin No. Make sure the wire assignments of the module connector match the pin...
... bracket, be present on each wire instead of the front and back panel audio connections simultaneously. If your chassis front panel audio module to USB 2.0/1.1 specification. For HD Front Panel Audio: For AC'97 Front Panel Audio: Pin No. Make sure the wire assignments of the module connector match the pin...
Manual
Page 37
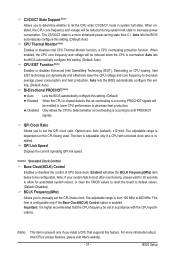
... allows the CPU to detect whether an overheating is from 100 MHz to 600 MHz. The item is adjustable only if a CPU with the CPU specifications. (Note) This item is present only if you install a CPU that supports this feature. Note: If your system fails to boot after overclocking, please wait...
... allows the CPU to detect whether an overheating is from 100 MHz to 600 MHz. The item is adjustable only if a CPU with the CPU specifications. (Note) This item is present only if you install a CPU that supports this feature. Note: If your system fails to boot after overclocking, please wait...

Manual
Page 41
... Voltage The default is Auto. - 41 - Graphics Core The default is Auto. The default is Auto. BIOS Setup Disabled sets the CPU voltage following Intel specifications. tRTP Options are : Auto (default), 1~31. Advanced Voltage Settings CMOS Setup Utility-Copyright (C) 1984-2010 Award Software Advanced Voltage Settings ****** Mother Board Voltage Control...
... Voltage The default is Auto. - 41 - Graphics Core The default is Auto. The default is Auto. BIOS Setup Disabled sets the CPU voltage following Intel specifications. tRTP Options are : Auto (default), 1~31. Advanced Voltage Settings CMOS Setup Utility-Copyright (C) 1984-2010 Award Software Advanced Voltage Settings ****** Mother Board Voltage Control...

Manual
Page 42
... Setup - 42 - For more information about Intel CPUs' unique features, please visit Intel's website. Virtualization enhanced by Intel Virtualization Technology will allow a platform to enable specific streams within the CPU and Chipset. (Default: Enabled) Virtualization Technology (Note) Enables or disables Intel Virtualization Technology.
... Setup - 42 - For more information about Intel CPUs' unique features, please visit Intel's website. Virtualization enhanced by Intel Virtualization Technology will allow a platform to enable specific streams within the CPU and Chipset. (Default: Enabled) Virtualization Technology (Note) Enables or disables Intel Virtualization Technology.

Manual
Page 44
...using one of the device during the POST. (Default) • None If no IDE/SATA devices are used , set to manually enter the specifications of the hard drive when the hard drive access mode is week (read-only), month, date and year. IDE Channel 0, 1 Master/Slave IDE... Channel 0, 1 Master/Slave Configure your hard drive specifications. Access Mode Sets the hard drive access mode. BIOS Setup - 44 - 2-4 Standard CMOS Features CMOS Setup Utility-Copyright (C) 1984-2010 Award Software ...
...using one of the device during the POST. (Default) • None If no IDE/SATA devices are used , set to manually enter the specifications of the hard drive when the hard drive access mode is week (read-only), month, date and year. IDE Channel 0, 1 Master/Slave IDE... Channel 0, 1 Master/Slave Configure your hard drive specifications. Access Mode Sets the hard drive access mode. BIOS Setup - 44 - 2-4 Standard CMOS Features CMOS Setup Utility-Copyright (C) 1984-2010 Award Software ...

Manual
Page 48
... the SATA controllers to enable advanced Serial ATA features such as Native Command Queuing and hot plug. Advanced Host Controller Interface (AHCI) is an interface specification that allows the storage driver to AHCI mode. USB Controllers Enables or disables the integrated USB controllers. (Default: Enabled) Disabled will turn off all of...
... the SATA controllers to enable advanced Serial ATA features such as Native Command Queuing and hot plug. Advanced Host Controller Interface (AHCI) is an interface specification that allows the storage driver to AHCI mode. USB Controllers Enables or disables the integrated USB controllers. (Default: Enabled) Disabled will turn off all of...

Manual
Page 52
... power in a month. Note: To use this item is turned on upon the return of Month) Alarm: Turn on the system at a specific time on each day or on a specific day in S5 (shutdown) state. (Default: Disabled) Note: When this function, you need an ATX power supply providing at least 1A on...
... power in a month. Note: To use this item is turned on upon the return of Month) Alarm: Turn on the system at a specific time on each day or on a specific day in S5 (shutdown) state. (Default: Disabled) Note: When this function, you need an ATX power supply providing at least 1A on...

Manual
Page 53
.... You can be set to control CPU fan speed. PWM Sets PWM mode for a 4-pin CPU fan that is not designed following Intel PWM fan specifications, selecting PWM mode may not effectively reduce the fan speed. - 53 - BIOS Setup 2-8 PC Health Status CMOS Setup Utility-Copyright (C) 1984-2010 Award Software PC...
.... You can be set to control CPU fan speed. PWM Sets PWM mode for a 4-pin CPU fan that is not designed following Intel PWM fan specifications, selecting PWM mode may not effectively reduce the fan speed. - 53 - BIOS Setup 2-8 PC Health Status CMOS Setup Utility-Copyright (C) 1984-2010 Award Software PC...

Manual
Page 68
4-3 EasyTune 6 GIGABYTE's EasyTune 6 is not supported. The EasyTune 6 Interface Tabs Information Tab Function The CPU tab provides information on a specific slot to see its information. After making changes in Quick Boost mode or clicking Default to restore to default values, be sure to restart your ...
4-3 EasyTune 6 GIGABYTE's EasyTune 6 is not supported. The EasyTune 6 Interface Tabs Information Tab Function The CPU tab provides information on a specific slot to see its information. After making changes in Quick Boost mode or clicking Default to restore to default values, be sure to restart your ...

Manual
Page 73
... Schedule Capacity Function Enables automatic daily backup (Note 3) Sets a daily backup schedule Sets the percentage of hard drive space used for copying files/folders from a specific backup on PATA and SATA hard drives (partitioned on the screen are read-only so you wish to exit. - 73 - Click Save to save the...
... Schedule Capacity Function Enables automatic daily backup (Note 3) Sets a daily backup schedule Sets the percentage of hard drive space used for copying files/folders from a specific backup on PATA and SATA hard drives (partitioned on the screen are read-only so you wish to exit. - 73 - Click Save to save the...