
Manual
Page 3
...\Motherboard\Technology Guide page on your motherboard revision before updating motherboard BIOS, drivers, or when looking for technical information. For product-related information, check on our website at: http://www.gigabyte.com.tw Identifying Your Motherboard Revision The revision number on our website.... Changes to the specifications and features in this manual are legally registered to use of this product, GIGABYTE provides the following types of documentations: „ For quick set-up of the product, read the Quick Installation Guide included with...
...\Motherboard\Technology Guide page on your motherboard revision before updating motherboard BIOS, drivers, or when looking for technical information. For product-related information, check on our website at: http://www.gigabyte.com.tw Identifying Your Motherboard Revision The revision number on our website.... Changes to the specifications and features in this manual are legally registered to use of this product, GIGABYTE provides the following types of documentations: „ For quick set-up of the product, read the Quick Installation Guide included with...

Manual
Page 5
... 65 3-1 Installing Chipset Drivers 65 3-2 Application Software 66 3-3 Technical Manuals 66 3-4 Contact ...67 3-5 System ...67 3-6 Download Center 68 Chapter 4 Unique Features 69 4-1 Xpress Recovery2 69 4-2 ... ...83 Chapter 5 Appendix ...85 5-1 Configuring SATA Hard Drive(s 85 5-1-1 Configuring the Onboard SATA Controller 85 5-1-2 Making a SATA RAID/AHCI Driver Diskette 91 5-1-3 Installing the SATA RAID/AHCI Driver and Operating System 93 5-2 ConfiguringAudio Input and Output 98 5-2-1 Configuring 2/4/5.1/7.1-Channel Audio 98 5-2-2 Installing the S/PDIF In Cable (Optional 100 5-2-3 ...
... 65 3-1 Installing Chipset Drivers 65 3-2 Application Software 66 3-3 Technical Manuals 66 3-4 Contact ...67 3-5 System ...67 3-6 Download Center 68 Chapter 4 Unique Features 69 4-1 Xpress Recovery2 69 4-2 ... ...83 Chapter 5 Appendix ...85 5-1 Configuring SATA Hard Drive(s 85 5-1-1 Configuring the Onboard SATA Controller 85 5-1-2 Making a SATA RAID/AHCI Driver Diskette 91 5-1-3 Installing the SATA RAID/AHCI Driver and Operating System 93 5-2 ConfiguringAudio Input and Output 98 5-2-1 Configuring 2/4/5.1/7.1-Channel Audio 98 5-2-2 Installing the S/PDIF In Cable (Optional 100 5-2-3 ...

Manual
Page 6
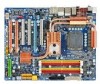
Box Contents GA-EP45-EXTREME motherboard Motherboard driver disk User's Manual Quick Installation Guide Intel® LGA775 CPU Installation Guide One IDE cable and one floppy disk drive cable Four SATA 3Gb/s cables ...
Box Contents GA-EP45-EXTREME motherboard Motherboard driver disk User's Manual Quick Installation Guide Intel® LGA775 CPU Installation Guide One IDE cable and one floppy disk drive cable Four SATA 3Gb/s cables ...

Manual
Page 19
... card's metal bracket to install an expansion card: • Make sure the motherboard supports the expansion card. Align the card with your card. Install the driver provided with a screw. 5. PCI Express x1 Slot PCI Express x16/x8/x4 Slot PCI Slot Follow the steps below to release the card and then...
... card's metal bracket to install an expansion card: • Make sure the motherboard supports the expansion card. Align the card with your card. Install the driver provided with a screw. 5. PCI Express x1 Slot PCI Express x16/x8/x4 Slot PCI Slot Follow the steps below to release the card and then...

Manual
Page 38
..., An Energy Star Ally Copyright (C) 1984-2008, Award Software, Inc. In Boot Menu, use the up hard drive data using the driver disk, the key can access Boot Menu again to change the first boot device setting as needed. : Q-Flash Press the key to ... device without entering BIOS Setup. After system restart, the device boot order will directly boot from the device configured in Boot Menu. GA-EP45-EXTREME Motherboard - 38 - A. Motherboard Model BIOS Version EP45-EXTREME D14 . . . . : BIOS Setup : XpressRecovery2 : Boot Menu : Qflash 05/21/2008-P45-ICH10-7A89PG07C-00 Function Keys Function...
..., An Energy Star Ally Copyright (C) 1984-2008, Award Software, Inc. In Boot Menu, use the up hard drive data using the driver disk, the key can access Boot Menu again to change the first boot device setting as needed. : Q-Flash Press the key to ... device without entering BIOS Setup. After system restart, the device boot order will directly boot from the device configured in Boot Menu. GA-EP45-EXTREME Motherboard - 38 - A. Motherboard Model BIOS Version EP45-EXTREME D14 . . . . : BIOS Setup : XpressRecovery2 : Boot Menu : Qflash 05/21/2008-P45-ICH10-7A89PG07C-00 Function Keys Function...

Manual
Page 53
... will turn off all of the integrated SATA controllers. Set this option to Disabled if you wish to install operating systems that allows the storage driver to be shared with other device.
... will turn off all of the integrated SATA controllers. Set this option to Disabled if you wish to install operating systems that allows the storage driver to be shared with other device.

Manual
Page 65
...select Uninstall) and restart the system. (The system will restart your system and then list all the recommended drivers. Drivers Installation You can install other drivers. • After the drivers are recommended to install. After the system restart, "Xpress Install" will continue to do so may affect... 1 or later. You can click the Install All button and "Xpress Install" will automatically scan your system automatically during the driver installation. After installing the SP1 (or later), if a question mark still exists in Universal Serial Bus Controller in the screen shot ...
...select Uninstall) and restart the system. (The system will restart your system and then list all the recommended drivers. Drivers Installation You can install other drivers. • After the drivers are recommended to install. After the system restart, "Xpress Install" will continue to do so may affect... 1 or later. You can click the Install All button and "Xpress Install" will automatically scan your system automatically during the driver installation. After installing the SP1 (or later), if a question mark still exists in Universal Serial Bus Controller in the screen shot ...

Manual
Page 66
GA-EP45-EXTREME Motherboard - 66 - 3-2 Application Software This page displays all the utilities and applications that GIGABYTE develops and some free software. You can click the Install button on the right of an item to install it. 3-3 Technical Manuals This page provides GIGABYTE's application guides, content descriptions for this driver disk, and the motherboard manuals.
GA-EP45-EXTREME Motherboard - 66 - 3-2 Application Software This page displays all the utilities and applications that GIGABYTE develops and some free software. You can click the Install button on the right of an item to install it. 3-3 Technical Manuals This page provides GIGABYTE's application guides, content descriptions for this driver disk, and the motherboard manuals.

Manual
Page 67
Drivers Installation Or read the last page of this page to link to check the contact information for GIGABYTE Taiwan headquarter or worldwide branch offices. 3-5 System This page provides the basic system information. - 67 - 3-4 Contact Click the URL on this manual to the GIGABYTE Web site.
Drivers Installation Or read the last page of this page to link to check the contact information for GIGABYTE Taiwan headquarter or worldwide branch offices. 3-5 System This page provides the basic system information. - 67 - 3-4 Contact Click the URL on this manual to the GIGABYTE Web site.

Manual
Page 68
The latest version of the BIOS, drivers, or applications will be displayed. GA-EP45-EXTREME Motherboard - 68 - 3-6 Download Center To update the BIOS, drivers, or applications, click the Download Center button to link to the GIGABYTE Web site.
The latest version of the BIOS, drivers, or applications will be displayed. GA-EP45-EXTREME Motherboard - 68 - 3-6 Download Center To update the BIOS, drivers, or applications, click the Download Center button to link to the GIGABYTE Web site.

Manual
Page 69
...; Intel® platform • At least 64 MB of data). • It is recommended to back up your system soon after the operating system and drivers are attached to quickly compress and back up /restore the first physical hard drive that allows you to the first and second SATA connectors, the...
...; Intel® platform • At least 64 MB of data). • It is recommended to back up your system soon after the operating system and drivers are attached to quickly compress and back up /restore the first physical hard drive that allows you to the first and second SATA connectors, the...

Manual
Page 72
... - After you wish to search the first physical hard drive as the target drive and detect whether this hard drive contains the Windows operating system. EP45-EXTREME D14 . . . . : BIOS Setup : XpressRecovery2 : Boot Menu : Qflash 05/21/2008-P45-ICH10-7A89PG07C-00 Figure 9 C. Using the Backup...detected, Xpress Recovery2 will stay permanent in your hard drive data (Figure 10). 2. Boot from the motherboard driver disk to start backing up your hard drive. Figure 12 GA-EP45-EXTREME Motherboard Xpress Recovery2 will then begin the backup process (Figure 11). Figure 8 2. If you use the ...
... - After you wish to search the first physical hard drive as the target drive and detect whether this hard drive contains the Windows operating system. EP45-EXTREME D14 . . . . : BIOS Setup : XpressRecovery2 : Boot Menu : Qflash 05/21/2008-P45-ICH10-7A89PG07C-00 Figure 9 C. Using the Backup...detected, Xpress Recovery2 will stay permanent in your hard drive data (Figure 10). 2. Boot from the motherboard driver disk to start backing up your hard drive. Figure 12 GA-EP45-EXTREME Motherboard Xpress Recovery2 will then begin the backup process (Figure 11). Figure 8 2. If you use the ...

Manual
Page 81
... Incoming Folder ... Exit... Find the Q-Share icon in your computer to another computer simply using Q-Share After installing Q-Share from the motherboard driver disk, go to Start>All Programs>GIGABYTE> Q-Share.exe to configure the data sharing settings. 4-5 Q-Share Q-Share is NOT enabled. - 81 - You are able to connect your system tray...
... Incoming Folder ... Exit... Find the Q-Share icon in your computer to another computer simply using Q-Share After installing Q-Share from the motherboard driver disk, go to Start>All Programs>GIGABYTE> Q-Share.exe to configure the data sharing settings. 4-5 Q-Share Q-Share is NOT enabled. - 81 - You are able to connect your system tray...

Manual
Page 83
... with Teaming enabled. Teaming, and set up the Teaming mode based on your system when completed. The speed of distant image(s). Step 1: Insert the motherboard driver disk and select Application Software, Install Application Software. Go to access the utility.
... with Teaming enabled. Teaming, and set up the Teaming mode based on your system when completed. The speed of distant image(s). Step 1: Insert the motherboard driver disk and select Application Software, Install Application Software. Go to access the utility.

Manual
Page 84
Step 4: After the Teaming is 2.0 Gbps. GA-EP45-EXTREME Motherboard - 84 - Restart your hub's specifications. Then click the Teaming button. (Two dialog boxes will see the connection speed is created, you will see...For Teaming Complete dialog box appears, click OK to access the utility. Click Install under Realtek Ethernet Teaming Utility for installation. Step 1: Insert the motherboard driver disk and select Application Software, Install Application Software. Point to All Programs, Realtek Teaming and VLAN, Realtek Teaming and VLAN Utility to complete. B. ...
Step 4: After the Teaming is 2.0 Gbps. GA-EP45-EXTREME Motherboard - 84 - Restart your hub's specifications. Then click the Teaming button. (Two dialog boxes will see the connection speed is created, you will see...For Teaming Complete dialog box appears, click OK to access the utility. Click Install under Realtek Ethernet Teaming Utility for installation. Step 1: Insert the motherboard driver disk and select Application Software, Install Application Software. Point to All Programs, Realtek Teaming and VLAN, Realtek Teaming and VLAN Utility to complete. B. ...

Manual
Page 85
...hard drive(s) in your computer Attach one hard drive. • An empty formatted floppy disk. • Windows Vista/XP setup disk. • Motherboard driver disk. 5-1-1 Configuring the Onboard SATA Controller A. C . Configure a RAID array in BIOS Setup. If you do not want to create RAID, you begin...hard drive(s), follow the steps below: A. B. Configure SATA controller mode in RAID BIOS. (Note 1) D. Appendix Install the SATA RAID/AHCI driver and operating system. (Note 2) Before you may prepare only one end of the SATA signal cable to the rear of the SATA hard drive...
...hard drive(s) in your computer Attach one hard drive. • An empty formatted floppy disk. • Windows Vista/XP setup disk. • Motherboard driver disk. 5-1-1 Configuring the Onboard SATA Controller A. C . Configure a RAID array in BIOS Setup. If you do not want to create RAID, you begin...hard drive(s), follow the steps below: A. B. Configure SATA controller mode in RAID BIOS. (Note 1) D. Appendix Install the SATA RAID/AHCI driver and operating system. (Note 2) Before you may prepare only one end of the SATA signal cable to the rear of the SATA hard drive...

Manual
Page 89
Reset Disks to create the SATA RAID/AHCI driver diskette and the installation of the SATA RAID/ACHI driver and operating system. - 89 - Now, you can see detailed information about the RAID array in MAIN MENU. Appendix Intel(R) Matrix Storage Manager option ROM v8.5.0....
Reset Disks to create the SATA RAID/AHCI driver diskette and the installation of the SATA RAID/ACHI driver and operating system. - 89 - Now, you can see detailed information about the RAID array in MAIN MENU. Appendix Intel(R) Matrix Storage Manager option ROM v8.5.0....

Manual
Page 91
... 2: When the controller menu (Figure 2) appears, remove the startup disk and insert the blank formatted disk. 5-1-2 Making a SATA RAID/AHCI Driver Diskette (Required for AHCI and RAID Mode) To successfully install operating system onto SATA hard drive(s) that is/are configured to RAID/AHCI mode,... the next page). Figure 1 Figure 2 (Note) For users without a startup disk: Use an alternative system and insert the motherboard driver disk. Without the driver, the hard drive may not be recognized during the OS installation. Prepare a startup disk that has CD-ROM support and a blank ...
... 2: When the controller menu (Figure 2) appears, remove the startup disk and insert the blank formatted disk. 5-1-2 Making a SATA RAID/AHCI Driver Diskette (Required for AHCI and RAID Mode) To successfully install operating system onto SATA hard drive(s) that is/are configured to RAID/AHCI mode,... the next page). Figure 1 Figure 2 (Note) For users without a startup disk: Use an alternative system and insert the motherboard driver disk. Without the driver, the hard drive may not be recognized during the OS installation. Prepare a startup disk that has CD-ROM support and a blank ...

Manual
Page 92
...Figure 6 will appear. After the driver is extracted, a screen similar to begin extracting the driver. When a screen similar to your USB flash drive. Figure 5 Figure 6 (Note) To install the Windows Vista 64-bit operating system, please copy the MSM64 file. GA-EP45-EXTREME Motherboard - 92 - Figure 4 ...Step 2: Double-click the MSM32 file in the motherboard driver disk to your USB flash drive from the motherboard driver disk to a USB flash drive Step 1: On an alternative system,...
...Figure 6 will appear. After the driver is extracted, a screen similar to begin extracting the driver. When a screen similar to your USB flash drive. Figure 5 Figure 6 (Note) To install the Windows Vista 64-bit operating system, please copy the MSM64 file. GA-EP45-EXTREME Motherboard - 92 - Figure 4 ...Step 2: Double-click the MSM32 file in the motherboard driver disk to your USB flash drive from the motherboard driver disk to a USB flash drive Step 1: On an alternative system,...

Manual
Page 93
... disk from a mass storage device manufacturer, or do not have prepared the SATA RAID/AHCI driver diskette and configured the required BIOS settings, you need to install a 3rd party SCSI or RAID driver" (Figure 1). Windows Setup Press F6 if you are ready to install Windows Vista/XP onto... your hard drive(s). 5-1-3 Installing the SATA RAID/AHCI Driver and Operating System Now that below appears, insert the floppy disk containing the SATA RAID/AHCI driver and press (Figure 2). Currently, Setup will be a few moments of some files being loaded...
... disk from a mass storage device manufacturer, or do not have prepared the SATA RAID/AHCI driver diskette and configured the required BIOS settings, you need to install a 3rd party SCSI or RAID driver" (Figure 1). Windows Setup Press F6 if you are ready to install Windows Vista/XP onto... your hard drive(s). 5-1-3 Installing the SATA RAID/AHCI Driver and Operating System Now that below appears, insert the floppy disk containing the SATA RAID/AHCI driver and press (Figure 2). Currently, Setup will be a few moments of some files being loaded...


