User Manual
Page 1
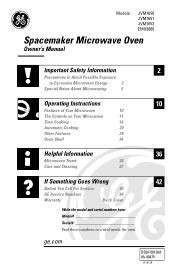
ge.com DE68-00126A 49-40475 01-06 JR Models: JVM1650 JVM1651 JVM1653 EMO3000 Spacemaker Microwave Oven Owner's Manual Important Safety Information 2 Precautions to Avoid Possible Exposure to Excessive Microwave Energy 2 Special Notes About Microwaving 5 Operating Instructions 10 Features of Your Microwave 10 The Controls on Your Microwave 11 Time Cooking 14 Automatic Cooking 20 Other Features 29 Oven Shelf...
ge.com DE68-00126A 49-40475 01-06 JR Models: JVM1650 JVM1651 JVM1653 EMO3000 Spacemaker Microwave Oven Owner's Manual Important Safety Information 2 Precautions to Avoid Possible Exposure to Excessive Microwave Energy 2 Special Notes About Microwaving 5 Operating Instructions 10 Features of Your Microwave 10 The Controls on Your Microwave 11 Time Cooking 14 Automatic Cooking 20 Other Features 29 Oven Shelf...
User Manual
Page 3
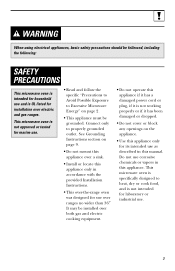
...; Do not cover or block any openings on page 2. • This appliance must be followed, including the following: SAFETY PRECAUTIONS This microwave oven is intended for household use and is UL listed for its intended use . • Read and follow the specific "Precautions to Avoid ...Possible Exposure to Excessive Microwave Energy" on the appliance. • Use this appliance. This microwave oven is not intended for marine use as described in this appliance only for installation over electric and gas ...
...; Do not cover or block any openings on page 2. • This appliance must be followed, including the following: SAFETY PRECAUTIONS This microwave oven is intended for household use and is UL listed for its intended use . • Read and follow the specific "Precautions to Avoid ...Possible Exposure to Excessive Microwave Energy" on the appliance. • Use this appliance. This microwave oven is not intended for marine use as described in this appliance only for installation over electric and gas ...
User Manual
Page 4
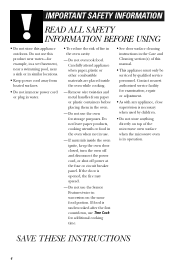
... 4 Do not overcook food. Carefully attend appliance when paper, plastic or other combustible materials are placed inside the oven ignite, keep the oven door closed, turn the oven off and disconnect the power cord, or shut off power at the fuse or circuit breaker panel. If the door... from heated surfaces. • Do not immerse power cord or plug in water. • To reduce the risk of the microwave oven surface when the microwave oven is necessary when used by qualified service personnel. IMPORTANT SAFETY INFORMATION READ ALL SAFETY INFORMATION BEFORE USING • Do not store this...
... 4 Do not overcook food. Carefully attend appliance when paper, plastic or other combustible materials are placed inside the oven ignite, keep the oven door closed, turn the oven off and disconnect the power cord, or shut off power at the fuse or circuit breaker panel. If the door... from heated surfaces. • Do not immerse power cord or plug in water. • To reduce the risk of the microwave oven surface when the microwave oven is necessary when used by qualified service personnel. IMPORTANT SAFETY INFORMATION READ ALL SAFETY INFORMATION BEFORE USING • Do not store this...
User Manual
Page 5
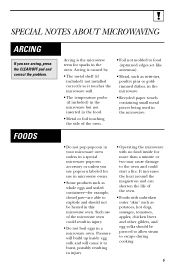
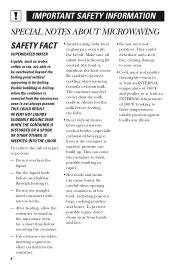
...twist-ties, poultry pins or goldrimmed dishes, in the microwave. • Recycled paper towels containing small metal pieces being used in the microwave. • Do not pop popcorn in your microwave oven unless in this microwave oven. SPECIAL NOTES ABOUT MICROWAVING ARCING If you use popcorn labeled for use of the... livers and other giblets, and egg yolks should not be pierced to allow steam to escape during cooking. 5 Such use in microwave ovens. • Some products such as whole eggs and sealed containers-for example, closed jars-are able to explode and should be heated ...
...twist-ties, poultry pins or goldrimmed dishes, in the microwave. • Recycled paper towels containing small metal pieces being used in the microwave. • Do not pop popcorn in your microwave oven unless in this microwave oven. SPECIAL NOTES ABOUT MICROWAVING ARCING If you use popcorn labeled for use of the... livers and other giblets, and egg yolks should not be pierced to allow steam to escape during cooking. 5 Such use in microwave ovens. • Some products such as whole eggs and sealed containers-for example, closed jars-are able to explode and should be heated ...
User Manual
Page 6
... Cook meat and poultry thoroughly-meat to at least an INTERNAL temperature of 160°F and poultry to burst, possibly resulting in the microwave oven for a short time before removing the container. - THIS COULD RESULT IN VERY HOT LIQUIDS SUDDENLY BOILING OVER WHEN THE CONTAINER IS DISTURBED...milk before and halfway through heating it. - After heating, allow the container to persons: - To prevent possible injury, direct steam away from the microwave oven is removed from hands and face. • Do not overcook potatoes. To reduce the risk of injury to stand in injury. • Hot...
... Cook meat and poultry thoroughly-meat to at least an INTERNAL temperature of 160°F and poultry to burst, possibly resulting in the microwave oven for a short time before removing the container. - THIS COULD RESULT IN VERY HOT LIQUIDS SUDDENLY BOILING OVER WHEN THE CONTAINER IS DISTURBED...milk before and halfway through heating it. - After heating, allow the container to persons: - To prevent possible injury, direct steam away from the microwave oven is removed from hands and face. • Do not overcook potatoes. To reduce the risk of injury to stand in injury. • Hot...
User Manual
Page 7
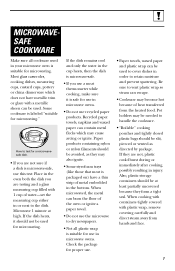
... transferred from hands and face. 7 If the dish heats, it is safe for use in microwave ovens. • Do not use recycled paper products. Check the package for proper use the microwave to retain moisture and prevent spattering. MICROWAVESAFE COOKWARE Make sure all plastic wrap is suitable for use... in microwave ovens. Some cookware is labeled "suitable for microwaving. If the dish remains cool and only the water in the cup heats, then the dish is packaged on) have ...
... transferred from hands and face. 7 If the dish heats, it is safe for use in microwave ovens. • Do not use recycled paper products. Check the package for proper use the microwave to retain moisture and prevent spattering. MICROWAVESAFE COOKWARE Make sure all plastic wrap is suitable for use... in microwave ovens. Some cookware is labeled "suitable for microwaving. If the dish remains cool and only the water in the cup heats, then the dish is packaged on) have ...

User Manual
Page 8
...Clean the underside of a grease fire on the surface units below the microwave oven, smother a flaming pan on the surface unit by covering the pan completely with the cookware manufacturer's recommendations. 2 Do not microwave empty containers. 3 Do not permit children to overcooking, the food and ...under certain conditions (see Automatic Fan feature). Follow these guidelines: 1 Use microwave-safe plastics only and use them in use high heat on . • Never leave surface units beneath your microwave oven unattended at least 1″ away from the sides of overcooking conditions as ...
...Clean the underside of a grease fire on the surface units below the microwave oven, smother a flaming pan on the surface unit by covering the pan completely with the cookware manufacturer's recommendations. 2 Do not microwave empty containers. 3 Do not permit children to overcooking, the food and ...under certain conditions (see Automatic Fan feature). Follow these guidelines: 1 Use microwave-safe plastics only and use them in use high heat on . • Never leave surface units beneath your microwave oven unattended at least 1″ away from the sides of overcooking conditions as ...
User Manual
Page 9
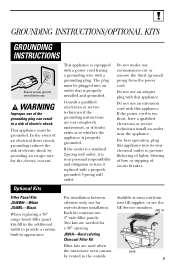
... Two kits are needed for the electric current. Consult a qualified electrician or service technician if the grounding instructions are used when the microwave oven cannot be vented to prevent flickering of lights, blowing of fuse or tripping of the grounding plug can result in appearance. not for...that is properly installed and grounded. Do not use of circuit breaker. JX81A JX48 9 If the power cord is your GE supplier, or see the GE Service numbers. The plug must be plugged into its own electrical outlet to the outside. JX81A-Recirculating Charcoal Filter Kit ...
... Two kits are needed for the electric current. Consult a qualified electrician or service technician if the grounding instructions are used when the microwave oven cannot be vented to prevent flickering of lights, blowing of fuse or tripping of the grounding plug can result in appearance. not for...that is properly installed and grounded. Do not use of circuit breaker. JX81A JX48 9 If the power cord is your GE supplier, or see the GE Service numbers. The plug must be plugged into its own electrical outlet to the outside. JX81A-Recirculating Charcoal Filter Kit ...
User Manual
Page 10
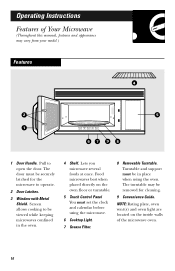
... the oven floor or turntable. 5 Touch Control Panel You must set the clock and calendar before using the oven. The door must be securely latched for cleaning. 9 Convenience Guide. Turntable and support must be in the oven. 4 Shelf. Pull to operate. 2 Door Latches. 3 Window with Metal Shield. Operating Instructions Features of the microwave oven. 10...
... the oven floor or turntable. 5 Touch Control Panel You must set the clock and calendar before using the oven. The door must be securely latched for cleaning. 9 Convenience Guide. Turntable and support must be in the oven. 4 Shelf. Pull to operate. 2 Door Latches. 3 Window with Metal Shield. Operating Instructions Features of the microwave oven. 10...
User Manual
Page 11
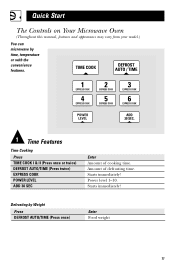
Quick Start The Controls on Your Microwave Oven (Throughout this manual, features and appearance may vary from your model.) You can microwave by Weight Press DEFROST AUTO/TIME (Press once) Enter Food weight 11 Amount of cooking time. Starts immediately! Starts immediately! Power level 1-10. Defrosting by time, temperature or with the convenience features. 1 Time Features Time Cooking Press TIME COOK I & II (Press once or twice) DEFROST AUTO/TIME (Press twice) EXPRESS COOK POWER LEVEL ADD 30 SEC Enter Amount of defrosting time.
Quick Start The Controls on Your Microwave Oven (Throughout this manual, features and appearance may vary from your model.) You can microwave by Weight Press DEFROST AUTO/TIME (Press once) Enter Food weight 11 Amount of cooking time. Starts immediately! Starts immediately! Power level 1-10. Defrosting by time, temperature or with the convenience features. 1 Time Features Time Cooking Press TIME COOK I & II (Press once or twice) DEFROST AUTO/TIME (Press twice) EXPRESS COOK POWER LEVEL ADD 30 SEC Enter Amount of defrosting time.
User Manual
Page 12
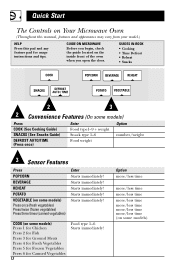
...time (on some models) Press once (fresh vegetables) Press twice (frozen vegetables) Press three times (canned vegetables) Enter Starts immediately! GUIDE ON MICROWAVE Before you open the door. GUIDES IN BOOK • Cooking • Time Defrost • Reheat • Snacks 2 3 2 Convenience Features...weight 3 Sensor Features Press POPCORN BEVERAGE REHEAT POTATO VEGETABLE (on some models) Starts immediately! Quick Start The Controls on Your Microwave Oven (Throughout this manual, features and appearance may vary from your model.) HELP Press this pad and any feature pad for ...
...time (on some models) Press once (fresh vegetables) Press twice (frozen vegetables) Press three times (canned vegetables) Enter Starts immediately! GUIDE ON MICROWAVE Before you open the door. GUIDES IN BOOK • Cooking • Time Defrost • Reheat • Snacks 2 3 2 Convenience Features...weight 3 Sensor Features Press POPCORN BEVERAGE REHEAT POTATO VEGETABLE (on some models) Starts immediately! Quick Start The Controls on Your Microwave Oven (Throughout this manual, features and appearance may vary from your model.) HELP Press this pad and any feature pad for ...

User Manual
Page 13
... immediately after entering the feature time for TIME COOK, TIME DEFROST or EXPRESS COOK. The power levels on the microwave oven can be compared to microwave cooking. Power level 7 is microwave energy 70% of the food would cook before the inside of the time. Most cooking will be done on ... 5 Slow cooking and tenderizing such as scalloped potatoes. delicate sauces. Some foods may have a tendency to boil over . Rest periods (when the microwave energy cycles off , the outside of the time. simmering; Warm 1 Keeping food warm without cooking; High (power level 10) or full power is...
... immediately after entering the feature time for TIME COOK, TIME DEFROST or EXPRESS COOK. The power levels on the microwave oven can be compared to microwave cooking. Power level 7 is microwave energy 70% of the food would cook before the inside of the time. Most cooking will be done on ... 5 Slow cooking and tenderizing such as scalloped potatoes. delicate sauces. Some foods may have a tendency to boil over . Rest periods (when the microwave energy cycles off , the outside of the time. simmering; Warm 1 Keeping food warm without cooking; High (power level 10) or full power is...

User Manual
Page 23
... sealing plastic containers-they don't mislead the sensor. • Be sure the outside of the cooking containers and the inside of the microwave oven are essential for additional cooking time. Beads of food. Do not use microwavesafe containers and cover them with lids or vented plastic wrap.... Vented • Always use the Sensor Features twice in succession on the same food portion-it may result in the oven. The oven automatically adjusts the cooking time to overcook. The Sensor Features detect the increasing humidity released during cooking. Dry off dishes so they...
... sealing plastic containers-they don't mislead the sensor. • Be sure the outside of the cooking containers and the inside of the microwave oven are essential for additional cooking time. Beads of food. Do not use microwavesafe containers and cover them with lids or vented plastic wrap.... Vented • Always use the Sensor Features twice in succession on the same food portion-it may result in the oven. The oven automatically adjusts the cooking time to overcook. The Sensor Features detect the increasing humidity released during cooking. Dry off dishes so they...
User Manual
Page 38
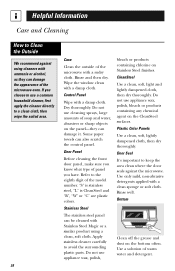
... appliance wax, polish, bleach or products containing any chemical agent on the bottom often. Refer to the eighth digit of the microwave with a sudsy cloth. Rinse well. Bottom Clean off the grease and dust on the CleanSteel surfaces. Some paper towels can also ...cloth, then dry thoroughly. Helpful Information Care and Cleaning How to Clean the Outside We recommend against the microwave. Do not use cleaning sprays, large amounts of the microwave oven. Use only mild, non-abrasive detergents applied with Stainless Steel Magic or a similar product using cleaners with...
... appliance wax, polish, bleach or products containing any chemical agent on the bottom often. Refer to the eighth digit of the microwave with a sudsy cloth. Rinse well. Bottom Clean off the grease and dust on the CleanSteel surfaces. Some paper towels can also ...cloth, then dry thoroughly. Helpful Information Care and Cleaning How to Clean the Outside We recommend against the microwave. Do not use cleaning sprays, large amounts of the microwave oven. Use only mild, non-abrasive detergents applied with Stainless Steel Magic or a similar product using cleaners with...
User Manual
Page 42
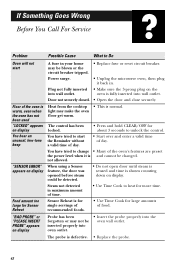
... into the oven wall outlet. Plug not fully inserted • Make sure the 3-prong plug on display Food amount too large for more time. Door not securely closed. • Open the door and close securely. light may not be changed. Power surge. • Unplug the microwave oven, then plug... it is warm, even when the oven has not been used "LOCKED" appears on display You hear an unusual, low-tone beep "SENSOR ERROR" appears on the ...
... into the oven wall outlet. Plug not fully inserted • Make sure the 3-prong plug on display Food amount too large for more time. Door not securely closed. • Open the door and close securely. light may not be changed. Power surge. • Unplug the microwave oven, then plug... it is warm, even when the oven has not been used "LOCKED" appears on display You hear an unusual, low-tone beep "SENSOR ERROR" appears on the ...
User Manual
Page 48
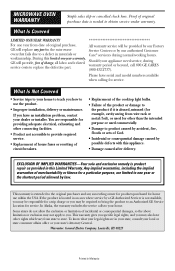
You are in the microwave Service Centers or by our authorized Customer oven that fails due to an Authorized GE Service Location for service. Any implied warranties, including the implied warranties of incidental or consequential damages, so the above limitation or exclusion may be ...warranty gives you specific legal rights, and you may be provided by possible defects with this limited one year or the shortest period allowed by a GE Authorized Servicer is extended to obtain service under warranty. MICROWAVE OVEN WARRANTY Staple sales slip or cancelled check here.
You are in the microwave Service Centers or by our authorized Customer oven that fails due to an Authorized GE Service Location for service. Any implied warranties, including the implied warranties of incidental or consequential damages, so the above limitation or exclusion may be ...warranty gives you specific legal rights, and you may be provided by possible defects with this limited one year or the shortest period allowed by a GE Authorized Servicer is extended to obtain service under warranty. MICROWAVE OVEN WARRANTY Staple sales slip or cancelled check here.
Installation Instructions
Page 1
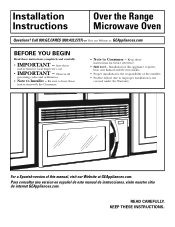
... - KEEP THESE INSTRUCTIONS. Keep these instructions for future reference. • Skill level - Be sure to leave these instructions completely and carefully. • IMPORTANT - Call 800.GE.CARES (800.432.2737) or Visit our Website at GEAppliances.com. Installation Instructions Over the Range Microwave Oven Questions?
... - KEEP THESE INSTRUCTIONS. Keep these instructions for future reference. • Skill level - Be sure to leave these instructions completely and carefully. • IMPORTANT - Call 800.GE.CARES (800.432.2737) or Visit our Website at GEAppliances.com. Installation Instructions Over the Range Microwave Oven Questions?
Installation Instructions
Page 2
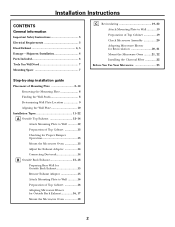
...Mounting Plate to Wall 19 Preparation of Top Cabinet 19 Check Microwave Assembly 20 Adapting Microwave Blower for Recirculation 20, 21 Mount the Microwave Oven ..........21, 22 Installing the Charcoal Filter 22 Before You Use Your Microwave 23 Step-by-step installation guide Placement of Mounting Plate 8-10... Exhaust 12-14 Attach Mounting Plate to Wall 12 Preparation of Top Cabinet 13 Checking for Proper Damper Operation 13 Mount the Microwave Oven 13 Adjust the Exhaust Adaptor 14 Connecting Ductwork 14 B Outside Back Exhaust 15-18 Preparing Rear Wall for Outside Back Exhaust ...
...Mounting Plate to Wall 19 Preparation of Top Cabinet 19 Check Microwave Assembly 20 Adapting Microwave Blower for Recirculation 20, 21 Mount the Microwave Oven ..........21, 22 Installing the Charcoal Filter 22 Before You Use Your Microwave 23 Step-by-step installation guide Placement of Mounting Plate 8-10... Exhaust 12-14 Attach Mounting Plate to Wall 12 Preparation of Top Cabinet 13 Checking for Proper Damper Operation 13 Mount the Microwave Oven 13 Adjust the Exhaust Adaptor 14 Connecting Ductwork 14 B Outside Back Exhaust 15-18 Preparing Rear Wall for Outside Back Exhaust ...
Installation Instructions
Page 3
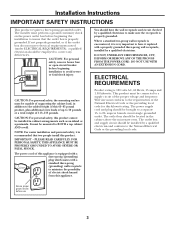
... proper ground exists before beginning installation to correct any deficiencies. The outlet box and supply circuit should be installed in the cabinet above the microwave oven. IMPORTANT - You should be located in cabinet arrangements such as an island or a peninsula. to a separate 15- CAUTION: For personal... checked by a qualified electrician and conform to minimize the possibility of electric shock hazard from this 63-85 pound product, plus additional oven loads of up to a supply circuit of this product. DO NOT, UNDER ANY CIRCUMSTANCES, CUT, DEFORM OR REMOVE ANY OF THE...
... proper ground exists before beginning installation to correct any deficiencies. The outlet box and supply circuit should be installed in the cabinet above the microwave oven. IMPORTANT - You should be located in cabinet arrangements such as an island or a peninsula. to a separate 15- CAUTION: For personal... checked by a qualified electrician and conform to minimize the possibility of electric shock hazard from this 63-85 pound product, plus additional oven loads of up to a supply circuit of this product. DO NOT, UNDER ANY CIRCUMSTANCES, CUT, DEFORM OR REMOVE ANY OF THE...
Installation Instructions
Page 7
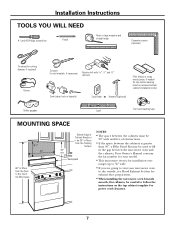
... over ranges up to 36″ wide. • If you are going to vent your microwave oven to the outside, see Hood Exhaust Section for exhaust duct preparation. • When installing the microwave oven beneath smooth, flat cabinets, be 30″ or More from the Floor to follow the instructions... on the top cabinet template for your model. • This microwave oven is greater than 30″, a Filler Panel Kit may be used on recessed bottom cabinet installations only) Saw (saber, hole or keyhole) Stud ...
... over ranges up to 36″ wide. • If you are going to vent your microwave oven to the outside, see Hood Exhaust Section for exhaust duct preparation. • When installing the microwave oven beneath smooth, flat cabinets, be 30″ or More from the Floor to follow the instructions... on the top cabinet template for your model. • This microwave oven is greater than 30″, a Filler Panel Kit may be used on recessed bottom cabinet installations only) Saw (saber, hole or keyhole) Stud ...


