
Installation Instructions
Page 2
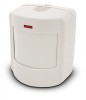
... 7.5 feet (see Figure 5). See Figure 5 to determine which knockouts to secure into the hole at a mounting height of the mounting plate. Use wall anchors and screws to use when mounting the motion sensor. Attach the sensor to its mounting plate by depressing the button on ...wall-tamper switch cannot be securely attached to the mounting plate. 6. This graph shows the top view of the bottom four mounting holes. Punch out two of the lens coverage area, for surface or corner mounting. 2 ITI® Pet Immune SAW PIR Motion Sensor Side View (Motion Sensor) at the top of...
... 7.5 feet (see Figure 5). See Figure 5 to determine which knockouts to secure into the hole at a mounting height of the mounting plate. Use wall anchors and screws to use when mounting the motion sensor. Attach the sensor to its mounting plate by depressing the button on ...wall-tamper switch cannot be securely attached to the mounting plate. 6. This graph shows the top view of the bottom four mounting holes. Punch out two of the lens coverage area, for surface or corner mounting. 2 ITI® Pet Immune SAW PIR Motion Sensor Side View (Motion Sensor) at the top of...


