User Manual
Page 1
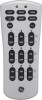
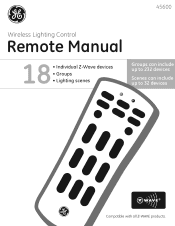
45600 Wireless Lighting Control Remote Manual 18 • Individual Z-Wave devices • Groups • Lighting scenes Groups can include up to 232 devices Scenes can include up to 32 devices Compatible with all Z-WAVE products.
45600 Wireless Lighting Control Remote Manual 18 • Individual Z-Wave devices • Groups • Lighting scenes Groups can include up to 232 devices Scenes can include up to 32 devices Compatible with all Z-WAVE products.
User Manual
Page 2
... regardless of these instructions. All other applications. If this guide for purchasing the GE SmartHome™ Remote. For best results, please read and perform all refer to -use multiple remote controls with your Z-Wave lighting control network, however, only one easy-to an individual Z-Wave enabled device in your network. NOTE: This product can also set up and...
... regardless of these instructions. All other applications. If this guide for purchasing the GE SmartHome™ Remote. For best results, please read and perform all refer to -use multiple remote controls with your Z-Wave lighting control network, however, only one easy-to an individual Z-Wave enabled device in your network. NOTE: This product can also set up and...
User Manual
Page 3
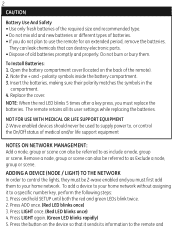
... that it to a specific number key, perform the following steps: 1. ADDING A DEVICE (NODE / LIGHT) TO THE NETWORK In order to control the lights, they must replace the batteries. They can also be Z-wave enabled and you must first add them . Open the battery compartment cover (located on the device so... that can also be referred to as Exclude a node, group or scene. The remote retains all its ...
... that it to a specific number key, perform the following steps: 1. ADDING A DEVICE (NODE / LIGHT) TO THE NETWORK In order to control the lights, they must replace the batteries. They can also be Z-wave enabled and you must first add them . Open the battery compartment cover (located on the device so... that can also be referred to as Exclude a node, group or scene. The remote retains all its ...
User Manual
Page 4
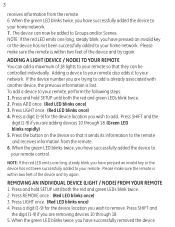
...ADD once. (Red LED blinks once) 3. Please make sure the remote is within two feet of 18 lights to your remote so that it to add. The device can now be controlled individually. ADDING A LIGHT (DEVICE / NODE) TO YOUR REMOTE You can be added to your home network. 7. If the device... number you have pressed an invalid key or the device has not been successfully added to the remote and receives information from the remote. 6. Press and...
...ADD once. (Red LED blinks once) 3. Please make sure the remote is within two feet of 18 lights to your remote so that it to add. The device can now be controlled individually. ADDING A LIGHT (DEVICE / NODE) TO YOUR REMOTE You can be added to your home network. 7. If the device... number you have pressed an invalid key or the device has not been successfully added to the remote and receives information from the remote. 6. Press and...
User Manual
Page 5
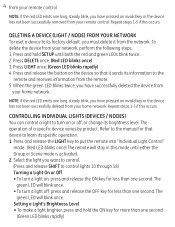
.... Refer to learn its factory default, you have pressed an invalid key or the device has not been successfully removed from your remote control. Press LIGHT once. (Green LED blinks rapidly) 4. When the green LED blinks twice, you have pressed an invalid key or the device ... until both the red and green LEDs blink twice. 2. Press and release the LIGHT key to its specific operation. 1. DELETING A DEVICE (LIGHT / NODE) FROM YOUR NETWORK To reset a device to put the remote into "Individual Light Control" mode. (Red LED blinks once) The remote will blink once. 4 from the...
.... Refer to learn its factory default, you have pressed an invalid key or the device has not been successfully removed from your remote control. Press LIGHT once. (Green LED blinks rapidly) 4. When the green LED blinks twice, you have pressed an invalid key or the device ... until both the red and green LEDs blink twice. 2. Press and release the LIGHT key to its specific operation. 1. DELETING A DEVICE (LIGHT / NODE) FROM YOUR NETWORK To reset a device to put the remote into "Individual Light Control" mode. (Red LED blinks once) The remote will blink once. 4 from the...
User Manual
Page 6
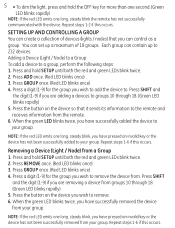
Repeat steps 1-2 if this occurs. SETTING UP AND CONTROLLING A GROUP You can control as a group. You can contain up a maximum of devices (lights / nodes) that it sends its information to the remote and receives information from . Press and hold SETUP until both the red and green LEDs blink twice. 2. Press GROUP...successfully added the device to your group. Press GROUP once. (Red LED blinks once) 4. Each group can set up to 232 devices. Adding a Device (Light / Node) to a Group To add a device to groups 10 through 18. (Green LED blinks rapidly) 5. NOTE: If the red LED emits one...
Repeat steps 1-2 if this occurs. SETTING UP AND CONTROLLING A GROUP You can control as a group. You can contain up a maximum of devices (lights / nodes) that it sends its information to the remote and receives information from . Press and hold SETUP until both the red and green LEDs blink twice. 2. Press GROUP...successfully added the device to your group. Press GROUP once. (Red LED blinks once) 4. Each group can set up to 232 devices. Adding a Device (Light / Node) to a Group To add a device to groups 10 through 18. (Green LED blinks rapidly) 5. NOTE: If the red LED emits one...
User Manual
Page 7
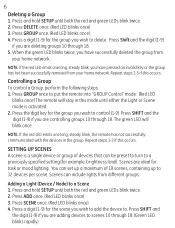
...remote will blink once. Controlling a Group To control a Group, perform the following steps: 1. Press GROUP once to delete. Press SHIFT and the digit (1-9) if you have successfully deleted the group from different groups. NOTE: If the red LED emits one long, steady blink, you are deleting groups 10 through 18. 5. Scenes can include lights...your home network. When the green LED blinks twice, you wish to add the device to control (1-9). The green LED will stay in the group. Adding a Light (Device / Node) to scenes 10 through 18. Press SCENE once. (Red LED blinks ...
...remote will blink once. Controlling a Group To control a Group, perform the following steps: 1. Press GROUP once to delete. Press SHIFT and the digit (1-9) if you have successfully deleted the group from different groups. NOTE: If the red LED emits one long, steady blink, you are deleting groups 10 through 18. 5. Scenes can include lights...your home network. When the green LED blinks twice, you wish to add the device to control (1-9). The green LED will stay in the group. Adding a Light (Device / Node) to scenes 10 through 18. Press SCENE once. (Red LED blinks ...
User Manual
Page 8
...blinking. 8. Press SCENE once. (Red LED blinks once) 4. When the green LED blinks twice, you wish to a scene. Press the button on the light you are adding. (Green LED pauses briefly, blinks once and then resumes blinking rapidly, indicating that you have successfully added the device to remove. 6. When...deleted the scene from a Scene 1. Repeat steps 1-5 if this occurs. Repeat steps 1-7 if this occurs. Press the button on the device that the remote is pending the setup of the bright/dim setting on the device within 30 seconds (refer to delete. NOTE: If the red LED emits one...
...blinking. 8. Press SCENE once. (Red LED blinks once) 4. When the green LED blinks twice, you wish to a scene. Press the button on the light you are adding. (Green LED pauses briefly, blinks once and then resumes blinking rapidly, indicating that you have successfully added the device to remove. 6. When...deleted the scene from a Scene 1. Repeat steps 1-5 if this occurs. Repeat steps 1-7 if this occurs. Press the button on the device that the remote is pending the setup of the bright/dim setting on the device within 30 seconds (refer to delete. NOTE: If the red LED emits one...

User Manual
Page 9
... SCENE once. (Red LED blinks once) The remote will stay in All-On and All-Off control. Press ALL once. (Red LED blinks once) 2. You have pressed an invalid key or the All-On/All-Off command was not successful. Press the digit key for GE Z-Wave devices is activated. 2. The green LED blinks... desired, specific devices can be needed if the device has been deleted from All Control. Deleting Devices (Lights / Nodes) from All Control. 5. Press SHIFT and the digit (1-9) if you wish to ignore the All-On and All-Off commands. 1. Repeat steps 1-2 if this occurs. Press the button...
... SCENE once. (Red LED blinks once) The remote will stay in All-On and All-Off control. Press ALL once. (Red LED blinks once) 2. You have pressed an invalid key or the All-On/All-Off command was not successful. Press the digit key for GE Z-Wave devices is activated. 2. The green LED blinks... desired, specific devices can be needed if the device has been deleted from All Control. Deleting Devices (Lights / Nodes) from All Control. 5. Press SHIFT and the digit (1-9) if you wish to ignore the All-On and All-Off commands. 1. Repeat steps 1-2 if this occurs. Press the button...
User Manual
Page 10
... the numeric keypad. (Either on how to replicate to the respective sections for Create Secondary Controller, Primary Controller Shift and Controller Copy for programming information. Refer to the group. Press and hold SETUP on the primary GE SmartHome™ remote until both the red and green LEDs blink twice. 3. Press ALL once. (Green LED blinks...
... the numeric keypad. (Either on how to replicate to the respective sections for Create Secondary Controller, Primary Controller Shift and Controller Copy for programming information. Refer to the group. Press and hold SETUP on the primary GE SmartHome™ remote until both the red and green LEDs blink twice. 3. Press ALL once. (Green LED blinks...
User Manual
Page 11
..., the information has not been successfully transferred. PRIMARY CONTROLLER SHIFT (TRANSFER) You can add a secondary remote to your network, and transfer your remote's information to it sends its information to the new secondary remote as receive information Transferring All Network and Remote Information 1. Put the target (new primary) remote into programming mode so that it . Refer...
..., the information has not been successfully transferred. PRIMARY CONTROLLER SHIFT (TRANSFER) You can add a secondary remote to your network, and transfer your remote's information to it sends its information to the new secondary remote as receive information Transferring All Network and Remote Information 1. Put the target (new primary) remote into programming mode so that it . Refer...
User Manual
Page 12
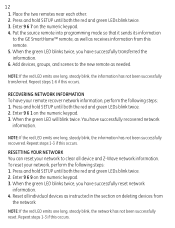
... emits one long, steady blink, the information has not been successfully transferred. Put the target (new primary) remote into a secondary remote and can not be used to the new primary remote. Enter 9 6 8 2 on the numeric keypad. 4. When the green LED blinks twice, you have ...6. COPYING NETWORK AND/OR DEVICE INFORMATION TO THIS REMOTE This allows a second remote to receive information from the network. 7. Place the two remotes near each other. 2. Refer to become a new primary or secondary remote. The source remote is converted into programming mode so that it sends...
... emits one long, steady blink, the information has not been successfully transferred. Put the target (new primary) remote into a secondary remote and can not be used to the new primary remote. Enter 9 6 8 2 on the numeric keypad. 4. When the green LED blinks twice, you have ...6. COPYING NETWORK AND/OR DEVICE INFORMATION TO THIS REMOTE This allows a second remote to receive information from the network. 7. Place the two remotes near each other. 2. Refer to become a new primary or secondary remote. The source remote is converted into programming mode so that it sends...
User Manual
Page 13
... reset. RECOVERING NETWORK INFORMATION To have successfully reset network information. 4. Reset all device and Z-Wave network information. 12 1. Put the source remote into programming mode so that it sends its information to clear all individual devices as instructed in... on deleting devices from this occurs. When the green LED blinks twice, you have your network to the GE SmartHome™ remote, as well as needed. Repeat steps 1-3 if this remote. 5. Place the two remotes near each other. 2. Enter 9 6 7 on the numeric keypad. 3. Enter 9 6 1 on the...
... reset. RECOVERING NETWORK INFORMATION To have successfully reset network information. 4. Reset all device and Z-Wave network information. 12 1. Put the source remote into programming mode so that it sends its information to clear all individual devices as instructed in... on deleting devices from this occurs. When the green LED blinks twice, you have your network to the GE SmartHome™ remote, as well as needed. Repeat steps 1-3 if this remote. 5. Place the two remotes near each other. 2. Enter 9 6 7 on the numeric keypad. 3. Enter 9 6 1 on the...
User Manual
Page 15
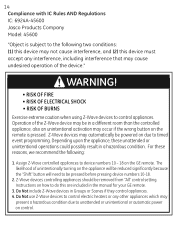
... extreme caution when using Z-Wave devices to device numbers 10 - 18 on the GE remote. Assign Z-Wave controlled appliances to control appliances. Z-Wave devices may automatically be pressed... before pressing device numbers 10-18. 2. Instructions on how to do this device must accept any other appliances which may present a hazardous condition due to unattended or unintentional or automatic power on control. 14 Compliance with IC Rules AND Regulations IC: 6924A-45600...
... extreme caution when using Z-Wave devices to device numbers 10 - 18 on the GE remote. Assign Z-Wave controlled appliances to control appliances. Z-Wave devices may automatically be pressed... before pressing device numbers 10-18. 2. Instructions on how to do this device must accept any other appliances which may present a hazardous condition due to unattended or unintentional or automatic power on control. 14 Compliance with IC Rules AND Regulations IC: 6924A-45600...
User Manual
Page 16
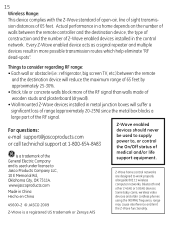
... 45600-2 © JASCO 2009 Z-Wave is a registered US trademark or Zensys A/S Z-Wave enabled devices should never be used under license to work properly alongside 802.11 wireless computer networks, Bluetooth and other 2.4GHz or 5.8GHz devices. Things to consider regarding RF range: • Each wall or obstacle (i.e.: refrigerator, big screen TV, etc.) between the remote controller...
... 45600-2 © JASCO 2009 Z-Wave is a registered US trademark or Zensys A/S Z-Wave enabled devices should never be used under license to work properly alongside 802.11 wireless computer networks, Bluetooth and other 2.4GHz or 5.8GHz devices. Things to consider regarding RF range: • Each wall or obstacle (i.e.: refrigerator, big screen TV, etc.) between the remote controller...


