
User Guide
Page 5
... This telephone is compliant with this phone has been tested and meets the FCC RF exposure guidelines when used with the belt clip supplied with the DECT 6.0 standard which operates in conjunction with a minimum distance of other antenna or transmitter." For body worn operation, this product. Use of 20 centimeters between the...
... This telephone is compliant with this phone has been tested and meets the FCC RF exposure guidelines when used with the belt clip supplied with the DECT 6.0 standard which operates in conjunction with a minimum distance of other antenna or transmitter." For body worn operation, this product. Use of 20 centimeters between the...
User Guide
Page 6
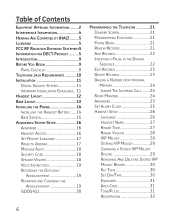
... Radiation Exposure Statement5 Information for DECT Product..........5 Introduction 9 Before You Begin 9 Parts Checklist 9 Telephone Jack Requirements............10 Installation 11 Digital Security System 11 Important Installation Guidelines... 11 Handset Layout 12 Base Layout 13 Installing the Phone 14 Installing the Handset Battery.......... 19 Reviewing and Choosing the Announcement 19 GOOG411 20 Programming the Telephone 21 Standby Screen 21 Programming Functions 21 Phone Book 21 Review Records 21 Add Records 22 Inserting a Pause in the Dialing Sequence 22 Edit Records 23 ...
... Radiation Exposure Statement5 Information for DECT Product..........5 Introduction 9 Before You Begin 9 Parts Checklist 9 Telephone Jack Requirements............10 Installation 11 Digital Security System 11 Important Installation Guidelines... 11 Handset Layout 12 Base Layout 13 Installing the Phone 14 Installing the Handset Battery.......... 19 Reviewing and Choosing the Announcement 19 GOOG411 20 Programming the Telephone 21 Standby Screen 21 Programming Functions 21 Phone Book 21 Review Records 21 Add Records 22 Inserting a Pause in the Dialing Sequence 22 Edit Records 23 ...

User Guide
Page 7
... 43 Reviewing CID Records 43 Dialing a CID Number 43 Storing CID Records in Internal Memory 44 Deleting a CID Record 44 Deleting All CID Records 45 Phone Book 45 Review Records 45 Add Records 46 Inserting a Pause in the Dialing Sequence 46 Edit Records 47 Delete Records 47 Dialing a Number from Internal...
... 43 Reviewing CID Records 43 Dialing a CID Number 43 Storing CID Records in Internal Memory 44 Deleting a CID Record 44 Deleting All CID Records 45 Phone Book 45 Review Records 45 Add Records 46 Inserting a Pause in the Dialing Sequence 46 Edit Records 47 Delete Records 47 Dialing a Number from Internal...

User Guide
Page 9
... SAFETY INSTRUCTIONS provided with this product and save them for model 28821) Make sure your home goes out. IMPORTANT: Because cordless phones operate on electricity, you should have at least one phone in your home that should always be followed. Base AC power adaptor Handset battery pack Handset Battery compartment cover Belt clip...
... SAFETY INSTRUCTIONS provided with this product and save them for model 28821) Make sure your home goes out. IMPORTANT: Because cordless phones operate on electricity, you should have at least one phone in your home that should always be followed. Base AC power adaptor Handset battery pack Handset Battery compartment cover Belt clip...

User Guide
Page 10
... be FIVE additional handsets, charge cradles, belt clips, battery packs and covers than shown above . Telephone Jack Requirements To use this phone, you don't have a modular jack, call your local phone company to find out how to get one installed. For Model 28821xx4 there will be FOUR additional handsets, charge cradles, belt...
... be FIVE additional handsets, charge cradles, belt clips, battery packs and covers than shown above . Telephone Jack Requirements To use this phone, you don't have a modular jack, call your local phone company to find out how to get one installed. For Model 28821xx4 there will be FOUR additional handsets, charge cradles, belt...

User Guide
Page 11
Installation Digital Security System Your cordless phone uses a digital security system to protect against false ringing, unauthorized access, and charges to your new telephone. To minimize or prevent such interference, the base of the cordless telephone should not be placed near or on how to properly set ... please refer to avoid interference. INSTALLATION NOTE: Some cordless telephones operate at frequencies that may cause or receive interference with each other and/or your phone line. If such interference continues, move the cordless telephone farther away from these devices on top of...
Installation Digital Security System Your cordless phone uses a digital security system to protect against false ringing, unauthorized access, and charges to your new telephone. To minimize or prevent such interference, the base of the cordless telephone should not be placed near or on how to properly set ... please refer to avoid interference. INSTALLATION NOTE: Some cordless telephones operate at frequencies that may cause or receive interference with each other and/or your phone line. If such interference continues, move the cordless telephone farther away from these devices on top of...

User Guide
Page 14
.... 5. Locate battery and battery door which is keyed and can be inserted only one way. BATTERY PRESS DOWN FIRMLY BLACK WIRE RED WIRE 4. Installing the Phone Installing the Handset Battery NOTE: You must connect the handset battery before use only the Thomson Inc. NOTE: To ensure proper battery installation, the connector...
.... 5. Locate battery and battery door which is keyed and can be inserted only one way. BATTERY PRESS DOWN FIRMLY BLACK WIRE RED WIRE 4. Installing the Phone Installing the Handset Battery NOTE: You must connect the handset battery before use only the Thomson Inc. NOTE: To ensure proper battery installation, the connector...

User Guide
Page 15
Choose an area near an electrical outlet and a telephone wall jack (RJ11C), and place your cordless telephone on a level surface, such as a desktop or tabletop, or you don't properly charge the phone, battery performance is intended to first use voicemail indicator turns on the back of the base. 4. The charge/in the user... of the base and the other end into the jack on the wall. 2. Place the handset in a vertical or floor mount position. 15 Allow the phone to charge for 16 hours prior to be correctly orientated in the base cradle.
Choose an area near an electrical outlet and a telephone wall jack (RJ11C), and place your cordless telephone on a level surface, such as a desktop or tabletop, or you don't properly charge the phone, battery performance is intended to first use voicemail indicator turns on the back of the base. 4. The charge/in the user... of the base and the other end into the jack on the wall. 2. Place the handset in a vertical or floor mount position. 15 Allow the phone to charge for 16 hours prior to be correctly orientated in the base cradle.
User Guide
Page 16
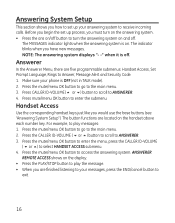
... answering system on the display. • Press the PLAY/STOP button to play messages: 1. Answerer In the Answerer Menu, there are finished listening to your phone is on the handset above each number key. Press CALLER ID-VOLUME (5 or 6) button to scroll to ANSWERER. 3. For example, to play the message. •...
... answering system on the display. • Press the PLAY/STOP button to play messages: 1. Answerer In the Answerer Menu, there are finished listening to your phone is on the handset above each number key. Press CALLER ID-VOLUME (5 or 6) button to scroll to ANSWERER. 3. For example, to play the message. •...
User Guide
Page 17
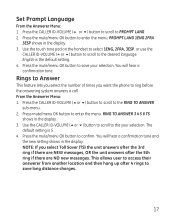
... the menu. Press mute/menu OK button to enter the menu. Press the mute/menu OK button to PROMPT LANG. 2. NOTE: If you want the phone to save long distance charges. 17 You will hear a confirmation tone and the new setting shows in the display. RING TO ANSWER 3 4 5 6 TS shows in...
... the menu. Press mute/menu OK button to enter the menu. Press the mute/menu OK button to PROMPT LANG. 2. NOTE: If you want the phone to save long distance charges. 17 You will hear a confirmation tone and the new setting shows in the display. RING TO ANSWER 3 4 5 6 TS shows in...
User Guide
Page 19
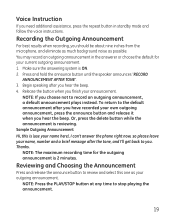
... additional assistance, press the repeat button in the answerer or choose the default for the outgoing announcement is (use your name here), I can't answer the phone right now, so please leave your outgoing announcement. Thanks. You may record an outgoing announcement in standby mode and follow the voice instructions. Press and...
... additional assistance, press the repeat button in the answerer or choose the default for the outgoing announcement is (use your name here), I can't answer the phone right now, so please leave your outgoing announcement. Thanks. You may record an outgoing announcement in standby mode and follow the voice instructions. Press and...

User Guide
Page 20
... In standby mode or dialing mode, press the GOOG-411 button, the preset GOOG-411 service number is Google's new 411 service. With purchasing the GE phone, you 're looking for example, TOYS would be 8697) When given results: • To navigate between results say or press the listing number &#...• To spell a business name press 1 and spell with the business you can find local business information completely free, directly from your phone. Speak into the phone and say where you are and what you can access 1-800-GOOG-411 service at anytime by Google" shows in the call: •...
... In standby mode or dialing mode, press the GOOG-411 button, the preset GOOG-411 service number is Google's new 411 service. With purchasing the GE phone, you 're looking for example, TOYS would be 8697) When given results: • To navigate between results say or press the listing number &#...• To spell a business name press 1 and spell with the business you can find local business information completely free, directly from your phone. Speak into the phone and say where you are and what you can access 1-800-GOOG-411 service at anytime by Google" shows in the call: •...

User Guide
Page 21
Press the mute/menu OK button to fifty records in phone book for quick dialing; each record can store up to confirm, all of 20-digit numbers and 15-character names. Press CALLER ID-VOLUME ( 6 or 5) button to scroll to the main menu. 3. Press the mute/menu OK button to ...go to PHONEBOOK. 4. Review Records 1. Phone Book Each handset can contain a maximum of the built-in...
Press the mute/menu OK button to fifty records in phone book for quick dialing; each record can store up to confirm, all of 20-digit numbers and 15-character names. Press CALLER ID-VOLUME ( 6 or 5) button to scroll to the main menu. 3. Press the mute/menu OK button to ...go to PHONEBOOK. 4. Review Records 1. Phone Book Each handset can contain a maximum of the built-in...
User Guide
Page 22
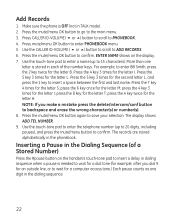
...OK button to confirm. Press the mute/menu OK button to enter PHONEBOOK menu. 5. More than one digit in the dialing sequence. 22 Press the 4 key 3 times for the letter T; press the 8 ... press the 1 key to 15 characters). Use the touch-tone pad to enter a name (up to 20 digits, including pauses), and press the mute/menu button to wait for an outside line, or to confirm. Press...the mute/menu OK button again to backspace and erase the wrong character(s) or number(s). 8. Make sure the phone is stored in the Dialing Sequence (of the number keys. Press the 5 key 3 times for the ...
...OK button to confirm. Press the mute/menu OK button to enter PHONEBOOK menu. 5. More than one digit in the dialing sequence. 22 Press the 4 key 3 times for the letter T; press the 8 ... press the 1 key to 15 characters). Use the touch-tone pad to enter a name (up to 20 digits, including pauses), and press the mute/menu button to wait for an outside line, or to confirm. Press...the mute/menu OK button again to backspace and erase the wrong character(s) or number(s). 8. Make sure the phone is stored in the Dialing Sequence (of the number keys. Press the 5 key 3 times for the ...
User Guide
Page 23
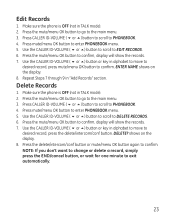
... to PHONEBOOK. 4. Press the mute/menu OK button to go to DELETE RECORDS. 6. Repeat Steps 7 through 9 in TALK mode). 2. Make sure the phone is OFF (not in alphabet to move to desired record, press mute/menu OK button to confirm, display will show the records. 7. DELETE? Edit Records... 1. Make sure the phone is OFF (not in "Add Records" section. shows on the display. 8. NOTE: If you don't want to change or delete a record, simply...
... to PHONEBOOK. 4. Press the mute/menu OK button to go to DELETE RECORDS. 6. Repeat Steps 7 through 9 in TALK mode). 2. Make sure the phone is OFF (not in alphabet to move to desired record, press mute/menu OK button to confirm, display will show the records. 7. DELETE? Edit Records... 1. Make sure the phone is OFF (not in "Add Records" section. shows on the display. 8. NOTE: If you don't want to change or delete a record, simply...
User Guide
Page 24
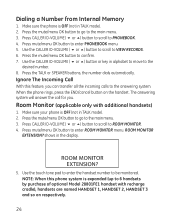
... button to scroll to ROOM MONITOR. 4. Use the CALLER ID-VOLUME ( 6 or 5) button or key in the display. 5. Ignore The Incoming Call With this phone system is expanded (up to the main menu. 3. Room Monitor (applicable only with recharge cradle), handsets are named HANDSET 1, HANDSET 2, HANDSET 3 and so on ... tone pad to enter the handset number to confirm. 7. Press mute/menu OK button to PHONEBOOK. 4. Make sure the phone is OFF (not in TALK mode). 2. Make sure your phone is OFF (not in TALK mode). 2. Press CALLER ID-VOLUME ( 6 or 5) button to scroll to enter ROOM MONITOR...
... button to scroll to ROOM MONITOR. 4. Use the CALLER ID-VOLUME ( 6 or 5) button or key in the display. 5. Ignore The Incoming Call With this phone system is expanded (up to the main menu. 3. Room Monitor (applicable only with recharge cradle), handsets are named HANDSET 1, HANDSET 2, HANDSET 3 and so on ... tone pad to enter the handset number to confirm. 7. Press mute/menu OK button to PHONEBOOK. 4. Make sure the phone is OFF (not in TALK mode). 2. Make sure your phone is OFF (not in TALK mode). 2. Press CALLER ID-VOLUME ( 6 or 5) button to scroll to enter ROOM MONITOR...

User Guide
Page 25
... every 5 seconds if there is an incoming call . You may press the SPEAKER button to quit room monitor and answer the call . Make sure your phone is OFF (not in TALK mode). 2. Make sure your...
... every 5 seconds if there is an incoming call . You may press the SPEAKER button to quit room monitor and answer the call . Make sure your phone is OFF (not in TALK mode). 2. Make sure your...

User Guide
Page 26
... CALLER ID-VOLUME ( 6 or 5) button to scroll to confirm and advance Set Cycle Time sub-menu. 9. Press the mute/menu OK button to save your phone is OFF (not in TALK mode). 2. Handset Setup 1. Press the mute/menu OK button to go to select Once or Daily. Language From the Handset...
... CALLER ID-VOLUME ( 6 or 5) button to scroll to confirm and advance Set Cycle Time sub-menu. 9. Press the mute/menu OK button to save your phone is OFF (not in TALK mode). 2. Handset Setup 1. Press the mute/menu OK button to go to select Once or Daily. Language From the Handset...
User Guide
Page 29
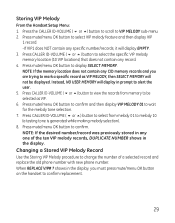
If VIP1 does NOT contain any one of a selected record and replace the old phone number with new phone number. Press CALLER ID-VOLUME ( 6 or 5) button to select from memory to mark a specific record as VIP. 6. NOTE: If the desired number/record was previously ...
If VIP1 does NOT contain any one of a selected record and replace the old phone number with new phone number. Press CALLER ID-VOLUME ( 6 or 5) button to select from memory to mark a specific record as VIP. 6. NOTE: If the desired number/record was previously ...
User Guide
Page 35
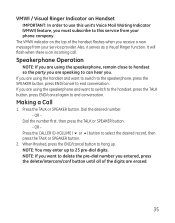
.... If you are speaking to can hear you are using the speakerphone, remain close to 25 pre-dial digits. NOTE: You may enter up . VMWI / Visual Ringer Indicator on the top of the digits are using the handset and want to switch to the handset, press the TALK button, press END/cancel... again to end conversation. The VMWI indicator on Handset IMPORTANT: In order to use this service from your phone company. It will flash when there is...
.... If you are speaking to can hear you are using the speakerphone, remain close to 25 pre-dial digits. NOTE: You may enter up . VMWI / Visual Ringer Indicator on the top of the digits are using the handset and want to switch to the handset, press the TALK button, press END/cancel... again to end conversation. The VMWI indicator on Handset IMPORTANT: In order to use this service from your phone company. It will flash when there is...


