User Guide
Page 5
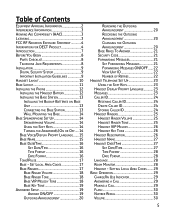
...Base VIP Melody Tone 18 Base Key Tone 19 Answerer Setup 19 Answer ON/OFF 19 Outgoing Announcement 20 Reviewing the Outgoing Announcement 20 Recording the Outgoing Announcement 20 Changing the Outgoing Announcement 20 Base Rings To Answer ... 3 Hearing Aid Compatibility (HAC 3 Licensing 3 FCC RF Radiation Exposure Statement 4 Information for DECT Product 4 Introduction 7 Before You Begin 8 Parts Checklist 8 Telephone Jack Requirements 8 Installation 9 Digital Security System 9 Important Installation Guidelines 9 Handset Layout 10 Base Layout 11 Installing the Phone 12...
...Base VIP Melody Tone 18 Base Key Tone 19 Answerer Setup 19 Answer ON/OFF 19 Outgoing Announcement 20 Reviewing the Outgoing Announcement 20 Recording the Outgoing Announcement 20 Changing the Outgoing Announcement 20 Base Rings To Answer ... 3 Hearing Aid Compatibility (HAC 3 Licensing 3 FCC RF Radiation Exposure Statement 4 Information for DECT Product 4 Introduction 7 Before You Begin 8 Parts Checklist 8 Telephone Jack Requirements 8 Installation 9 Digital Security System 9 Important Installation Guidelines 9 Handset Layout 10 Base Layout 11 Installing the Phone 12...
User Guide
Page 6
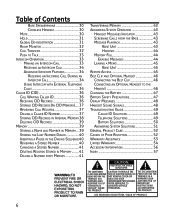
...Telephone Calls 34 Caller ID (CID 36 Call Waiting Caller ID 36 Receiving CID Records 36 Storing CID Records (In CID Memory)..... 37 Reviewing Call Records 37 Dialing a Caller ID Number 37 Storing CID Records in Internal Memory 38 Deleting CID Records 39 Memory 39 Storing a Name... and Number in Memory.... 39 Storing the Last Number Dialed 40 Inserting a Pause in the Dialing Sequence 40 Reviewing a Stored Number 40 Changing a Stored Number 41 Deleting Records Stored in Memory......... 41 Dialing a Number from Memory 41 Transferring Memory 42 Answering ...
...Telephone Calls 34 Caller ID (CID 36 Call Waiting Caller ID 36 Receiving CID Records 36 Storing CID Records (In CID Memory)..... 37 Reviewing Call Records 37 Dialing a Caller ID Number 37 Storing CID Records in Internal Memory 38 Deleting CID Records 39 Memory 39 Storing a Name... and Number in Memory.... 39 Storing the Last Number Dialed 40 Inserting a Pause in the Dialing Sequence 40 Reviewing a Stored Number 40 Changing a Stored Number 41 Deleting Records Stored in Memory......... 41 Dialing a Number from Memory 41 Transferring Memory 42 Answering ...
User Guide
Page 20
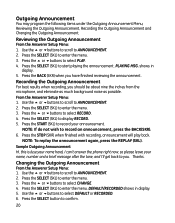
...6buttons to record your name, number and a brief message after the tone, and I'll get back to start playing the announcement. Reviewing the Outgoing Announcement, Recording the Outgoing Announcement and Changing the Outgoing Announcement. NOTE: To replay the announcement again, press the REPLAY (... 6. NOTE: If do not wish to display RECORD. 5. Recording the Outgoing Announcement For best results when recording, you have finished reviewing the announcement. Press the STOP (SKR) when finished with recording, announcement will play back. DEFAULT/RECORDED shows in display. 5. Use ...
...6buttons to record your name, number and a brief message after the tone, and I'll get back to start playing the announcement. Reviewing the Outgoing Announcement, Recording the Outgoing Announcement and Changing the Outgoing Announcement. NOTE: To replay the announcement again, press the REPLAY (... 6. NOTE: If do not wish to display RECORD. 5. Recording the Outgoing Announcement For best results when recording, you have finished reviewing the announcement. Press the STOP (SKR) when finished with recording, announcement will play back. DEFAULT/RECORDED shows in display. 5. Use ...

User Guide
Page 24
... 9. Use the 5 or 6 buttons to select DELETE CID and delete only that record. • Press 1 to review. • Press 3 to skip. • Press 4 to turn OFF/ON. • Press 7 to review CID. Press the Yes (SKL) to select DELETE ALL CID. 8. Press the 5 or 6 buttons until the desired... Caller ID record is OFF (not in TALK mode). 2. Storing Caller ID 1. Press the 5 or 6buttons to review menu again. Press the OPTION (SKL) to confirm. 5. Press the SELECT (SKL) to access the option menu. 7. Make sure your phone is OFF (not...
... 9. Use the 5 or 6 buttons to select DELETE CID and delete only that record. • Press 1 to review. • Press 3 to skip. • Press 4 to turn OFF/ON. • Press 7 to review CID. Press the Yes (SKL) to select DELETE ALL CID. 8. Press the 5 or 6 buttons until the desired... Caller ID record is OFF (not in TALK mode). 2. Storing Caller ID 1. Press the 5 or 6buttons to review menu again. Press the OPTION (SKL) to confirm. 5. Press the SELECT (SKL) to access the option menu. 7. Make sure your phone is OFF (not...
User Guide
Page 30
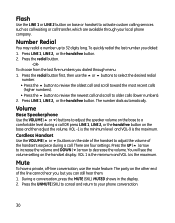
...conversation, use the 5 or 6 buttons to select the desired redial number. • Press the 5 button to review the oldest call and scroll toward the most recent calls (higher numbers). • Press the 6 button to review the newest call OR press LINE 1, LINE 2, or the handsfree button on the base and then adjust... the last number you can still hear them. 1. Press LINE 1, LINE 2, or the handsfree button. Press the UNMUTE (SKL) to cancel and return to 32 digits long. You will see the volume setting on the side of the handset to decrease the volume. VOL -1 is the minimum level and VOL-9 is...
...conversation, use the 5 or 6 buttons to select the desired redial number. • Press the 5 button to review the oldest call and scroll toward the most recent calls (higher numbers). • Press the 6 button to review the newest call OR press LINE 1, LINE 2, or the handsfree button on the base and then adjust... the last number you can still hear them. 1. Press LINE 1, LINE 2, or the handsfree button. Press the UNMUTE (SKL) to cancel and return to 32 digits long. You will see the volume setting on the side of the handset to decrease the volume. VOL -1 is the minimum level and VOL-9 is...
User Guide
Page 37
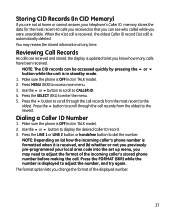
... Press the LINE 1 or LINE 2 button or handsfree button to enter the menu. 5. You may need to adjust the format of the displayed number. 37 Reviewing Call Records As calls are not at any time. Press the 5 button to the oldest. Make sure the phone is in TALK mode). 2. NOTE: Depending...mode. 1. Dialing a Caller ID Number 1. Storing CID Records (In CID Memory) If you are received and stored, the display is updated to let you may review the stored information at home or cannot answer, your local area code into the set up menu, you know how many calls have been received.
... Press the LINE 1 or LINE 2 button or handsfree button to enter the menu. 5. You may need to adjust the format of the displayed number. 37 Reviewing Call Records As calls are not at any time. Press the 5 button to the oldest. Make sure the phone is in TALK mode). 2. NOTE: Depending...mode. 1. Dialing a Caller ID Number 1. Storing CID Records (In CID Memory) If you are received and stored, the display is updated to let you may review the stored information at home or cannot answer, your local area code into the set up menu, you know how many calls have been received.
User Guide
Page 40
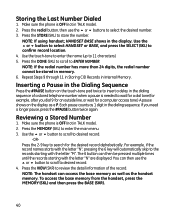
... to insert a delay in Internal Memory. Press the STORE (SKL) to desired record. -OR- NOTE: If the redial number has more than 24 digits, the redial number cannot be pressed multiple times until the records starting with the letter "N" are displayed. If you dial 9 for an outside line, ...dial tone (for the desired record alphabetically. Use the touch-tone to enter the name (up to confirm record location. 4. Press the 2-9 key to review the detail information of a stored telephone number when a pause is OFF (not in the display. Use the 5 or 6 button to select HANDSET or ...
... to insert a delay in Internal Memory. Press the STORE (SKL) to desired record. -OR- NOTE: If the redial number has more than 24 digits, the redial number cannot be pressed multiple times until the records starting with the letter "N" are displayed. If you dial 9 for an outside line, ...dial tone (for the desired record alphabetically. Use the touch-tone to enter the name (up to confirm record location. 4. Press the 2-9 key to review the detail information of a stored telephone number when a pause is OFF (not in the display. Use the 5 or 6 button to select HANDSET or ...
User Guide
Page 44
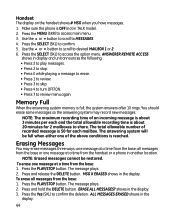
... Press and hold the DELETE button. ALL MESSAGES ERASED shows in the display. Memory Full When the answering system memory is 50 for 2 mailboxes to review menu again. Press the PLAY/STOP button. shows in TALK mode). 2. Use the 5 or 6button to scroll to desired MAILBOX 1 or 2. ... the following; • Press 2 to play messages. • Press 2 to stop. • Press 0 while playing a message to erase. • Press 1 to review. • Press 3 to skip. • Press 4 to turn OFF/ON. • Press 7 to share. The answering system will be restored. Erasing Messages You may...
... Press and hold the DELETE button. ALL MESSAGES ERASED shows in the display. Memory Full When the answering system memory is 50 for 2 mailboxes to review menu again. Press the PLAY/STOP button. shows in TALK mode). 2. Use the 5 or 6button to scroll to desired MAILBOX 1 or 2. ... the following; • Press 2 to play messages. • Press 2 to stop. • Press 0 while playing a message to erase. • Press 1 to review. • Press 3 to skip. • Press 4 to turn OFF/ON. • Press 7 to share. The answering system will be restored. Erasing Messages You may...
User Guide
Page 45
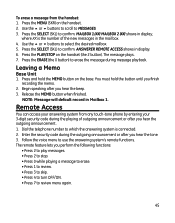
... ERASE (the 0 button) to review menu again. 45 Release the MEMO button when finished. Use the 5 or 6 buttons to scroll to select the desired mailbox. 5. Press the PLAY/STOP on the handset. 2. You must hold the MEMO button on the base. Remote Access You can access your 3-digit security code during message...
... ERASE (the 0 button) to review menu again. 45 Release the MEMO button when finished. Use the 5 or 6 buttons to scroll to select the desired mailbox. 5. Press the PLAY/STOP on the handset. 2. You must hold the MEMO button on the base. Remote Access You can access your 3-digit security code during message...
User Guide
Page 59
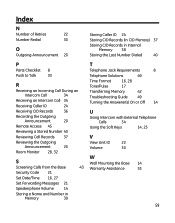
... 34 Receiving an Intercom Call 34 Receiving Caller ID 24 Receiving CID Records 36 Recording the Outgoing Announcement 20 Remote Access 45 Reviewing a Stored Number 40 Reviewing Call Records 37 Reviewing the Outgoing Announcement 20 Room Monitor 28, 32 S Screening Calls from the Base 43 Security Code 21 Set Date/Time 16, 27...
... 34 Receiving an Intercom Call 34 Receiving Caller ID 24 Receiving CID Records 36 Recording the Outgoing Announcement 20 Remote Access 45 Reviewing a Stored Number 40 Reviewing Call Records 37 Reviewing the Outgoing Announcement 20 Room Monitor 28, 32 S Screening Calls from the Base 43 Security Code 21 Set Date/Time 16, 27...