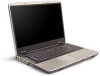

8511418 - Component Replacement Manual
Page 6
Screws Screws 9 Remove the cover from Gateway with the operating system, applications, and drivers installed, you will see a blank screen, restart your notebook, then press F11 while your computer is starting. 18 Insert the Operating System Recovery CD... holes line up. 11 Replace the four screws that secure the hard drive to you see the Windows startup screen. -ORIf you from the old drive. Gateway and eMachines are trademarks or registered trademarks of Gateway, Inc. All other countries. Technical Support See the label on -screen instructions. All rights reserved. 8 ...
Screws Screws 9 Remove the cover from Gateway with the operating system, applications, and drivers installed, you will see a blank screen, restart your notebook, then press F11 while your computer is starting. 18 Insert the Operating System Recovery CD... holes line up. 11 Replace the four screws that secure the hard drive to you see the Windows startup screen. -ORIf you from the old drive. Gateway and eMachines are trademarks or registered trademarks of Gateway, Inc. All other countries. Technical Support See the label on -screen instructions. All rights reserved. 8 ...
8511180 - Hardware Reference Gateway Notebook
Page 44
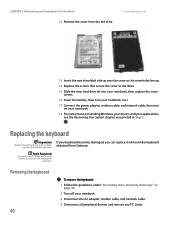
...it with a similar keyboard provided by Gateway. If your keyboard becomes damaged, you printed in Step 2. Removing the keyboard 40 To remove the keyboard: 1 Follow the guidelines under "Preventing static electricity discharge" on installing Windows, your drivers, and your notebook. 3 Disconnect the... AC adapter, modem cable, and network cable. 4 Disconnect all peripheral devices and remove any PC Cards. www.gateway.com 13 Insert the new drive label side up...
...it with a similar keyboard provided by Gateway. If your keyboard becomes damaged, you printed in Step 2. Removing the keyboard 40 To remove the keyboard: 1 Follow the guidelines under "Preventing static electricity discharge" on installing Windows, your drivers, and your notebook. 3 Disconnect the... AC adapter, modem cable, and network cable. 4 Disconnect all peripheral devices and remove any PC Cards. www.gateway.com 13 Insert the new drive label side up...


