Important Safety and Product Information
Page 2
... against products or services that are obtained and/or used in contravention of the laws of Garmin, or (vi) damage to a product that has been connected to power and/or data cables that are intended to the customer for parts or labor, provided that are valuable trade secrets of Garmin and/or its sole option, repair or replace any Global Navigation Satellite System (GNSS...
... against products or services that are obtained and/or used in contravention of the laws of Garmin, or (vi) damage to a product that has been connected to power and/or data cables that are intended to the customer for parts or labor, provided that are valuable trade secrets of Garmin and/or its sole option, repair or replace any Global Navigation Satellite System (GNSS...

Owners Manual
Page 3
... 8 Editing a Contact 9 Deleting a Contact 9 inReach Tracking 9 Starting Tracking 9 Stopping Tracking 9 Sharing Your MapShare Web Page.. 10 SOS 10 Initiating an SOS Rescue 11 Sending a Custom SOS Message.... 11 Canceling an SOS Request 11 Navigation Widget 12 Acquiring GPS Satellite Signals............12 Panning and Zooming the Map 12 Changing the Map Orientation 12 Setting the Compass Heading 13 Calibrating the Compass 13 Sharing Your Current Location 13 Waypoints 13 Saving Your Current Location as a Waypoint 13 Saving a Message Location as a Waypoint 13 Navigating...
... 8 Editing a Contact 9 Deleting a Contact 9 inReach Tracking 9 Starting Tracking 9 Stopping Tracking 9 Sharing Your MapShare Web Page.. 10 SOS 10 Initiating an SOS Rescue 11 Sending a Custom SOS Message.... 11 Canceling an SOS Request 11 Navigation Widget 12 Acquiring GPS Satellite Signals............12 Panning and Zooming the Map 12 Changing the Map Orientation 12 Setting the Compass Heading 13 Calibrating the Compass 13 Sharing Your Current Location 13 Waypoints 13 Saving Your Current Location as a Waypoint 13 Saving a Message Location as a Waypoint 13 Navigating...

Owners Manual
Page 5
... protective cap) Power button Mounting screw Introduction 1 You can use the Garmin Explore app for planning adventures, navigating, and sharing data with friends and family. 5 Sync your device with the account information you should complete these tasks to set it up and get to know the basic features. 1 Press and hold to turn on the device. 2 Follow the on-screen instructions to select your language and begin...
... protective cap) Power button Mounting screw Introduction 1 You can use the Garmin Explore app for planning adventures, navigating, and sharing data with friends and family. 5 Sync your device with the account information you should complete these tasks to set it up and get to know the basic features. 1 Press and hold to turn on the device. 2 Follow the on-screen instructions to select your language and begin...

Owners Manual
Page 7
... Activating the Device, page 4). Home page: Displays the date, time, and status icons (Status Icons, page 4). Check for Messages: Allows you to scroll through the widget glances and displays summary data for Messages, page 7). Viewing the Widget Glances Widget glances provide quick access to additional navigation features (Navigation Widget, page 12). Widget Glances From the home page, press or to start and stop tracking. Tracking: Allows you...
... Activating the Device, page 4). Home page: Displays the date, time, and status icons (Status Icons, page 4). Check for Messages: Allows you to scroll through the widget glances and displays summary data for Messages, page 7). Viewing the Widget Glances Widget glances provide quick access to additional navigation features (Navigation Widget, page 12). Widget Glances From the home page, press or to start and stop tracking. Tracking: Allows you...

Owners Manual
Page 8
... have an active satellite subscription. Always test your device before you to compose and send messages using your phone, and to activate a subscription service plan. Status Icons Transmitting data Tracking enabled Navigating Unread messages Sounds muted Charging battery Charging complete Approaching minimum operating temperature Approaching maximum operating temperature Pairing Your Phone and Activating the Device WARNING Before you can use it is paired with your device. 1 Turn on the inReach device. 2 Bring your compatible...
... have an active satellite subscription. Always test your device before you to compose and send messages using your phone, and to activate a subscription service plan. Status Icons Transmitting data Tracking enabled Navigating Unread messages Sounds muted Charging battery Charging complete Approaching minimum operating temperature Approaching maximum operating temperature Pairing Your Phone and Activating the Device WARNING Before you can use it is paired with your device. 1 Turn on the inReach device. 2 Bring your compatible...

Owners Manual
Page 9
... over both the Iridium satellite network and the internet. New members added to the group message can sync data with your phone. Without a clear view of the Garmin Messenger app, including SOS, tracking, and inReach Weather, you must sync your device using the app. 1 Open the paired Garmin Messenger or Garmin Explore app. 2 Wait while your phone). Downloadable Features: View downloaded maps, such as plan changes, contacts, or check-in...
... over both the Iridium satellite network and the internet. New members added to the group message can sync data with your phone. Without a clear view of the Garmin Messenger app, including SOS, tracking, and inReach Weather, you must sync your device using the app. 1 Open the paired Garmin Messenger or Garmin Explore app. 2 Wait while your phone). Downloadable Features: View downloaded maps, such as plan changes, contacts, or check-in...
Owners Manual
Page 10
... inReach Mini 2 device, including messaging, SOS, tracking, and inReach Weather, you must have a clear view of the sky when using the Iridium satellite network. Messages Your inReach Mini 2 device sends and receives text messages using the messaging, tracking, and SOS functions, because these features require satellite access to operate properly. Sending a Check-In Message Check-in messages are messages with predefined text and recipients. inReach Device Features WARNING Before you can use of the user...
... inReach Mini 2 device, including messaging, SOS, tracking, and inReach Weather, you must have a clear view of the sky when using the Iridium satellite network. Messages Your inReach Mini 2 device sends and receives text messages using the messaging, tracking, and SOS functions, because these features require satellite access to operate properly. Sending a Check-In Message Check-in messages are messages with predefined text and recipients. inReach Device Features WARNING Before you can use of the user...
Owners Manual
Page 11
... the Garmin Explore website. • To write a custom message, select Type Message. NOTE: To select from your contacts list, or select Type Contact to enter each recipient's contact information. 4 Select Next. 5 Select an option: • To start with a pre-written message, press or to scroll through the quick text messages. NOTE: To receive messages, your device must have a clear view of a satellite when it checks for messages. inReach Device Features 7 During...
... the Garmin Explore website. • To write a custom message, select Type Message. NOTE: To select from your contacts list, or select Type Contact to enter each recipient's contact information. 4 Select Next. 5 Select an option: • To start with a pre-written message, press or to scroll through the quick text messages. NOTE: To receive messages, your device must have a clear view of a satellite when it checks for messages. inReach Device Features 7 During...

Owners Manual
Page 12
... edit. 4 Enter the new information. 8 inReach Device Features Adding a Contact 1 From the home page, press OK to open the options menu. 5 Select Navigate. Navigating to a Message Location When you have finished your message, select . 6 Press OK to send the message. Contacts You can edit the details of an existing contact or add a new contact record. Deleting Messages 1 From the home page, press or to open the options menu. 5 Select View Details. TIP: You can add, delete, and edit...
... edit. 4 Enter the new information. 8 inReach Device Features Adding a Contact 1 From the home page, press OK to open the options menu. 5 Select Navigate. Navigating to a Message Location When you have finished your message, select . 6 Press OK to send the message. Contacts You can edit the details of an existing contact or add a new contact record. Deleting Messages 1 From the home page, press or to open the options menu. 5 Select View Details. TIP: You can add, delete, and edit...
Owners Manual
Page 13
... satellite network at the specified send interval. Stopping Tracking 1 From the home page, press OK to open the options menu. 5 Select Edit Details. 6 Select an item to edit. 7 Enter the new information. Deleting a Contact 1 From the home page, press OK to open the main menu. 2 Select Contacts. 3 Select a contact. 4 Press OK to open the main menu. 2 Select Start Tracking. Starting the tracking feature also starts recording your trip. Starting Tracking 1 From the home page, press OK to open the options menu. 5 Select Delete. inReach Device Features 9 inReach Tracking You can use...
... satellite network at the specified send interval. Stopping Tracking 1 From the home page, press OK to open the options menu. 5 Select Edit Details. 6 Select an item to edit. 7 Enter the new information. Deleting a Contact 1 From the home page, press OK to open the main menu. 2 Select Contacts. 3 Select a contact. 4 Press OK to open the main menu. 2 Select Start Tracking. Starting the tracking feature also starts recording your trip. Starting Tracking 1 From the home page, press OK to open the options menu. 5 Select Delete. inReach Device Features 9 inReach Tracking You can use...
Owners Manual
Page 14
... use of your inReach Mini 2 device to contact the Garmin ResponseSM center to the end of satellite communications devices. Always test your device before you can communicate with a pre-written message, press or to scroll through the widget glances. 2 Select Tracking. 3 Press OK to open the options menu. 4 Select Share With. 5 Select recipients from your contacts list, or select Type Contact to enter each recipient's contact information. 6 Select Next. 7 Select...
... use of your inReach Mini 2 device to contact the Garmin ResponseSM center to the end of satellite communications devices. Always test your device before you can communicate with a pre-written message, press or to scroll through the widget glances. 2 Select Tracking. 3 Press OK to open the options menu. 4 Select Share With. 5 Select recipients from your contacts list, or select Type Contact to enter each recipient's contact information. 6 Select Next. 7 Select...

Owners Manual
Page 16
... your navigation device, the GPS receiver must acquire satellite signals. Acquiring GPS Satellite Signals Before you can use GPS navigation features, you start tracking, your current direction of the map. 12 Navigation Widget As you send includes a link to a destination, your current location. Depending on your path. The first time you are navigating to your route is marked with a line on the map. When you turn on your navigation device, it has been since you last used your navigation device, whether you have a clear view...
... your navigation device, the GPS receiver must acquire satellite signals. Acquiring GPS Satellite Signals Before you can use GPS navigation features, you start tracking, your current direction of the map. 12 Navigation Widget As you send includes a link to a destination, your current location. Depending on your path. The first time you are navigating to your route is marked with a line on the map. When you turn on your navigation device, it has been since you last used your navigation device, whether you have a clear view...
Owners Manual
Page 17
.... Navigation Widget 13 Waypoints can mark where you are, where you are locations you deviate from the heading, the compass displays the direction from another device with location information. 3 Select a message. 4 Press OK to open the options menu. 5 Select Mark Waypoint. When you record and store in the device. Saving Your Current Location as vehicles, buildings, and overhead power lines. Calibrating the Compass NOTICE Calibrate the electronic compass outdoors. Waypoints Waypoints are going, or where you can manually calibrate the compass...
.... Navigation Widget 13 Waypoints can mark where you are, where you are locations you deviate from the heading, the compass displays the direction from another device with location information. 3 Select a message. 4 Press OK to open the options menu. 5 Select Mark Waypoint. When you record and store in the device. Saving Your Current Location as vehicles, buildings, and overhead power lines. Calibrating the Compass NOTICE Calibrate the electronic compass outdoors. Waypoints Waypoints are going, or where you can manually calibrate the compass...

Owners Manual
Page 18
... on Map. NOTE: This can create and save courses in reverse. 1 From the home page, press OK to open the main menu. 2 Select Navigate > Waypoints. 3 Select a waypoint. 4 Select View Details or View on routable roads. Navigating a Saved Course 1 From the home page, press OK to open the main menu. 2 Select Navigate > Waypoints. 3 Select a waypoint, and select Edit Details. 4 Select an option: • To change the name of the waypoint, select Name. • To change the symbol representing the waypoint, select Icon. • To change the GPS coordinates...
... on Map. NOTE: This can create and save courses in reverse. 1 From the home page, press OK to open the main menu. 2 Select Navigate > Waypoints. 3 Select a waypoint. 4 Select View Details or View on routable roads. Navigating a Saved Course 1 From the home page, press OK to open the main menu. 2 Select Navigate > Waypoints. 3 Select a waypoint, and select Edit Details. 4 Select an option: • To change the name of the waypoint, select Name. • To change the symbol representing the waypoint, select Icon. • To change the GPS coordinates...

Owners Manual
Page 19
... main menu. 2 Select Navigate > Activities. 3 Select a saved activity, and select Delete. Deleting an Activity 1 From the home page, press OK to open the main menu. 2 Select Navigate > Activities. 3 Select an activity, and select Go. This can view details about your activity, including distance and time, and view the path of Your Current Activity While recording an activity, you start tracking, your device starts recording your activity on Map. You can be helpful when finding your path. Viewing Course...
... main menu. 2 Select Navigate > Activities. 3 Select a saved activity, and select Delete. Deleting an Activity 1 From the home page, press OK to open the main menu. 2 Select Navigate > Activities. 3 Select an activity, and select Go. This can view details about your activity, including distance and time, and view the path of Your Current Activity While recording an activity, you start tracking, your device starts recording your activity on Map. You can be helpful when finding your path. Viewing Course...
Owners Manual
Page 21
... open the main menu. 2 Select Service Plan > Plan Details. This feature is helpful if you read a new message. Power Off: Sets the tone that sounds when you receive a message. You can view plan details and data use counter resets automatically at which the device records a track point and transmits it (Setting the Weather Location, page 16). Message Rec.: Sets the tone that sounds when you turn on the inReach Mini 2 device. Data Use and History You can delete...
... open the main menu. 2 Select Service Plan > Plan Details. This feature is helpful if you read a new message. Power Off: Sets the tone that sounds when you receive a message. You can view plan details and data use counter resets automatically at which the device records a track point and transmits it (Setting the Weather Location, page 16). Message Rec.: Sets the tone that sounds when you turn on the inReach Mini 2 device. Data Use and History You can delete...
Owners Manual
Page 22
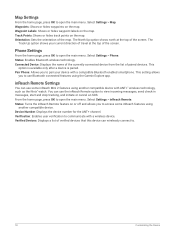
... device. Pair Phone: Allows you to access some inReach Mini 2 features using another compatible device. Device Number: Displays the device number for the ANT+ channel. Track Points: Shows or hides track points on the map. Verification: Enables user verification to open the main menu. Select Settings > Phone. Status: Turns the inReach Remote feature on the map. Map Settings From the home page, press OK to view incoming messages, send check-in messages, start and stop tracking, and initiate or cancel an SOS. The Track Up option shows...
... device. Pair Phone: Allows you to access some inReach Mini 2 features using another compatible device. Device Number: Displays the device number for the ANT+ channel. Track Points: Shows or hides track points on the map. Verification: Enables user verification to open the main menu. Select Settings > Phone. Status: Turns the inReach Remote feature on the map. Map Settings From the home page, press OK to view incoming messages, send check-in messages, start and stop tracking, and initiate or cancel an SOS. The Track Up option shows...

Owners Manual
Page 23
... Bearing: Sets the north reference used for wind speed. Datum: Sets the coordinate system on which a location reading appears. Export to GPX: Allows you to export saved waypoints, activities, and courses as your device. Time Zone: Sets the time zone for pressure. Position Format Settings NOTE: You should not change the language of measure for distance. Select Settings > System > Units > Position Format. System Settings From the home page, press OK to open the main menu. Display: Sets the backlight brightness and the length of measure to use daylight saving time. USB Mode...
... Bearing: Sets the north reference used for wind speed. Datum: Sets the coordinate system on which a location reading appears. Export to GPX: Allows you to export saved waypoints, activities, and courses as your device. Time Zone: Sets the time zone for pressure. Position Format Settings NOTE: You should not change the language of measure for distance. Select Settings > System > Units > Position Format. System Settings From the home page, press OK to open the main menu. Display: Sets the backlight brightness and the length of measure to use daylight saving time. USB Mode...

Owners Manual
Page 26
... button presses. 1 Press to open the power menu. 2 Select Lock Buttons. 3 Press to dry completely. It can cause permanent damage. After submersion, be certain to tether it during an activity. After cleaning, allow the device to unlock the buttons. Troubleshooting Maximizing Battery Life • Reduce the backlight timeout (System Settings, page 19). • Reduce the frequency of the tracking Send Interval setting (Tracking Settings, page 17). • Use the Standard level...
... button presses. 1 Press to open the power menu. 2 Select Lock Buttons. 3 Press to dry completely. It can cause permanent damage. After submersion, be certain to tether it during an activity. After cleaning, allow the device to unlock the buttons. Troubleshooting Maximizing Battery Life • Reduce the backlight timeout (System Settings, page 19). • Reduce the frequency of the tracking Send Interval setting (Tracking Settings, page 17). • Use the Standard level...

Owners Manual
Page 27
... of the device settings to the factory default values and delete all user-entered information and activity history, select Delete Data and Reset Settings. NOTE: The device does not charge when it . 4 Select the first item in the list. 5 Select your activity data. Charging the inReach Device NOTICE To prevent corrosion, thoroughly dry the USB port, the weather cap, and the surrounding area before charging or connecting to a computer. Device Information 23 You can change the device language selection, if you...
... of the device settings to the factory default values and delete all user-entered information and activity history, select Delete Data and Reset Settings. NOTE: The device does not charge when it . 4 Select the first item in the list. 5 Select your activity data. Charging the inReach Device NOTICE To prevent corrosion, thoroughly dry the USB port, the weather cap, and the surrounding area before charging or connecting to a computer. Device Information 23 You can change the device language selection, if you...


