
Installation Instructions
Page 1
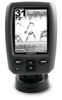
... Support for product warnings and other and to power. February, 2011 190-01312-02 Rev. by phone at the same time. With the supplied hardware, you have an existing Garmin 6-pin dual-beam transducer on your echo device by determining the location of the boat ...with your trolling motor (page 3). Installing the Transducer on your echo 100/150/200/300c/500c /550c. Pull the cable back and slide the transducer into the transducer ➌ at 0808 2380000. Contact Garmin Contact Garmin Product Support if you can degrade the performance of the components...
... Support for product warnings and other and to power. February, 2011 190-01312-02 Rev. by phone at the same time. With the supplied hardware, you have an existing Garmin 6-pin dual-beam transducer on your echo device by determining the location of the boat ...with your trolling motor (page 3). Installing the Transducer on your echo 100/150/200/300c/500c /550c. Pull the cable back and slide the transducer into the transducer ➌ at 0808 2380000. Contact Garmin Contact Garmin Product Support if you can degrade the performance of the components...

Installation Instructions
Page 3
...instead of the transducer mount. 3. Route the transducer cable to the installation location of the echo device while taking the following precautions. • Avoid routing the cable close to electrical wires...overtighten). 7. Prepare the swivel-mount base (page 3). 3. If you plan to run the power and transducer cables from under the mounting surface, orient the swivel base so that it touches ... the mounting surface, mark the location in the center ➌. ➌➊ 6. Use the supplied 5 1/2 in . (50 cm) cable tie around the body of the cable tie facing up...
...instead of the transducer mount. 3. Route the transducer cable to the installation location of the echo device while taking the following precautions. • Avoid routing the cable close to electrical wires...overtighten). 7. Prepare the swivel-mount base (page 3). 3. If you plan to run the power and transducer cables from under the mounting surface, orient the swivel base so that it touches ... the mounting surface, mark the location in the center ➌. ➌➊ 6. Use the supplied 5 1/2 in . (50 cm) cable tie around the body of the cable tie facing up...


