
Declaration of Conformity
Page 1
... EN 60950:2000 Safety of Equipment: Information Technology Equipment (Global Positioning System Receiver) Model Number(s): GPSMAP 76 The undersigned does hereby declare that the equipment complies to which Conformity is Declared: EN 50081-1 Electromagnetic Compatibility - Authorised Representative: GARMIN (Europe) Ltd, The Quadrangle, Abbey Park Ind. Type of Information Technology Equipment Manufactured by: Manufacture...
... EN 60950:2000 Safety of Equipment: Information Technology Equipment (Global Positioning System Receiver) Model Number(s): GPSMAP 76 The undersigned does hereby declare that the equipment complies to which Conformity is Declared: EN 50081-1 Electromagnetic Compatibility - Authorised Representative: GARMIN (Europe) Ltd, The Quadrangle, Abbey Park Ind. Type of Information Technology Equipment Manufactured by: Manufacture...

Owner's Manual
Page 1
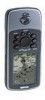
GPSMAP® 76 chartplotting receiver owner's manual
GPSMAP® 76 chartplotting receiver owner's manual
Owner's Manual
Page 2
... improvements. Unit 5, The Quadrangle, Abbey Park Industrial Estate, Romsey, SO51 9DL, U.K. Garmin hereby grants permission to download a single copy of Garmin. Garmin reserves the right to change without the express permission of this manual onto a hard drive or other Garmin products. Garmin®, GPSMAP®, AutoLocate®, TracBack®, BlueChart®, and MapSource® are registered...
... improvements. Unit 5, The Quadrangle, Abbey Park Industrial Estate, Romsey, SO51 9DL, U.K. Garmin hereby grants permission to download a single copy of Garmin. Garmin reserves the right to change without the express permission of this manual onto a hard drive or other Garmin products. Garmin®, GPSMAP®, AutoLocate®, TracBack®, BlueChart®, and MapSource® are registered...
Owner's Manual
Page 3
... features such as specifications, optional accessories, and maintenance information. INTRODUCTION > ABOUT THIS MANUAL INTRODUCTION Thank you for choosing the Garmin GPSMAP 76. This manual is provided at the end of Garmin GPS and full-featured mapping to turn the unit on and adjust the backlight. The Introduction chapter contains the Table of...
... features such as specifications, optional accessories, and maintenance information. INTRODUCTION > ABOUT THIS MANUAL INTRODUCTION Thank you for choosing the Garmin GPSMAP 76. This manual is provided at the end of Garmin GPS and full-featured mapping to turn the unit on and adjust the backlight. The Introduction chapter contains the Table of...

Owner's Manual
Page 4
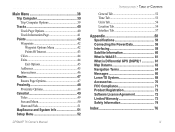
Table of Contents Introduction i About This Manual i Care Information iv Getting Started 1 Unit Basics 1 Interface Keys 3 Basic Operation 4 Turning on the GPSMAP 76 4 Adjusting Backlight and Contrast 5 Selecting and Entering Data 5 Simulator Mode 5 Initializing the GPS Receiver 7 Initialization Options 8 Creating a Waypoint 9 New, Mark, and Waypoint Page Options............11 ... Pointer Page 34 Pointer Page Options 34 Highway Page 35 Highway Page Options 36 Line Tab 36 Waypoint Tab 37 Active Route/Goto Page 37 GPSMAP 76 Owner's Manual
Table of Contents Introduction i About This Manual i Care Information iv Getting Started 1 Unit Basics 1 Interface Keys 3 Basic Operation 4 Turning on the GPSMAP 76 4 Adjusting Backlight and Contrast 5 Selecting and Entering Data 5 Simulator Mode 5 Initializing the GPS Receiver 7 Initialization Options 8 Creating a Waypoint 9 New, Mark, and Waypoint Page Options............11 ... Pointer Page 34 Pointer Page Options 34 Highway Page 35 Highway Page Options 36 Line Tab 36 Waypoint Tab 37 Active Route/Goto Page 37 GPSMAP 76 Owner's Manual
Owner's Manual
Page 5
... Proximity 48 Proximity Options 48 Celestial 49 Tides 49 Sun and Moon 50 Hunt and Fish 51 MapSource and System Info 51 Setup Menu 52 GPSMAP 76 Owner's Manual INTRODUCTION > TABLE OF CONTENTS General Tab 52 Time Tab 53 Units Tab 54 Location Tab 54 Interface Tab 57 Appendix 58 Specifi... Messages 66 Loran TD System 68 Accessories 70 FCC Compliance 71 Product Registration 72 Software License Agreement 72 Limited Warranty 73 Safety Information 74 Index 76 iii
... Proximity 48 Proximity Options 48 Celestial 49 Tides 49 Sun and Moon 50 Hunt and Fish 51 MapSource and System Info 51 Setup Menu 52 GPSMAP 76 Owner's Manual INTRODUCTION > TABLE OF CONTENTS General Tab 52 Time Tab 53 Units Tab 54 Location Tab 54 Interface Tab 57 Appendix 58 Specifi... Messages 66 Loran TD System 68 Accessories 70 FCC Compliance 71 Product Registration 72 Software License Agreement 72 Limited Warranty 73 Safety Information 74 Index 76 iii
Owner's Manual
Page 6
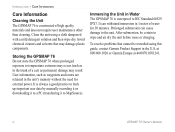
...IPX7. Immersing the Unit in the unit's memory without the need for 30 minutes. at 800/800.1020 or Garmin Europe at 44/0870.8501241. iv GPSMAP 76 Owner's Manual Avoid chemical cleaners and solvents that cannot be certain to the unit. User information, such as ...To resolve problems that may result. INTRODUCTION > CARE INFORMATION Care Information Cleaning the Unit The GPSMAP 76 is constructed of water for external power. Clean the unit using this guide, contact Garmin Product Support in 1 meter of high quality materials and does not require user maintenance other ...
...IPX7. Immersing the Unit in the unit's memory without the need for 30 minutes. at 800/800.1020 or Garmin Europe at 44/0870.8501241. iv GPSMAP 76 Owner's Manual Avoid chemical cleaners and solvents that cannot be certain to the unit. User information, such as ...To resolve problems that may result. INTRODUCTION > CARE INFORMATION Care Information Cleaning the Unit The GPSMAP 76 is constructed of water for external power. Clean the unit using this guide, contact Garmin Product Support in 1 meter of high quality materials and does not require user maintenance other ...

Owner's Manual
Page 8
... Unit and turning the D-ring clockwise. Follow the battery manufacturer's instructions on the proper care and handling of the unit. 2. Remove the batteries from your GPSMAP 76 when you do not expect to observe the proper polarity when inserting the batteries. Route the strap through the slot at the bottom of the...-install the Battery Cover by turning the D-ring 1/4 turn counter clockwise and pulling the cover loose. 2. Be sure to use the unit for several months. GPSMAP 76 Owner's Manual
... Unit and turning the D-ring clockwise. Follow the battery manufacturer's instructions on the proper care and handling of the unit. 2. Remove the batteries from your GPSMAP 76 when you do not expect to observe the proper polarity when inserting the batteries. Route the strap through the slot at the bottom of the...-install the Battery Cover by turning the D-ring 1/4 turn counter clockwise and pulling the cover loose. 2. Be sure to use the unit for several months. GPSMAP 76 Owner's Manual

Owner's Manual
Page 9
... to turn unit On/Off • Press and release to adjust backlighting QUIT Key • Press and release to cancel data entry or exit a page GPSMAP 76 Owner's Manual GETTING STARTED > INTERFACE KEYS ROCKER Key • Move Up/Down or Right/Left to move through lists, highlight fields, on-screen buttons...
... to turn unit On/Off • Press and release to adjust backlighting QUIT Key • Press and release to cancel data entry or exit a page GPSMAP 76 Owner's Manual GETTING STARTED > INTERFACE KEYS ROCKER Key • Move Up/Down or Right/Left to move through lists, highlight fields, on-screen buttons...

Owner's Manual
Page 10
... Information and Warning pages. You will now see the Satellite Information page. 3. BASIC OPERATION > TURNING ON THE GPSMAP 76 BASIC OPERATION Turning on the GPSMAP 76 When the GPSMAP 76 is turned on, the Welcome page is now displayed. The GPS Information page is displayed, followed by pressing the...you have read and understand the Information and Warning pages, press PAGE. To turn On and Off the GPSMAP 76: 1. Press and hold the red POWER key again. 4 GPSMAP 76 Owner's Manual The unit must now collect satellite data and establish its present position. Acknowledge each of the...
... Information and Warning pages. You will now see the Satellite Information page. 3. BASIC OPERATION > TURNING ON THE GPSMAP 76 BASIC OPERATION Turning on the GPSMAP 76 When the GPSMAP 76 is turned on, the Welcome page is now displayed. The GPS Information page is displayed, followed by pressing the...you have read and understand the Information and Warning pages, press PAGE. To turn On and Off the GPSMAP 76: 1. Press and hold the red POWER key again. 4 GPSMAP 76 Owner's Manual The unit must now collect satellite data and establish its present position. Acknowledge each of the...

Owner's Manual
Page 11
...the display better. If the key needs to be directed to press a specified Interface key or highlight a field. When the GPSMAP 76 is turned off . NOTE: Do not try to press a key, you . Any Satellite Signal Strength Indicators displayed are not available. Press and... satellite signals are only simulations and do not indicate the strength of the highlight is great for actual navigation. GPS Information Page Menu GPSMAP 76 Owner's Manual 5 When you are directed to navigate in Simulator Mode, the GPS receiver is in Simulator Mode. Adjusting Backlight and ...
...the display better. If the key needs to be directed to press a specified Interface key or highlight a field. When the GPSMAP 76 is turned off . NOTE: Do not try to press a key, you . Any Satellite Signal Strength Indicators displayed are not available. Press and... satellite signals are only simulations and do not indicate the strength of the highlight is great for actual navigation. GPS Information Page Menu GPSMAP 76 Owner's Manual 5 When you are directed to navigate in Simulator Mode, the GPS receiver is in Simulator Mode. Adjusting Backlight and ...

Owner's Manual
Page 12
BASIC OPERATION > TURNING ON THE GPSMAP 76 To put the GPSMAP 76 in the Compass Ring indicating the GPS is on track to the right. Using the ROCKER key, highlight Start Simulator then press the ENTER key. ..., press the MENU key. 2. To simulate movement, press PAGE until your Track has changed about 40°. This simulates the direction change to the destination. 6 GPSMAP 76 Owner's Manual With the GPS Information page displayed, press the MENU key. 2. Press the ROCKER key LEFT or RIGHT changes the Track. When the Simulator...
BASIC OPERATION > TURNING ON THE GPSMAP 76 To put the GPSMAP 76 in the Compass Ring indicating the GPS is on track to the right. Using the ROCKER key, highlight Start Simulator then press the ENTER key. ..., press the MENU key. 2. To simulate movement, press PAGE until your Track has changed about 40°. This simulates the direction change to the destination. 6 GPSMAP 76 Owner's Manual With the GPS Information page displayed, press the MENU key. 2. Press the ROCKER key LEFT or RIGHT changes the Track. When the Simulator...
Owner's Manual
Page 13
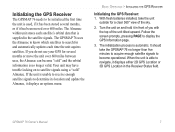
...you with the top of the unit tilted upward. With fresh batteries installed, take the GPSMAP 76 no longer valid. GPSMAP 76 Owner's Manual 7 BASIC OPERATION > INITIALIZING THE GPS RECEIVER Initializing the GPS Receiver: 1. The GPSMAP 76 uses the Almanac to know which satellites to search for a clear 360° view... for and automatically updates each satellite's orbital data that is supplied in front of the sky. 2. Initializing the GPS Receiver The GPSMAP 76 needs to be initialized the first time the unit is used, if it has been stored several months or move the ...
...you with the top of the unit tilted upward. With fresh batteries installed, take the GPSMAP 76 no longer valid. GPSMAP 76 Owner's Manual 7 BASIC OPERATION > INITIALIZING THE GPS RECEIVER Initializing the GPS Receiver: 1. The GPSMAP 76 uses the Almanac to know which satellites to search for a clear 360° view... for and automatically updates each satellite's orbital data that is supplied in front of the sky. 2. Initializing the GPS Receiver The GPSMAP 76 needs to be initialized the first time the unit is used, if it has been stored several months or move the ...

Owner's Manual
Page 14
Start Simulator-is used when you select Simulator, the GPS receiver is turned off saving battery power. This process may be severly degraded. 8 GPSMAP 76 Owner's Manual If the date is incorrect, select Stored w/o Batteries to acquire satellites. When initializing the receiver or trying to select. New ...when in the unit may take longer to search for satellites. Highlight the option and then press ENTER to receive satellite signals, orient the GPSMAP 76 so the top of the unit pointed toward the sky. When you have moved the unit over 600 miles and are not available. If...
Start Simulator-is used when you select Simulator, the GPS receiver is turned off saving battery power. This process may be severly degraded. 8 GPSMAP 76 Owner's Manual If the date is incorrect, select Stored w/o Batteries to acquire satellites. When initializing the receiver or trying to select. New ...when in the unit may take longer to search for satellites. Highlight the option and then press ENTER to receive satellite signals, orient the GPSMAP 76 so the top of the unit pointed toward the sky. When you have moved the unit over 600 miles and are not available. If...
Owner's Manual
Page 15
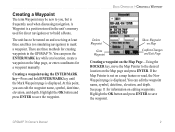
... are three methods for creating waypoints in the unit's memory used when discussing navigation. At this point, you , but is a position stored in the GPSMAP 76. You can edit the waypoint name, symbol, date/time, elevation, and depth. Highlight the OK button and press ENTER to the desired location on the... Map page and press ENTER. GPSMAP 76 Owner's Manual 9 The unit has to be new to you can edit the waypoint name, symbol, date/time, elevation, and depth. You can ...
... are three methods for creating waypoints in the unit's memory used when discussing navigation. At this point, you , but is a position stored in the GPSMAP 76. You can edit the waypoint name, symbol, date/time, elevation, and depth. Highlight the OK button and press ENTER to the desired location on the... Map page and press ENTER. GPSMAP 76 Owner's Manual 9 The unit has to be new to you can edit the waypoint name, symbol, date/time, elevation, and depth. You can ...

Owner's Manual
Page 16
... as you have adjusted all elements of interest. Press ENTER. Highlight the Distance field and press Enter. Highlight OK and then press ENTER. 10 GPSMAP 76 Owner's Manual When you would select a waypoint or point of the projected location, highlight Save and press Enter. Use the ROCKER to adjust the distance...
... as you have adjusted all elements of interest. Press ENTER. Highlight the Distance field and press Enter. Highlight OK and then press ENTER. 10 GPSMAP 76 Owner's Manual When you would select a waypoint or point of the projected location, highlight Save and press Enter. Use the ROCKER to adjust the distance...
Owner's Manual
Page 17
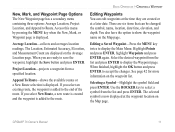
... the option to the route. Select the desired waypoint from the list and press ENTER. See page 42 for more information on the Map page. GPSMAP 76 Owner's Manual 11 New, Mark, and Waypoint Page Options The New Waypoint page has a secondary menu containing three options: Average Location, Project Location, and Append...
... the option to the route. Select the desired waypoint from the list and press ENTER. See page 42 for more information on the Map page. GPSMAP 76 Owner's Manual 11 New, Mark, and Waypoint Page Options The New Waypoint page has a secondary menu containing three options: Average Location, Project Location, and Append...

Owner's Manual
Page 18
... and select options in all of the fields in either direction. • Do not press the ENTER key until the desired number is displayed. GPSMAP 76 Owner's Manual BASIC OPERATION > CREATING A WAYPOINT Changing the Name-Highlight the name field and press ENTER. Use the ROCKER key to scroll through the...
... and select options in all of the fields in either direction. • Do not press the ENTER key until the desired number is displayed. GPSMAP 76 Owner's Manual BASIC OPERATION > CREATING A WAYPOINT Changing the Name-Highlight the name field and press ENTER. Use the ROCKER key to scroll through the...

Owner's Manual
Page 19
... is displayed. Using the ROCKER key, you move around the map. The location of the map. We have already created a waypoint with the ENTER key. GPSMAP 76 Owner's Manual 13 Press the QUIT key to current GPS location. Change the waypoint name and store the waypoint in the center of the Map...
... is displayed. Using the ROCKER key, you move around the map. The location of the map. We have already created a waypoint with the ENTER key. GPSMAP 76 Owner's Manual 13 Press the QUIT key to current GPS location. Change the waypoint name and store the waypoint in the center of the Map...

Owner's Manual
Page 20
...If you are traveling (Track). BASIC OPERATION > CREATING A WAYPOINT To go to be moving. Highlight Waypoints and press ENTER. 4. The GPSMAP 76 is realigned with the vertical line on the Compass Ring. Press the PAGE key until the Pointer is now navigating to press or hold ... while the GPS is displayed. The Pointer page displays a Pointer and Compass Ring. When you are several data fields, one time. GPSMAP 76 Owner's Manual Fortunately, you are headed directly toward your destination, the Pointer is the Speed field. Press the NAV key. 2. Highlight...
...If you are traveling (Track). BASIC OPERATION > CREATING A WAYPOINT To go to be moving. Highlight Waypoints and press ENTER. 4. The GPSMAP 76 is realigned with the vertical line on the Compass Ring. Press the PAGE key until the Pointer is now navigating to press or hold ... while the GPS is displayed. The Pointer page displays a Pointer and Compass Ring. When you are several data fields, one time. GPSMAP 76 Owner's Manual Fortunately, you are headed directly toward your destination, the Pointer is the Speed field. Press the NAV key. 2. Highlight...
