GMR 404/406 Installation Instructions
Page 5
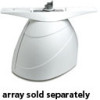
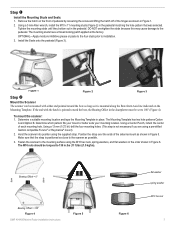
...Figure 6. Install the Seals onto the pedestal (Figure 3). Hoist the scanner into position using a pre-drilled Garmin compatible Furuno® or Raymarine® mount). 2. Bearing Offset = 0° bow stern Bearing Offset = 180° Figure 4 GMR 404/406 Marine Radar Installation Instructions Figure 5 Figure 6 ... Using a 5 mm Allen wrench, install the M10 x 71 mounting studs (Figure 2) in the chartplotter must be torqued to the pedestal. Figure 1 Figure 2 Figure 3 Step Mount the Scanner The scanner can be mounted with the hatch is positioned as close ...
...Figure 6. Install the Seals onto the pedestal (Figure 3). Hoist the scanner into position using a pre-drilled Garmin compatible Furuno® or Raymarine® mount). 2. Bearing Offset = 0° bow stern Bearing Offset = 180° Figure 4 GMR 404/406 Marine Radar Installation Instructions Figure 5 Figure 6 ... Using a 5 mm Allen wrench, install the M10 x 71 mounting studs (Figure 2) in the chartplotter must be torqued to the pedestal. Figure 1 Figure 2 Figure 3 Step Mount the Scanner The scanner can be mounted with the hatch is positioned as close ...


