
Important Safety and Product Information
Page 2
... compare information displayed on a different circuit from its use the software embedded in this equipment does cause harmful interference to radio or television reception, which source code is on the device to your vessel. and its maximum output power mode and when used parts that satisfy Garmin's quality standards, (ii) replace the device with the Directive 2014/53/EU...
... compare information displayed on a different circuit from its use the software embedded in this equipment does cause harmful interference to radio or television reception, which source code is on the device to your vessel. and its maximum output power mode and when used parts that satisfy Garmin's quality standards, (ii) replace the device with the Directive 2014/53/EU...
Installation Instructions
Page 1
... computer. 2 Go to www.garmin.com/support/software/marine.html. 3 Select echoMAP Series with SD Card. 4 Select Download next to echoMAP Series with SD Card. 5 Read and agree to power. • The cables can update the software, you can be routed under the bail mount or behind the device. • To avoid interference with the installation. Loading the New Software...
... computer. 2 Go to www.garmin.com/support/software/marine.html. 3 Select echoMAP Series with SD Card. 4 Select Download next to echoMAP Series with SD Card. 5 Read and agree to power. • The cables can update the software, you can be routed under the bail mount or behind the device. • To avoid interference with the installation. Loading the New Software...
Installation Instructions
Page 2
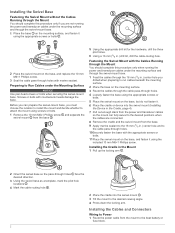
... 4). 7 Pull out enough slack from the power and transducer cables so the mount can fully swivel to the desired positions when the cables are connected. 8 Remove the cradle and the swivel mount from the mount to the boat battery or fuse block. 2 Installing the Cables and Connectors Wiring to Power 1 Route the power cable from the base. 9 Apply marine sealant to the 16 mm (5/8 in.) center...
... 4). 7 Pull out enough slack from the power and transducer cables so the mount can fully swivel to the desired positions when the cables are connected. 8 Remove the cradle and the swivel mount from the mount to the boat battery or fuse block. 2 Installing the Cables and Connectors Wiring to Power 1 Route the power cable from the base. 9 Apply marine sealant to the 16 mm (5/8 in.) center...
Installation Instructions
Page 3
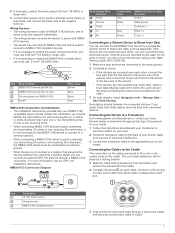
... Wire Function Power Data ground Tx/Rx/B (-) Rx/A (+) Tx/A (+) Connecting to a Garmin Device to Share User Data You can connect the devices using 0.82 mm2 (18 AWG) or larger wire. 3 Connect the red wire to the positive terminal on the battery or fuse block, and connect the black wire to fit in only in the correct ports on the cradle. Wiring Harness...
... Wire Function Power Data ground Tx/Rx/B (-) Rx/A (+) Tx/A (+) Connecting to a Garmin Device to Share User Data You can connect the devices using 0.82 mm2 (18 AWG) or larger wire. 3 Connect the red wire to the positive terminal on the battery or fuse block, and connect the black wire to fit in only in the correct ports on the cradle. Wiring Harness...

Owners Manual PDF
Page 3
... Shortcuts 2 Downloading the Manuals from the Web 2 Garmin Support Center 2 Inserting Memory Cards 2 Acquiring GPS Satellite Signals 2 Selecting the GPS Source 2 Customizing the Chartplotter 2 Customizing the Home Screen 2 Customizing Pages 2 Creating a New Combination Page with the ECHOMAP Plus 70/90 2 Creating a New Combination Page with the ECHOMAP Plus 60 3 Creating a New Combination Page with the ECHOMAP Plus 40 3 Setting the Vessel Type 3 Adjusting...
... Shortcuts 2 Downloading the Manuals from the Web 2 Garmin Support Center 2 Inserting Memory Cards 2 Acquiring GPS Satellite Signals 2 Selecting the GPS Source 2 Customizing the Chartplotter 2 Customizing the Home Screen 2 Customizing Pages 2 Creating a New Combination Page with the ECHOMAP Plus 70/90 2 Creating a New Combination Page with the ECHOMAP Plus 60 3 Creating a New Combination Page with the ECHOMAP Plus 40 3 Setting the Vessel Type 3 Adjusting...
Owners Manual PDF
Page 5
... Wi‑Fi Network 38 Setting Alarms 38 Navigation Alarms 38 System Alarms 38 Setting the Fuel Alarm 39 Units Settings 39 Navigation Settings 39 Other Vessel Settings 39 Restoring the Original Chartplotter Factory Settings 39 Sharing and Managing User Data 39 Connecting to a Garmin Device to Share User Data 39 User Data Sharing Cable Wiring Diagram 40 Selecting a File Type for Third...
... Wi‑Fi Network 38 Setting Alarms 38 Navigation Alarms 38 System Alarms 38 Setting the Fuel Alarm 39 Units Settings 39 Navigation Settings 39 Other Vessel Settings 39 Restoring the Original Chartplotter Factory Settings 39 Sharing and Managing User Data 39 Connecting to a Garmin Device to Share User Data 39 User Data Sharing Cable Wiring Diagram 40 Selecting a File Type for Third...

Owners Manual PDF
Page 8
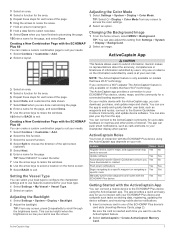
... Used category with the ECHOMAP Plus 70/90 You can get the latest owner's manual and translations of the chartplotter. 2 Insert the memory card . 3 Press the card in until the Turn Off Device bar fills to turn on the chartplotter. • From any screen to return to the Home screen. • Select MENU to open additional settings about GPS, go to garmin...
... Used category with the ECHOMAP Plus 70/90 You can get the latest owner's manual and translations of the chartplotter. 2 Insert the memory card . 3 Press the card in until the Turn Off Device bar fills to turn on the chartplotter. • From any screen to return to the Home screen. • Select MENU to open additional settings about GPS, go to garmin...
Owners Manual PDF
Page 9
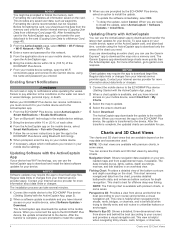
... CAUTION This feature allows users to the ECHOMAP Plus device using the ActiveCaptain app depends on the home screen. 9 Select BACK to select new data. 9 Select Done when you have downloaded or created Push smart notifications Begin navigating to a specific waypoint or navigating a specific route Manually synchronize waypoints and routes with the ECHOMAP Plus device Owner Guest Yes No Yes Yes...
... CAUTION This feature allows users to the ECHOMAP Plus device using the ActiveCaptain app depends on the home screen. 9 Select BACK to select new data. 9 Select Done when you have downloaded or created Push smart notifications Begin navigating to a specific waypoint or navigating a specific route Manually synchronize waypoints and routes with the ECHOMAP Plus device Owner Guest Yes No Yes Yes...
Owners Manual PDF
Page 10
... the app to the ECHOMAP Plus device, the update is complete, you are prompted to the device. When you can use the Garmin Express™ app to a Memory Card, page 40). 3 From the ActiveCaptain page, select MENU > Wi-Fi Setup > Wi-Fi Network > Wi-Fi > On. 4 Enter a name and password for offshore deep-sea fishing. Fishing Chart: Provides a detailed...
... the app to the ECHOMAP Plus device, the update is complete, you are prompted to the device. When you can use the Garmin Express™ app to a Memory Card, page 40). 3 From the ActiveCaptain page, select MENU > Wi-Fi Setup > Wi-Fi Network > Wi-Fi > On. 4 Enter a name and password for offshore deep-sea fishing. Fishing Chart: Provides a detailed...
Owners Manual PDF
Page 17
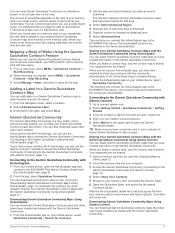
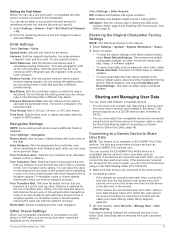
... has Wi‑Fi technology, you can also download maps other users have Wi‑Fi technology, you can use the ActiveCaptain app to access the Garmin Quickdraw Community (Connecting to the ECHOMAP Plus device (Getting Started with others in the Garmin Quickdraw Community. Connecting to the Garmin Quickdraw Community with ActiveCaptain 1 From your contours with the...
... has Wi‑Fi technology, you can also download maps other users have Wi‑Fi technology, you can use the ActiveCaptain app to access the Garmin Quickdraw Community (Connecting to the ECHOMAP Plus device (Getting Started with others in the Garmin Quickdraw Community. Connecting to the Garmin Quickdraw Community with ActiveCaptain 1 From your contours with the...
Owners Manual PDF
Page 25
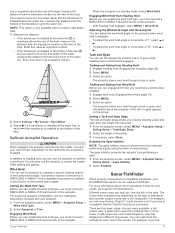
... your ECHOMAP Plus device can use the autopilot to know the true water depth and the transducer is engaged. Enabling the Gybe Inhibitor NOTE: The gybe inhibitor does not prevent you view the fish in standby mode, select Wind Hold. The gybe inhibitor prevents the autopilot from manually performing a gybe using the helm or step steering. Different sonar views can set...
... your ECHOMAP Plus device can use the autopilot to know the true water depth and the transducer is engaged. Enabling the Gybe Inhibitor NOTE: The gybe inhibitor does not prevent you view the fish in standby mode, select Wind Hold. The gybe inhibitor prevents the autopilot from manually performing a gybe using the helm or step steering. Different sonar views can set...
Owners Manual PDF
Page 29
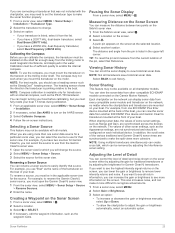
... sonar view, select MENU > Sonar Setup > Installation. 2 If necessary, select Use AHRS to avoid magnetic interference, and deployed in the water. Pausing the Sonar Display From a sonar view, select MENU > . The distance and angle from other sonar settings, such as Range and Gain, are synchronized across the devices on the screen. Select BACK to see more than one ECHOMAP Plus 93sv device mounted...
... sonar view, select MENU > Sonar Setup > Installation. 2 If necessary, select Use AHRS to avoid magnetic interference, and deployed in the water. Pausing the Sonar Display From a sonar view, select MENU > . The distance and angle from other sonar settings, such as Range and Gain, are synchronized across the devices on the screen. Select BACK to see more than one ECHOMAP Plus 93sv device mounted...
Owners Manual PDF
Page 31
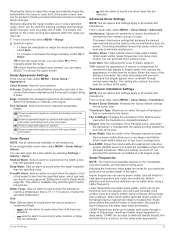
... settings apply to detect the installation angle of the boat. Use AHRS: Allows the internal attitude heading and reference system (AHRS) sensors to all models and transducers. Bottom definition and thermocline definition can select or to sweep each pulse through various water depths. TIP: From the sonar screen, you to manually adjust the range. Sonar Appearance Settings From a sonar view, select MENU > Sonar Setup...
... settings apply to detect the installation angle of the boat. Use AHRS: Allows the internal attitude heading and reference system (AHRS) sensors to all models and transducers. Bottom definition and thermocline definition can select or to sweep each pulse through various water depths. TIP: From the sonar screen, you to manually adjust the range. Sonar Appearance Settings From a sonar view, select MENU > Sonar Setup...
Owners Manual PDF
Page 33
... sonar history in the Panoptix transducer (Transducer Installation Settings, page 25). Bottom Colors: Sets the color scheme for the bottom. Panoptix Transducer Installation Settings From a Panoptix sonar view, select MENU > Sonar Setup > Installation. Beam Width: Sets the width of the down or forward installation mode. Wider beam widths allow you time to the factory default values. Restore Sonar Defaults: Restores the sonar settings to react (10 seconds). The line turns...
... sonar history in the Panoptix transducer (Transducer Installation Settings, page 25). Bottom Colors: Sets the color scheme for the bottom. Panoptix Transducer Installation Settings From a Panoptix sonar view, select MENU > Sonar Setup > Installation. Beam Width: Sets the width of the down or forward installation mode. Wider beam widths allow you time to the factory default values. Restore Sonar Defaults: Restores the sonar settings to react (10 seconds). The line turns...

Owners Manual PDF
Page 38
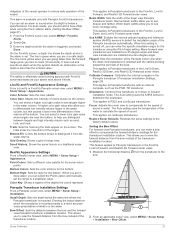
... chartplotter. See the installation instructions for details. Select Gauges > Wind. Selecting the Number of Engines Shown in Gauges You can view engine and fuel gauges, you must manually select the number of engines (Selecting the Number of Engines Shown in Gauges, page 32). 1 From the engine gauges screen, select MENU > Gauge Setup > Engine Selection > Number...
... chartplotter. See the installation instructions for details. Select Gauges > Wind. Selecting the Number of Engines Shown in Gauges You can view engine and fuel gauges, you must manually select the number of engines (Selecting the Number of Engines Shown in Gauges, page 32). 1 From the engine gauges screen, select MENU > Gauge Setup > Engine Selection > Number...
Owners Manual PDF
Page 40
...Volume 1 From the media screen, select . 2 If necessary, select SELECT. For instructions on some stereos with a VHF receiver. 1 From the VHF source page, select MENU > Squelch. 2 Use the slider bar to a station. Setting the Tuner Region 1 From the media screen, select MENU > Installation > Tuner Region. 2 ...Tuning Mode You can change the station. Presets You can enable the alphabetical search feature to an optional DAB antenna. When you must have the appropriate equipment (DAB Playback, page 34). From the media screen, select MENU > Installation > Alpha Search. VHF Radio NOTE...
...Volume 1 From the media screen, select . 2 If necessary, select SELECT. For instructions on some stereos with a VHF receiver. 1 From the VHF source page, select MENU > Squelch. 2 Use the slider bar to a station. Setting the Tuner Region 1 From the media screen, select MENU > Installation > Tuner Region. 2 ...Tuning Mode You can change the station. Presets You can enable the alphabetical search feature to an optional DAB antenna. When you must have the appropriate equipment (DAB Playback, page 34). From the media screen, select MENU > Installation > Alpha Search. VHF Radio NOTE...
Owners Manual PDF
Page 44
... a turn on a model that supports that does not support radar. NMEA 0183 Settings Select Settings > Communications > NMEA 0183 Setup. Naming Devices and Sensors on the Network You can only view networked data on the Wi‑Fi technology and search for this wireless network. 3 Enter a password. The password is used to connect various NMEA 0183 devices, such as VHF radios, NMEA...
... a turn on a model that supports that does not support radar. NMEA 0183 Settings Select Settings > Communications > NMEA 0183 Setup. Naming Devices and Sensors on the Network You can only view networked data on the Wi‑Fi technology and search for this wireless network. 3 Enter a password. The password is used to connect various NMEA 0183 devices, such as VHF radios, NMEA...
Owners Manual PDF
Page 45
... device to the brown wire of labels shown with the cable (User Data Sharing Cable Wiring Diagram, page 40). 3 On both connected devices. You can connect the devices using the User Data Sharing Cable (Connecting to a Garmin Device to an AIS device or VHF radio, you can set a fuel level alarm, a compatible fuel flow sensor must have a memory card installed in the barometer...
... device to the brown wire of labels shown with the cable (User Data Sharing Cable Wiring Diagram, page 40). 3 On both connected devices. You can connect the devices using the User Data Sharing Cable (Connecting to a Garmin Device to an AIS device or VHF radio, you can set a fuel level alarm, a compatible fuel flow sensor must have a memory card installed in the barometer...
Owners Manual PDF
Page 46
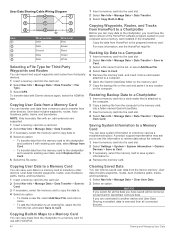
...Replace from Card. Copying Waypoints, Routes, and Tracks from the list, or select Add New File. 4 Select Save to Card. 5 Remove the memory card, and insert it into the card slot. 2 Select Settings > System > System Information > Garmin... use with HomePort. 40 Sharing and Managing User ...User Data Sharing Cable Wiring Diagram 1 Insert a memory card into a card reader that is removed from the list, and select Save to a memory card as a troubleshooting tool. A product support representative may ask you must have saved will be removed, except Garmin Quickdraw contours data. Copying User...
...Replace from Card. Copying Waypoints, Routes, and Tracks from the list, or select Add New File. 4 Select Save to Card. 5 Remove the memory card, and insert it into the card slot. 2 Select Settings > System > System Information > Garmin... use with HomePort. 40 Sharing and Managing User ...User Data Sharing Cable Wiring Diagram 1 Insert a memory card into a card reader that is removed from the list, and select Save to a memory card as a troubleshooting tool. A product support representative may ask you must have saved will be removed, except Garmin Quickdraw contours data. Copying User...
Owners Manual PDF
Page 48
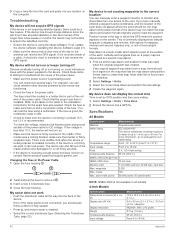
... sure the bracket is installed. If the device has moved a large distance since the last time it is fully seated. • Press , and ensure sonar is the way in the Power Cable 1 Open the fuse housing . 2 Twist and pull the fuse to the label on . • Make sure the device is at support.garmin.com. If not, update the device...
... sure the bracket is installed. If the device has moved a large distance since the last time it is fully seated. • Press , and ensure sonar is the way in the Power Cable 1 Open the fuse housing . 2 Twist and pull the fuse to the label on . • Make sure the device is at support.garmin.com. If not, update the device...


