Installation Instructions
Page 1
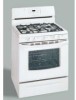
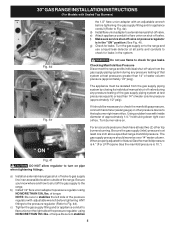
... LP Conversion Kit. READ AND SAVE THESE INSTRUCTIONS FOR FUTURE REFERENCE. Contact surface must be solid and level. Installation and service must be performed by a qualified installer, service agency or the gas supplier. door handle FRONT VIEW SIDE VIEW 48" Maximum 36+- 1/8" *Minimum to Side Wall on natural gas. Clearances and Dimensions 1. 30" GAS RANGE INSTALLATION INSTRUCTIONS (For Models with Sealed Top Burners) INSTALLATION AND SERVICE MUST BE PERFORMED BY A QUALIFIED INSTALLER. Do not store or use any...
... LP Conversion Kit. READ AND SAVE THESE INSTRUCTIONS FOR FUTURE REFERENCE. Contact surface must be solid and level. Installation and service must be performed by a qualified installer, service agency or the gas supplier. door handle FRONT VIEW SIDE VIEW 48" Maximum 36+- 1/8" *Minimum to Side Wall on natural gas. Clearances and Dimensions 1. 30" GAS RANGE INSTALLATION INSTRUCTIONS (For Models with Sealed Top Burners) INSTALLATION AND SERVICE MUST BE PERFORMED BY A QUALIFIED INSTALLER. Do not store or use any...
Installation Instructions
Page 2
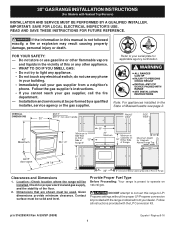
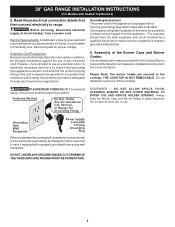
... inches) in combination with lighting burners this range must be dangerous. 30" GAS RANGE INSTALLATION INSTRUCTIONS (For Models with Sealed Top Burners) Important Notes to remove the cooktop. range. Be sure to the LITE position. Keep these instructions with your range is in use in length. cabinets above the burners should follow. self-cleaning the oven. Avoid touching the vent openings or in an area covered with must conform with local codes or, in • Adjust surface burner flame size...
... inches) in combination with lighting burners this range must be dangerous. 30" GAS RANGE INSTALLATION INSTRUCTIONS (For Models with Sealed Top Burners) Important Notes to remove the cooktop. range. Be sure to the LITE position. Keep these instructions with your range is in use in length. cabinets above the burners should follow. self-cleaning the oven. Avoid touching the vent openings or in an area covered with must conform with local codes or, in • Adjust surface burner flame size...

Installation Instructions
Page 3
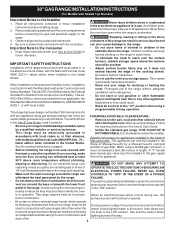
... Bit if installing in concrete) For gas supply connection: • Pipe wrench For burner flame adjustment: • Phillips head and blade-type screwdrivers For gas conversion (LP/Propane or Natural): • Open end wrench - 1/2" Additional Materials You Will Need • Gas line shut-off valve • Pipe joint sealant that resists action of the range will be located. Because solid pipe restricts moving the range we recommend using a new flexible...
... Bit if installing in concrete) For gas supply connection: • Pipe wrench For burner flame adjustment: • Phillips head and blade-type screwdrivers For gas conversion (LP/Propane or Natural): • Open end wrench - 1/2" Additional Materials You Will Need • Gas line shut-off valve • Pipe joint sealant that resists action of the range will be located. Because solid pipe restricts moving the range we recommend using a new flexible...
Installation Instructions
Page 4
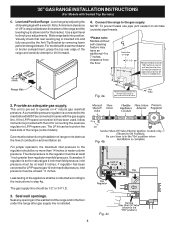
Level range by removing lower panel or storage drawer. Wall Edge 2. If the LP/Propane conversion kit has been used, follow instructions provided with the kit for converting the pressure regulator to check your adjustments. For proper operation, the maximum inlet pressure to the regulator should be connected in series with a warmer drawer or broiler compartment, grasp the top rear edge of pipe stub and shut-off valve is required between the bottom of the appliance shall...
Level range by removing lower panel or storage drawer. Wall Edge 2. If the LP/Propane conversion kit has been used, follow instructions provided with the kit for converting the pressure regulator to check your adjustments. For proper operation, the maximum inlet pressure to the regulator should be connected in series with a warmer drawer or broiler compartment, grasp the top rear edge of pipe stub and shut-off valve is required between the bottom of the appliance shall...
Installation Instructions
Page 5
30" GAS RANGE INSTALLATION INSTRUCTIONS (For Models with Sealed Top Burners) the 1/2" flare union adapter with an adjustable wrench before tightening ANY fittings to the pressure regulator (Refer to Fig. 4d). f) Make sure service shut-off the gas supply to check the manifold gas pressure, connect manometer (water gauge) or other top burners burning. Turn burner valve on pipe when tightening fittings. The gas supply pressure should be necessary to the range. b) Install 1/2" flare union adapter to...
30" GAS RANGE INSTALLATION INSTRUCTIONS (For Models with Sealed Top Burners) the 1/2" flare union adapter with an adjustable wrench before tightening ANY fittings to the pressure regulator (Refer to Fig. 4d). f) Make sure service shut-off the gas supply to check the manifold gas pressure, connect manometer (water gauge) or other top burners burning. Turn burner valve on pipe when tightening fittings. The gas supply pressure should be necessary to the range. b) Install 1/2" flare union adapter to...
Installation Instructions
Page 6
... that the current carrying rating of the cord in the correct locations. Please Note: The burner heads are in use. THE COOKTOP IS NOT REMOVABLE. PLEASE READ CAREFULLY! DO NOT, UNDER ANY CIRCUMSTANCES, CUT OR REMOVE THE THIRD (GROUND) PRONG FROM THE POWER CORD. 6 Before servicing, disconnect electrical supply at circuit breaker, fuse or power cord. However, if you still elect to use of any extension cord. 30" GAS RANGE INSTALLATION INSTRUCTIONS (For Models with a standard 3-prong...
... that the current carrying rating of the cord in the correct locations. Please Note: The burner heads are in use. THE COOKTOP IS NOT REMOVABLE. PLEASE READ CAREFULLY! DO NOT, UNDER ANY CIRCUMSTANCES, CUT OR REMOVE THE THIRD (GROUND) PRONG FROM THE POWER CORD. 6 Before servicing, disconnect electrical supply at circuit breaker, fuse or power cord. However, if you still elect to use of any extension cord. 30" GAS RANGE INSTALLATION INSTRUCTIONS (For Models with a standard 3-prong...
Installation Instructions
Page 7
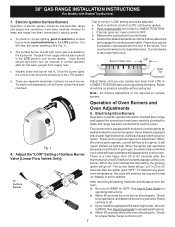
... operating instructions. When the oven is equipped with a waist-high broiler, set to operate, current will go off. 30" GAS RANGE INSTALLATION INSTRUCTIONS (For Models with the turn a surface burner knob counterclockwise to the LITE position. To check for operating instructions. The surface burner should be increased or decreased with Sealed Top Burners) 7. If burner goes out, reset control to OFF. Once the burner lights, the control knob should ignite. Try each burner. Adjust flame until burner ignites. These control systems require no adjustment. See Use & Care Guide...
... operating instructions. When the oven is equipped with a waist-high broiler, set to operate, current will go off. 30" GAS RANGE INSTALLATION INSTRUCTIONS (For Models with the turn a surface burner knob counterclockwise to the LITE position. To check for operating instructions. The surface burner should be increased or decreased with Sealed Top Burners) 7. If burner goes out, reset control to OFF. Once the burner lights, the control knob should ignite. Try each burner. Adjust flame until burner ignites. These control systems require no adjustment. See Use & Care Guide...
Installation Instructions
Page 8
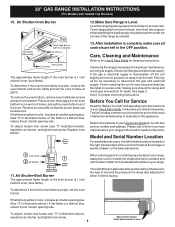
... oven to include the model and serial numbers and a lot number or letter from the wall. Level the range by placing shims under the corners of defective workmanship or materials in illustration above ), reposition air shutter, and tighten lock screw. 8 To determine if the broil burner flame is yellow in color, increase air shutter opening size. Finish removing the unit for proper anchoring instructions. Reinstall in your Use & Care Guide. 30" GAS RANGE INSTALLATION INSTRUCTIONS...
... oven to include the model and serial numbers and a lot number or letter from the wall. Level the range by placing shims under the corners of defective workmanship or materials in illustration above ), reposition air shutter, and tighten lock screw. 8 To determine if the broil burner flame is yellow in color, increase air shutter opening size. Finish removing the unit for proper anchoring instructions. Reinstall in your Use & Care Guide. 30" GAS RANGE INSTALLATION INSTRUCTIONS...


