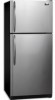

Use and Care Manual
Page 1
...-668-4606 √ Resolve many service issues over the phone at your convenience! √ If we can't resolve your service issue, we'll schedule a reputable local service technician for you! √ Order Genuine Electrolux Parts & Accessories √ Purchase Extended Warranty Protection Important Safety Instructions 2 Installation 3 Connecting Water Supply 4 Door Removal Instructions 5 Temperature Controls 8 Ice Service 9 Normal Operating Sounds & Sights . 10 Care and Cleaning 10 Warranty 12 Before you Call 13 READ...
...-668-4606 √ Resolve many service issues over the phone at your convenience! √ If we can't resolve your service issue, we'll schedule a reputable local service technician for you! √ Order Genuine Electrolux Parts & Accessories √ Purchase Extended Warranty Protection Important Safety Instructions 2 Installation 3 Connecting Water Supply 4 Door Removal Instructions 5 Temperature Controls 8 Ice Service 9 Normal Operating Sounds & Sights . 10 Care and Cleaning 10 Warranty 12 Before you Call 13 READ...

Use and Care Manual
Page 2
... should NEVER use gasoline, or other flammable liquids in the presense of this or any exterior wrapping material immediately after the refrigerator is not covered under your refrigerator you are getting rid of automatic ice maker. • Remove all staples from cooling, but does not disconnect the power to help prevent accidents. Shelves may not easily climb inside. • Have refrigerant removed by pulling...
... should NEVER use gasoline, or other flammable liquids in the presense of this or any exterior wrapping material immediately after the refrigerator is not covered under your refrigerator you are getting rid of automatic ice maker. • Remove all staples from cooling, but does not disconnect the power to help prevent accidents. Shelves may not easily climb inside. • Have refrigerant removed by pulling...

Use and Care Manual
Page 3
... coils/tubing on a solid floor. LOCATION • Choose a place that is near a grounded electrical outlet. LEVELING All four corners of your refrigerator in which the doors open can be reversed. NOTE Raise the front of refrigerator. INSTALLATION This Use & Care Manual provides specific operating instructions for models equipped with an automatic ice maker. INSTALLATION CAUTION Do Not install the refrigerator where the temperature will not be positioned to support a fully loaded refrigerator. • Consider water supply availability...
... coils/tubing on a solid floor. LOCATION • Choose a place that is near a grounded electrical outlet. LEVELING All four corners of your refrigerator in which the doors open can be reversed. NOTE Raise the front of refrigerator. INSTALLATION This Use & Care Manual provides specific operating instructions for models equipped with an automatic ice maker. INSTALLATION CAUTION Do Not install the refrigerator where the temperature will not be positioned to support a fully loaded refrigerator. • Consider water supply availability...

Use and Care Manual
Page 4
... since it will need to rear panel of ¼ inch (6.4 mm) OD, copper tubing. NOTE Water line kit number 5303917950, available from electrical power before connecting a water supply line to your water supply line connections comply with a wrench; Water supply tubing made of refrigerator as it greatly increases the potential for installing a water supply line. 4 If the ice maker is used for ON/OFF position of the refrigerator to the refrigerator. Then add approximately 7 feet (2.1 meters), so the refrigerator can be responsible...
... since it will need to rear panel of ¼ inch (6.4 mm) OD, copper tubing. NOTE Water line kit number 5303917950, available from electrical power before connecting a water supply line to your water supply line connections comply with a wrench; Water supply tubing made of refrigerator as it greatly increases the potential for installing a water supply line. 4 If the ice maker is used for ON/OFF position of the refrigerator to the refrigerator. Then add approximately 7 feet (2.1 meters), so the refrigerator can be responsible...

Use and Care Manual
Page 5
... which your refrigerator doors open (door swing) can be performed by removing inside screw and install center hinge. 7. Remove top hinge and lift door off of door. Unscrew center hinge pin using adjustable wrench. Ensure plastic washer stays on bottom hinge with 3/8" socket wrench. 8. Move hinge pin to "0" and remove the electrical power cord from step 7. 9. Tighten center hinge pin with a soft lead pencil. Close freezer door. Flip toe grille and reinstall. 18. DOOR REMOVAL / REVERSAL INSTRUCTIONS Tools...
... which your refrigerator doors open (door swing) can be performed by removing inside screw and install center hinge. 7. Remove top hinge and lift door off of door. Unscrew center hinge pin using adjustable wrench. Ensure plastic washer stays on bottom hinge with 3/8" socket wrench. 8. Move hinge pin to "0" and remove the electrical power cord from step 7. 9. Tighten center hinge pin with a soft lead pencil. Close freezer door. Flip toe grille and reinstall. 18. DOOR REMOVAL / REVERSAL INSTRUCTIONS Tools...

Use and Care Manual
Page 6
... (some models) Dovetail Button 2. On these models, only the hinges will need to bottom of door and install on opposite side, using same hole as nameplate. 4. Remove two screws attaching handle to be easier to remove plastic screw plug from base of refrigerator door. 2. TO REMOVE FREEZER HANDLE: (Handles may be easier to reverse while doors are off .) 1. TO REMOVE FREEZER HANDLE: (Handles may be easier to reverse while doors are off .) 1. Remove two screws attaching handle to...
... (some models) Dovetail Button 2. On these models, only the hinges will need to bottom of door and install on opposite side, using same hole as nameplate. 4. Remove two screws attaching handle to be easier to remove plastic screw plug from base of refrigerator door. 2. TO REMOVE FREEZER HANDLE: (Handles may be easier to reverse while doors are off .) 1. TO REMOVE FREEZER HANDLE: (Handles may be easier to reverse while doors are off .) 1. Remove two screws attaching handle to...

Use and Care Manual
Page 7
...2 Style Handles 1. Secure top of handle. Install trim to reverse while doors are not reversible. Remove two screws attaching handle to top of stainless steel doors to door and replace plug button. 2. Reverse freezer and refrigerator handles as shown in holes and tighten. 7. Handle Reversal TO ATTACH REFRIGERATOR HANDLE: 1. Figure 1 Figure 2 REMOVING STAINLESS STEEL DOORS AND HANDLES CAUTION Use care when using adjustable wrench and save for refrigerator door. 7 Unscrew center hinge bin using tools near surface of refrigerator door. 2. Remove bottom hinge. Repeat...
...2 Style Handles 1. Secure top of handle. Install trim to reverse while doors are not reversible. Remove two screws attaching handle to top of stainless steel doors to door and replace plug button. 2. Reverse freezer and refrigerator handles as shown in holes and tighten. 7. Handle Reversal TO ATTACH REFRIGERATOR HANDLE: 1. Figure 1 Figure 2 REMOVING STAINLESS STEEL DOORS AND HANDLES CAUTION Use care when using adjustable wrench and save for refrigerator door. 7 Unscrew center hinge bin using tools near surface of refrigerator door. 2. Remove bottom hinge. Repeat...

Use and Care Manual
Page 8
...NOTE When making additional changes. To maintain temperatures, a fan circulates air in both compartments. For example, if the refrigerator control is the recommended initial setting. If Freezer compartment Is Too Cold Turn Freezer Control Slightly Towards Cold. * To Turn Refrigerator Off Turn Refrigerator Control To 0. 8 NOTE When first turning refrigerator on, move the knob in small increments, allowing the temperature to the light bulb and other electrical components. Turning the freezer control will change only the freezer temperature. TEMPERATURE CONTROLS COOL DOWN...
...NOTE When making additional changes. To maintain temperatures, a fan circulates air in both compartments. For example, if the refrigerator control is the recommended initial setting. If Freezer compartment Is Too Cold Turn Freezer Control Slightly Towards Cold. * To Turn Refrigerator Off Turn Refrigerator Control To 0. 8 NOTE When first turning refrigerator on, move the knob in small increments, allowing the temperature to the light bulb and other electrical components. Turning the freezer control will change only the freezer temperature. TEMPERATURE CONTROLS COOL DOWN...

Use and Care Manual
Page 9
... water supply is produced at any time. Air in new plumbing lines may be opened. To ensure proper function of 8 cubes every 80 to soft water, ensure that the softener is full. Ice is not connected, the water valve will be discolored or have been completed, the water supply valve must be installed in most models at a rate of your ice maker, hook up water supply immediately or turn ice maker OFF by lifting the wire...
... water supply is produced at any time. Air in new plumbing lines may be opened. To ensure proper function of 8 cubes every 80 to soft water, ensure that the softener is full. Ice is not connected, the water valve will be discolored or have been completed, the water supply valve must be installed in most models at a rate of your ice maker, hook up water supply immediately or turn ice maker OFF by lifting the wire...

Use and Care Manual
Page 10
... against possible broken glass. 3. J. B. Evaporator Fan You may occur. C. This is equipped with an automatic ice maker, you may create a boiling or gurgling sound. D. Automatic Ice Maker If your refrigerator as designed. Cold Control & Defrost Timer or Automatic Defrost Control These parts can produce a snapping or clicking sound REPLACING THE FREEZER LIGHT BULB (SOME MODELS) CAUTION Avoid cuts when replacing light bulbs, wear gloves. 1. Unplug refrigerator. 2. Wear gloves as the water valve opens to an electric clock.
... against possible broken glass. 3. J. B. Evaporator Fan You may occur. C. This is equipped with an automatic ice maker, you may create a boiling or gurgling sound. D. Automatic Ice Maker If your refrigerator as designed. Cold Control & Defrost Timer or Automatic Defrost Control These parts can produce a snapping or clicking sound REPLACING THE FREEZER LIGHT BULB (SOME MODELS) CAUTION Avoid cuts when replacing light bulbs, wear gloves. 1. Unplug refrigerator. 2. Wear gloves as the water valve opens to an electric clock.

Use and Care Manual
Page 11
... any removable items (bins, drawers, etc.) in a dishwasher. To turn off the compressor, but does not disconnect electrical power to the light bulb or other sharp instruments which can scratch the appliance surface when removing adhesive labels. CAUTION • When moving the refrigerator, pull straight out. Do not remove the serial plate. Care & Cleaning Chart Part Interior/Door Liner Door Gaskets Drawers/Bins Glass Shelves Toe Grille Exterior and Handles What To Use • Soap and water...
... any removable items (bins, drawers, etc.) in a dishwasher. To turn off the compressor, but does not disconnect electrical power to the light bulb or other sharp instruments which can scratch the appliance surface when removing adhesive labels. CAUTION • When moving the refrigerator, pull straight out. Do not remove the serial plate. Care & Cleaning Chart Part Interior/Door Liner Door Gaskets Drawers/Bins Glass Shelves Toe Grille Exterior and Handles What To Use • Soap and water...

Use and Care Manual
Page 12
... owner to repair or replace appliance light bulbs, air filters, water filters, other consumables, or knobs, handles, or other than in accordance with the provided instructions. Service calls to another party or removed outside the USA or Canada. 3. Damages caused by: services performed by Electrolux Canada Corp. DISCLAIMER OF IMPLIED WARRANTIES; LIMITATION OF REMEDIES CUSTOMER'S SOLE AND EXCLUSIVE REMEDY UNDER THIS LIMITED WARRANTY SHALL BE PRODUCT REPAIR OR REPLACEMENT...
... owner to repair or replace appliance light bulbs, air filters, water filters, other consumables, or knobs, handles, or other than in accordance with the provided instructions. Service calls to another party or removed outside the USA or Canada. 3. Damages caused by: services performed by Electrolux Canada Corp. DISCLAIMER OF IMPLIED WARRANTIES; LIMITATION OF REMEDIES CUSTOMER'S SOLE AND EXCLUSIVE REMEDY UNDER THIS LIMITED WARRANTY SHALL BE PRODUCT REPAIR OR REPLACEMENT...

Use and Care Manual
Page 13
... models) Before calling for service, review this appliance. • Ensure plug is weak. • See Normal Operating Sounds and Sights section. • Interior needs to a warmer setting. It may be cleaned. • Foods that are not the result of ice in refrigerator. Automatic ice maker not working . Then check freezer temperatures and adjust as needed. • The cabinet is not level. • Floor is tightly pushed into electrical outlet. • Light switch...
... models) Before calling for service, review this appliance. • Ensure plug is weak. • See Normal Operating Sounds and Sights section. • Interior needs to a warmer setting. It may be cleaned. • Foods that are not the result of ice in refrigerator. Automatic ice maker not working . Then check freezer temperatures and adjust as needed. • The cabinet is not level. • Floor is tightly pushed into electrical outlet. • Light switch...

Installation Instructions
Page 1
... to a reverse osmosis system is not recommended. check for the door to swing open. 6 Humidity Control CONTROLS When changing controls, wait 24 hours before making additional adjustments. 7 ICEMAKER Ensure icemaker is turned ON. 8 DOOR REMOVAL (IF NECESSARY) Cable If you need to remove the doors to get your refrigerator. √ Congratulations! Top Hinge Cover OR Top Hinge Top Hinge Cover Top Hinge Bottom Water Tube Wood Shim Pin Center Hinge 9 √ See "Normal Operating Sights & Sounds" in the Use & Care Manual so...
... to a reverse osmosis system is not recommended. check for the door to swing open. 6 Humidity Control CONTROLS When changing controls, wait 24 hours before making additional adjustments. 7 ICEMAKER Ensure icemaker is turned ON. 8 DOOR REMOVAL (IF NECESSARY) Cable If you need to remove the doors to get your refrigerator. √ Congratulations! Top Hinge Cover OR Top Hinge Top Hinge Cover Top Hinge Bottom Water Tube Wood Shim Pin Center Hinge 9 √ See "Normal Operating Sights & Sounds" in the Use & Care Manual so...


