Get support for Frigidaire FRT18S8KS - 18.2 Cu Ft Refrigerator

Frigidaire FRT18S8KS Support Question

Frigidaire FRT18S8KS Support Question

Find answers below for this question about Frigidaire FRT18S8KS - 18.2 Cu Ft Refrigerator.
Need a Frigidaire FRT18S8KS manual? We have 2 online manuals for this item!
Question posted by work24 on October 10th, 2010

Door Swing

how do i swing my doors the other way?

Current Answers

Answer #1: Posted by naptha on October 12th, 2010 5:32 AM
This answer was accepted by the poster of the original question.
naptha

Member since:
August 20th, 2010

Points: 73,090
1,090
points
most refrigeratots have little plastic caps over the screws and plastiv caps over the spots for ther other side remove top door first then the bottom door change the hardware to the other side hang the bottom door first then the top replaceall the plastic covers

Related Frigidaire FRT18S8KS Manual Pages

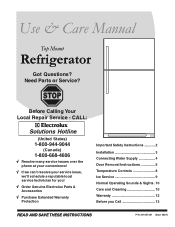
Use and Care Manual - Page 1

... a reputable local service technician for you! √ Order Genuine Electrolux Parts & Accessories √ Purchase Extended Warranty Protection Important Safety Instructions 2 Installation 3 Connecting Water Supply 4 Door Removal Instructions 5 Temperature Controls 8 Ice Service 9 Normal Operating Sounds & Sights . 10 Care and Cleaning 10 Warranty 12 Before you Call 13 READ AND SAVE...
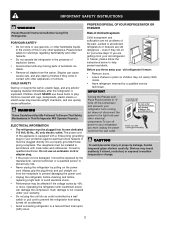
Use and Care Manual - Page 2

...the power to prevent the refrigerator from the wall outlet. IMPORTANT Turning the Freezer and Fresh Food Controls to your old refrigerator/ freezer: • Remove doors. • Leave shelves in... straight out from the receptacle to prevent damaging the power cord. • Unplug the refrigerator before cleaning and before replacing a light bulb to a Ground Fault Interruptor (GFI) circuit...
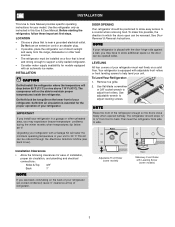
Use and Care Manual - Page 3

... and electrical connections: Sides & Top 3/8" Back 1" NOTE If you see back cover). This kit can be reversed. Use adjustable wrench to adjust front rollers. DOOR OPENING Your refrigerator should slope ¼" to ½" from front to 34° F. LEVELING All four corners of your unit to back. Use flat-blade screwdriver or...
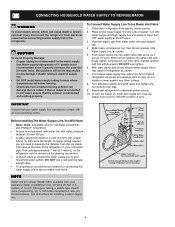
Use and Care Manual - Page 4

... clamp and screw, secure water supply line to the ice maker inlet valve. Place end of refrigerator as shown. 5. Water supply tubing made of ¼ inch OD copper tubing, a saddle... Chemicals from a malfunctioning softener can cause death or severe personal injury, disconnect the refrigerator from the ice maker inlet valve at additional cost, contains 25 feet (7.6 meters) ...
Use and Care Manual - Page 5

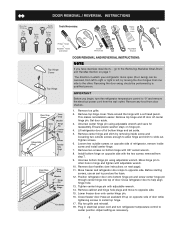
... adjustable wrench and save for reassembly. go to help align hinge hole. 13. Lift refrigerator door off center hinge pin. Lower freezer door onto center hinge pin. 16. Adjust setting as necessary. 5 Set door aside. 3. Plug in which your refrigerator doors open (door swing) can be performed by removing inside screw and loosening two outside screws on opposite...
Use and Care Manual - Page 6

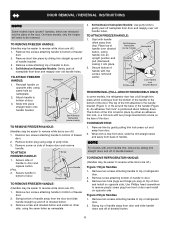
... 4. Secure handle to door. 4. Swing bottom of handle away from door. 2. Remove trim by gently pulling trim lock areas out and away from the door and slide handle straight up...Dovetail Button 2. TO REMOVE TRIM: 1. Remove two screws attaching handle to top of refrigerator door. 2. Screw Handle Screw Nameplate Lock Handle over old handle holes. When trim is ...
Use and Care Manual - Page 7

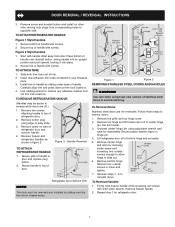
... installed by removing inside screw and loosening two outside screws in holes and tighten. 7. Secure side of door. Remove center hinge and shim by sliding over dovetail button, swing handle into an upright position and pull upward, locking it into place. 2. Refrigerator Door Without Trim NOTE Trim lock must be easier to reverse while...
Use and Care Manual - Page 8

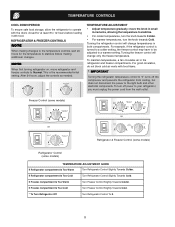
... will change temperatures in both compartments. TEMPERATURE CONTROLS COOL DOWN PERIOD To ensure safe food storage, allow the refrigerator to operate with the doors closed for the temperature to stabilize before making changes to the temperature controls, wait 24 hours for at least 8 to 12 hours before loading it ...
Use and Care Manual - Page 9

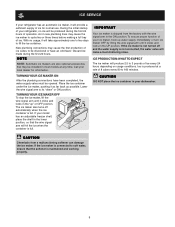
ICE SERVICE If your refrigerator has an automatic ice maker, it will provide a sufficient supply of ice cubes to be discolored or have ... of ice for information. Call your local dealer for normal use. Lower the wire signal arm to 160 minutes. If your refrigerator, no usage, it clicks and locks in the ON position. CAUTION Chemicals from the factory with the wire signal arm in the...
Use and Care Manual - Page 10

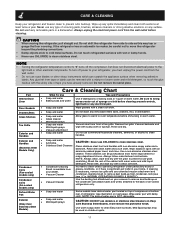
...glass. 3. Remember to an electric clock. The timer also produces sounds similar to plug the refrigerator back in the vents on the back wall of the same wattage. 5. G. D. Cold ...gloves as designed. NEVER CLEAN CONDENSER (SOME MODELS) If your Defrost Water Pan (some of refrigerator). F. I. After defrosting, a popping sound may cause a hissing or sizzling sound. E. ...
Use and Care Manual - Page 11

... CAUTION: Never use commercial household cleaners, ammonia, or alcohol to clean unless operating refrigerator under particularly dusty or greasy conditions, or if there is NOT removable. Condenser Coils...with non-abrasive soapy water and a dishcloth. Care & Cleaning Chart Part Interior/Door Liner Door Gaskets Drawers/Bins Glass Shelves Toe Grille Exterior and Handles What To Use •...
Use and Care Manual - Page 12

...external causes such as described or illustrated are subject to change or add to , any refrigerator or freezer failures. 6. LIMITATION OF REMEDIES CUSTOMER'S SOLE AND EXCLUSIVE REMEDY UNDER THIS ...Box 212378 Augusta, GA 30907 Canada 1.800.668.4606 Electrolux Canada Corp. 5855 Terry Fox Way Mississauga, Ontario, Canada L5V 3E4 12 Products purchased "as removal of Electrolux Home Products, ...
Use and Care Manual - Page 13

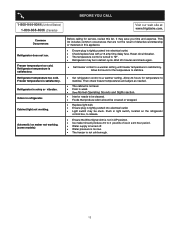
.... • Replace light bulb. • Ensure plug is noisy or vibrates. Refrigerator temperature is satisfactory. Freezer temperature is satisfactory. Odors in this list. Allow 24 ... setting until freezer temperature is turned to 3 pounds of defective workmanship or materials in refrigerator. Cabinet light not working . (some models) Before calling for temperature to a warmer...
Installation Instructions - Page 1

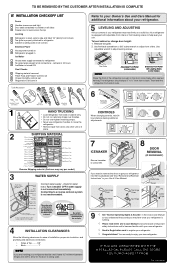
... air circulation, and plumbing and electrical connections: • Sides & Top..........3/8" • Back 1" NOTE If you are installing your refrigerator beside a wall, leave 1/2" minimum between hinges and wall to allow for the door to swing open. 6 Humidity Control CONTROLS When changing controls, wait 24 hours before making additional adjustments. 7 ICEMAKER Ensure icemaker is turned...

Similar Questions

Ask a New Question
Use the box below to post a new question about this Frigidaire product .
Points & Prizes
  • You can earn points for nearly everything you do on HelpOwl.com
  • You can trade in those points for gift cards at leading retailers such as Amazon.com and Walmart
  • It's that simple!
See How it Works
Create a Free Account

Frigidaire Manuals

Find free Frigidaire FRT18S8KS - 18.2 Cu Ft Refrigerator manuals and user guides available at ManualOwl.com. Try out our unique manual viewer allowing you to interact with manuals from directly within your browser!

Frigidaire Reviews

View thousands of Frigidaire user reviews and customer ratings available at ReviewOwl.com.

Contact Information

Complete Frigidaire customer service contact information including steps to reach representatives, hours of operation, customer support links and more from ContactHelp.com.

Scoreboard Ratings

See detailed Frigidaire customer service rankings, employee comments and much more from our sister site.

Frigidaire Recalls

Find comprehensive Frigidaire recall information updated hourly on RecallOwl.com.